If your Steam Deck sees the dock, or another dock function still works, but a keyboard, mouse, controller, receiver, or drive does nothing through the dock’s USB ports, test one simple wired device on one port first. Disconnect every other peripheral, leave the dock’s documented power and host connection in place, then try the same device on another port or another computer.
Do not begin with developer mode, a SteamOS reimage, battery storage mode, or an undocumented reset. A USB-only failure can sit in the peripheral, its cable or receiver, one downstream port, the dock’s internal USB path, the dock-to-Deck link, or an app that has not accepted a controller SteamOS already detected.
Everything here stays on Steam Deck and SteamOS. It does not use Windows Device Manager or Windows driver steps.
Match the USB state
| What you see | What it proves | Next check |
|---|---|---|
| Display or Ethernet works, but no USB peripheral works | Part of the dock path works, but downstream USB data is unproved | Remove every peripheral and test one simple wired keyboard or mouse |
| One USB port works and another does not | The dock can pass USB data on at least one route | Repeat the same device on each documented downstream port |
| A keyboard works, but a drive does not appear | The basic USB path works for one device | Protect the drive’s data and try that drive on another computer |
| The device works on another computer but not through this dock | The peripheral works in the comparison | Keep it fixed and isolate dock port, dock power, and host link |
| A controller appears in SteamOS but one game ignores it | The dock port already passed USB data | Leave the dead-port branch and check the game’s controller selection or mapping |
| Display, Ethernet, charging, and every USB device are absent | Nothing about the dock path is proved | Use the dock maker’s whole-device support path |
If the failing device is storage and it holds the only copy of important files, stop using it as a test device. Do not initialize, format, repair, or repeatedly unplug a drive just to learn whether a dock port carries data.
Use the shortest safe sequence
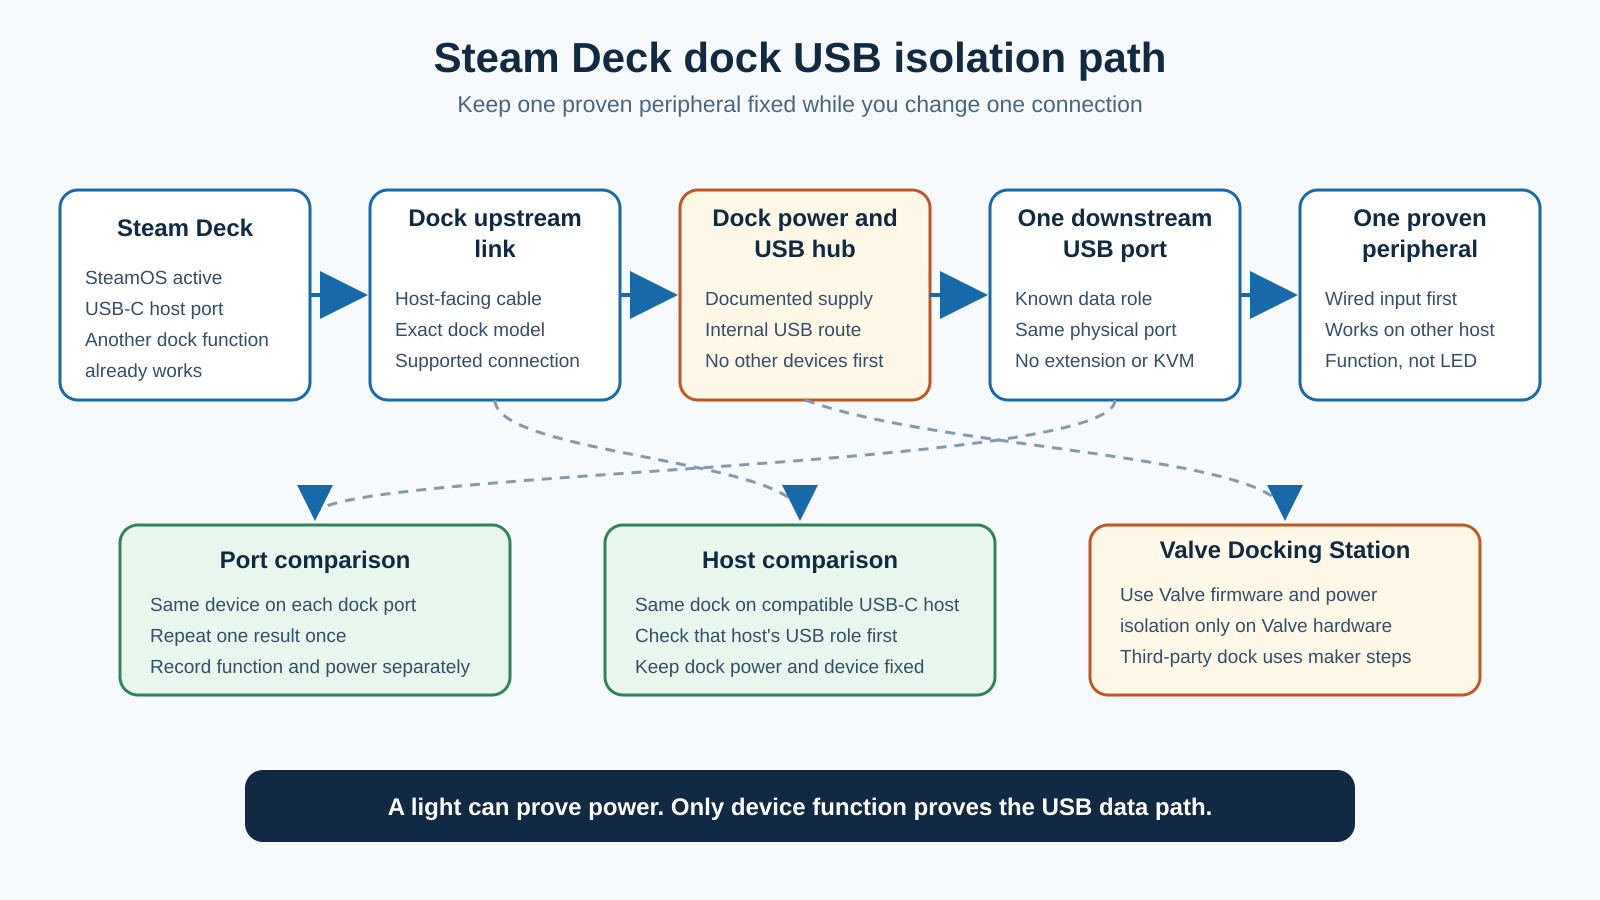
- Record the dock model and every dock function that still works.
- Disconnect all downstream USB devices.
- Confirm one simple wired keyboard or mouse works on another computer.
- Connect the dock with its documented host cable and power supply.
- Test that one device on one downstream port.
- Move the same device to each documented USB data port.
- Add other peripherals back one at a time.
- Use Valve’s firmware or power-isolation procedure only for Valve’s Docking Station.
- Try the dock or peripheral on another supported host.
- Escalate with the port-by-port results.
Step 1: prove that the symptom is USB-only
Write down the complete dock model. Valve’s Docking Station, a basic USB-C hub, and a third-party gaming dock can use similar connectors and still have different port maps, power supplies, firmware, and support.
Check which functions still work:
- Does the Deck show a charging state?
- Does an external display appear?
- Does the Ethernet interface appear?
- Does any USB keyboard, mouse, receiver, or drive work?
- Does the dock change state when you connect it?
Another working function only proves part of the dock path. A display, a charging state, or an Ethernet link tells you nothing about downstream USB data.
If every function is missing, leave this USB-only guide and start with the dock’s host connection, power supply, and whole-device support procedure. If only Ethernet fails, keep the USB ports out of the network diagnosis. If only the external display fails, diagnose the video path, because USB port steps do not apply to a picture problem.
Step 2: protect storage and choose a simple test device
A wired keyboard or mouse is a safer first test than a drive, because you get an immediate result and risk no interrupted file operation.
Use a device that already works on another computer. If it has a removable cable or a receiver, keep the same cable or receiver for the whole first comparison.
Avoid these as a first test:
- a drive holding the only copy of important data
- a receiver paired with several devices, when you cannot tell which is active
- a controller whose behavior depends on one game’s mapping
- a webcam or capture device that also needs to be picked inside an app
- anything connected through an extension, a KVM, or a second hub
If you need a simple replacement input device after isolating the original one, the USB-C keyboard guide and USB-C mouse guide cover that. Buying one is not a troubleshooting step.
Step 3: rebuild the setup around one port
Disconnect every USB peripheral from the dock. Leave the external display and Ethernet disconnected for the first USB check, unless one of them is your only sign that the dock is present.
For Valve’s Docking Station:
- Use the captive USB-C cable to connect the Docking Station to the Steam Deck.
- Use the documented USB-C power input with Valve’s supplied or supported power source.
- Connect one known-working wired keyboard or mouse to one of the three USB-A ports.
- Check whether the device responds in the SteamOS interface.
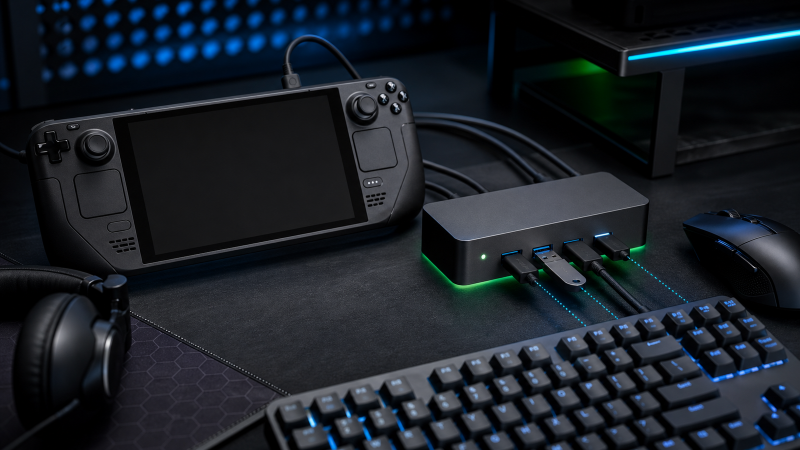
Valve lists three USB-A 3.1 Gen 1 ports on the official Docking Station. The specification describes the ports, but it does not promise that every device works and says nothing about a failing unit.
For a third-party dock, read its port map first. A USB-C receptacle can be power input, host input, data output, or a port for one specific feature. USB-IF guidance separates the USB Type-C connector name from the functions a product implements.
Do not treat a charging result as a data test. A receiver LED or a drive light only proves that some power reached the device. The test is whether SteamOS accepts input or exposes what the device is meant to do.
Step 4: test one device across the dock’s ports
Keep the Steam Deck, the dock, the power supply, and the host link fixed. Move only the peripheral.
Record a small matrix:
| Dock port | Device power sign | Device function in SteamOS | Repeated result |
|---|---|---|---|
| Port 1 | yes or no | works or absent | same after one reconnect |
| Port 2 | yes or no | works or absent | same after one reconnect |
| Port 3 | yes or no | works or absent | same after one reconnect |
One working port proves that the Deck and the dock can pass USB data in that setup. A failure that repeats on one physical port points at that port or its internal route. Do not open the dock or probe the connector.
If every port fails with the same proven device, keep the peripheral fixed and move on to dock power and the upstream path. If the device only works while you flex or hold a connector, stop using that connection. A loose, hot, deformed, or damaged connector needs service.
Step 5: add peripherals one at a time
Reconnect the original device only after the simple wired device works, and add nothing else yet.
Keyboard, mouse, or wired controller
Test the device in the SteamOS interface before you open a game. If SteamOS accepts it but one game does not, the dock port has already passed data. Check the game’s selected controller, the Steam Input state, and the device maker’s support instead of resetting the dock.
Wireless receiver
Confirm that the receiver has power and that the paired device works close to it. Keep other receivers, drives, and extensions out of the first test. If a wired input works on the same port and the receiver does not, move on to the receiver’s pairing and compatibility.
Valve warns that high-bandwidth USB 3 accessories can interfere with nearby 2.4 GHz wireless devices, and suggests keeping those accessories farther from the Deck body. Apply that note only once the receiver is detected. A receiver that is detected but behaves badly over the air is not a dead USB port.
Storage
Use a drive only after the important data exists somewhere else. A drive that works on another computer but not through the dock needs a port, cable, power, and device comparison. Do not format it.
If you need replacement storage after the drive itself is isolated, compare the interface and use case in the USB-C flash drive guide. Buying a new drive cannot recover files.
Step 6: check power without assuming a shortage
Use the power supply documented for the dock. For the Valve Docking Station, keep its USB-C power input connected during the one-device check.
A device that lights up can still fail to appear in SteamOS. If a simple input device works while another does not, check that peripheral, its cable, the dock’s support for it, and the power it needs. One failure is not evidence of a wattage shortage across the dock.
Read:
- the dock’s required power supply
- the exact role of each downstream port
- the peripheral’s power and host requirements
- whether a third-party dock reserves power for itself or for attached devices
- whether the dock maker supports that class of peripheral
Do not swap in a larger power supply unless the dock maker supports it. Use the USB-C charger guide only after you know the dock’s exact input requirement.
Step 7: use Valve’s Docking Station sequence when it applies
Valve publishes a firmware sequence for its own Docking Station. Keep the scope exact.
Valve’s current support page instructs you to:
- Connect the Docking Station power supply and the Deck.
- Restart the Deck.
- Unplug both the Deck and the power supply from the dock.
- Wait 10 seconds.
- Reconnect the power supply, then the Deck.
Valve says that sequence should start the Docking Station firmware update. If it does not, Valve provides a second trigger that begins with the Deck and the supply already connected.
Valve also documents a full power isolation for the Docking Station. Unplug the Deck, the Docking Station power supply, and the display cables, then reconnect them. Valve explains why both have to come out. The Deck can keep powering the dock even when the external supply is gone.
Do not apply either sequence to a third-party dock, add button holds, use battery storage mode, or repeat it as a ritual. Use the third-party dock maker’s own support page instead.
Step 8: cross-test one endpoint
Valve’s docking support suggests trying another compatible USB-C host to narrow down a dock problem when the external display or USB peripherals do not work. Use the same idea carefully for a USB-only failure.
Before you connect another laptop or phone, check its manual. Some USB-C ports only charge, or carry limited data roles. A failed comparison on an unsuitable port proves nothing.
Try the same peripheral on another computer, then try another proven peripheral on the original dock. If you need more evidence, connect the same dock and peripheral to another compatible USB-C host.
Keep the cable and power setup fixed wherever the product design allows it. The USB-C cable testing guide helps document a removable cable’s data behavior, but it cannot qualify Valve’s captive cable or speak for every class of peripheral. If a removable cable is isolated, compare exact data and power support in the USB-C cable guide.
Valve and third-party dock boundaries
Valve says most compliant USB-C docks and hubs should work with Steam Deck. Thunderbolt and DisplayLink docks may also work, but Valve does not officially support them. Neither statement guarantees one particular dock.
For Valve’s Docking Station, use Valve’s port map, power connection, firmware sequence, and Steam Support.
For any other dock, collect:
- the exact brand, model, and hardware revision
- its power supply model
- the upstream cable identity
- the downstream USB port labels
- the maker’s current firmware or support status
- the port-by-port result with one simple peripheral
- the same peripheral’s result on another computer
If the dock is isolated and does not meet your needs, compare requirements in the gaming laptop docking station guide, the USB-C docking station guide, or the portable USB-C hub guide. Check Steam Deck support on the exact product page before you buy.
Escalation and replacement boundary
| Controlled result | Who to contact | What to send |
|---|---|---|
| One Valve Docking Station port repeatedly fails with the same working device | Valve Steam Support | Dock serial, port position, SteamOS version, other working functions, device comparison |
| Every dock USB port fails, but another dock function works | Dock maker | Exact model, power supply, host link, one-device matrix, firmware state |
| The peripheral fails on the dock and on another supported host | Peripheral maker | Device model, cable or receiver, both results |
| A wired device works but one game ignores a detected controller | Game or controller support | Controller model, SteamOS detection state, game selection |
| Another compatible dock works with the same Deck and peripheral | Original dock maker | The fixed Deck, peripheral, and comparison setup |
| The current dock has an unsupported or unclear USB role | Dock maker or replacement route | The peripheral class, port count, power, cable, display, and network you need |
Replace a dock only after its manual rules out the function you need, or a fixed comparison isolates it. Replace a peripheral only after it fails on another supported path, or its maker confirms it is incompatible.
Frequently asked questions
Why do my Steam Deck dock USB ports have power but no data?
An LED only proves that some power reached the device. Test one proven wired keyboard or mouse through one documented downstream data port, then move it across the dock’s other ports without changing anything else.
Should I put my Steam Deck into battery storage mode?
No. Valve’s docking page mentions battery storage mode inside a broader no-display or no-peripheral path, but a USB-only problem does not need that step. Get one device working first, and use the exact Docking Station firmware or power-isolation sequence.
Can I use Windows Device Manager on Steam Deck?
No. The Steam Deck runs SteamOS. Windows Device Manager instructions belong to Windows and do not transfer to a SteamOS USB path.
Why does my keyboard work but my external drive does not?
The keyboard result proves that one basic USB route works. The drive still has its own cable, power, storage state, and support requirements. Protect its data, try it on another computer, and do not format it as a dock test.
Can a third-party dock use Valve’s firmware reset?
No. Valve’s firmware and power-isolation sequences apply to Valve’s Docking Station. Use the third-party maker’s own manual and support page.
Does Steam Deck require a Thunderbolt dock?
No. Valve describes Steam Deck docking over USB-C and says most compliant USB-C docks or hubs should work. Valve does not officially support Thunderbolt or DisplayLink docks, though some may still work.
When should I replace the dock?
Replace or service it after you confirm the port’s documented role and the same proven peripheral fails through that dock while working on another supported host or dock. Keep power, cable, and device identity fixed during the comparison.
Sources and Methodology
Current official pages were checked on July 28, 2026. Valve’s Docking the Steam Deck page controls the Docking Station firmware and power-isolation steps, the third-party support limits, the peripheral examples, and the compatible-host comparison. Valve’s Docking Station technical page controls the official port map. USB-IF documentation supplies only the distinction between a USB-C connector and the functions a product implements.
No Steam Deck, dock, cable, receiver, controller, or storage device was tested. The method proves one peripheral, one port, and one host route at a time. It does not promise that Valve’s procedure fixes a third-party dock, or that every USB peripheral works with SteamOS.