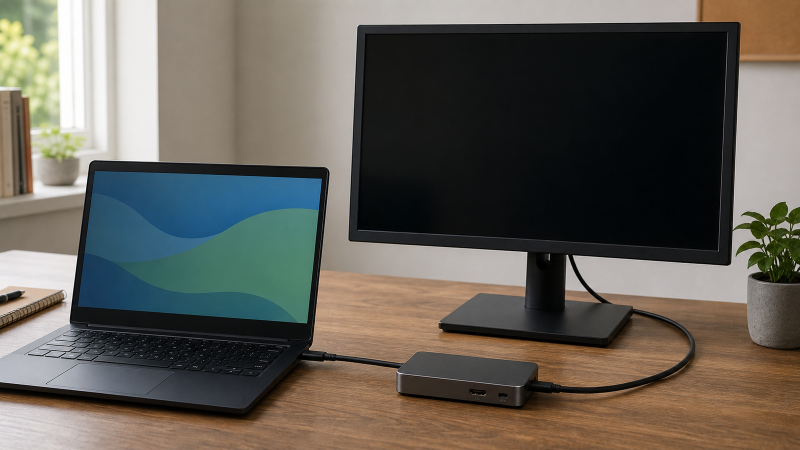
If an external monitor does not work through your Chromebook dock, test the display path in sections. Prove the monitor and selected input first. Then connect the Chromebook directly to that same monitor if the documented ports allow it. Finally add the dock back with its specified upstream cable and one display output.
The result shows which section changes the symptom. A monitor that works directly but not through the dock narrows the problem to the dock route, cable, output, power, or compatibility. It does not prove the dock is defective.
Charging through the dock and a monitor appearing in ChromeOS are separate results.
Start here: match the symptom
| What happens | What it establishes | Test next |
|---|---|---|
The monitor shows No signal and ChromeOS does not list it |
The monitor has power, but no usable display path has reached ChromeOS and the selected input | Prove the monitor and cable from another known-good source |
| The monitor works directly from the Chromebook but not through the dock | The direct path works and the docked path changes the result | Prove the dock’s upstream connection and one output |
| USB devices work through the dock but the monitor does not | Part of the dock’s USB path works | Check whether the host port and dock support display output, not only USB data |
| One dock output works and another does not | The problem follows an output or its documented restrictions | Read the exact port map and output matrix |
ChromeOS shows Cable may not support displays |
ChromeOS has identified a cable or connection limitation | Use the cable specified by the Chromebook or dock maker |
| The monitor appears under Displays but the panel is blank | ChromeOS recognizes a display | Check the selected monitor input and a documented conservative mode |
| The route worked before a ChromeOS or dock change | Compatibility or saved state may have changed | Record versions and use supported update paths |
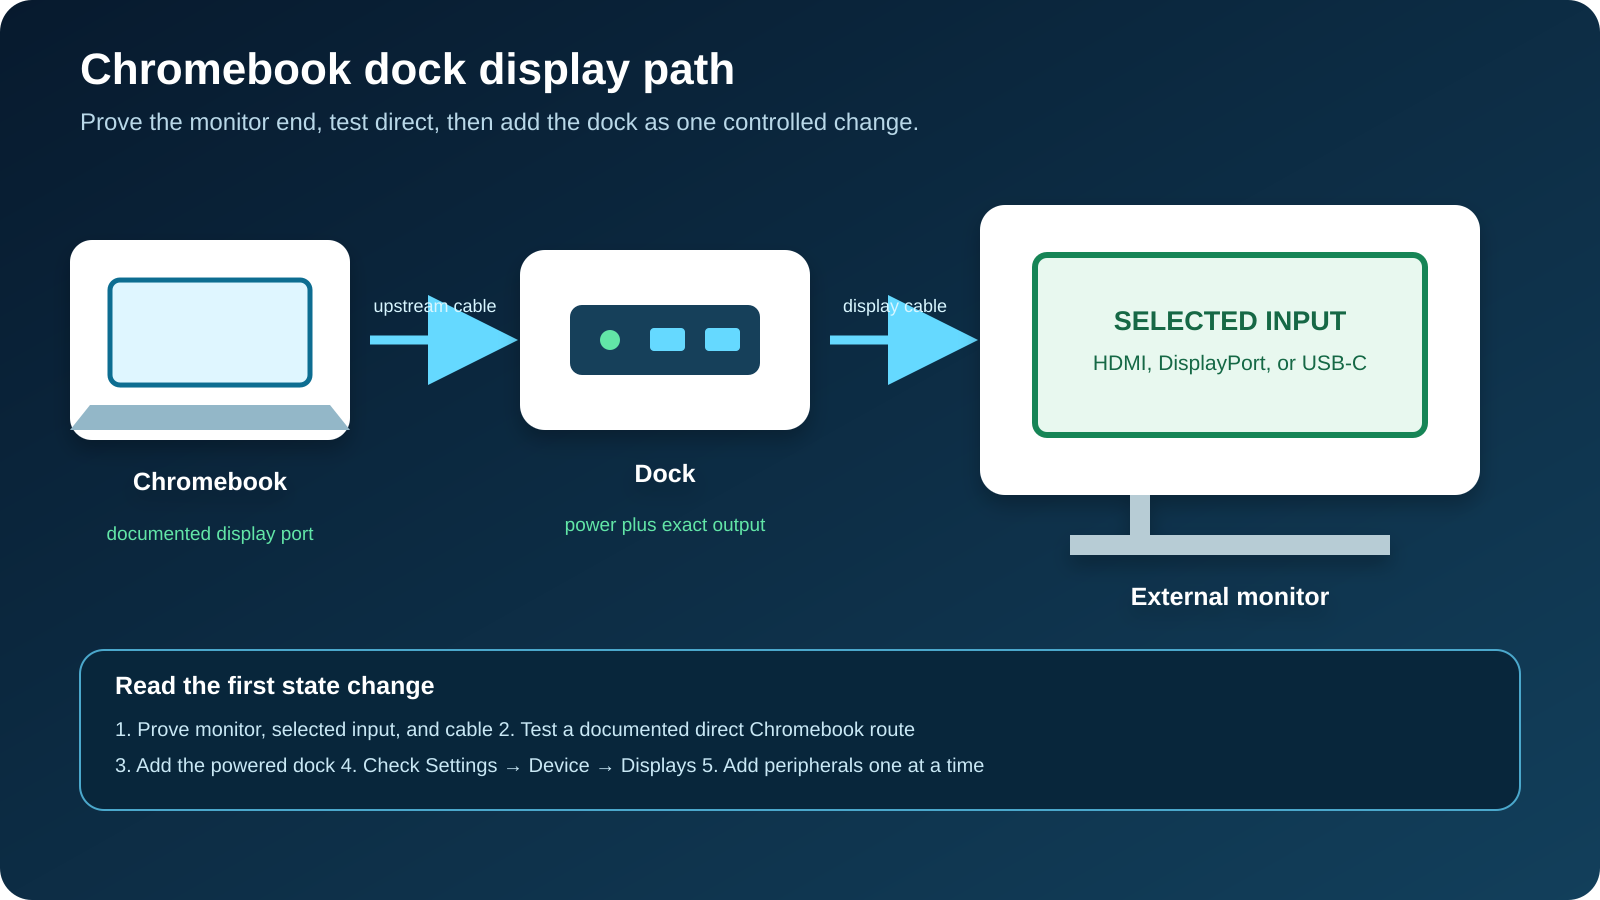
Record the route before you move it
Write down the exact hardware:
- Chromebook maker, full model, and board or configuration where the maker distinguishes ports;
- physical USB-C or Thunderbolt port in use;
- ChromeOS version under Settings, About ChromeOS;
- dock maker, model, hardware revision, and power adapter;
- upstream cable and the dock port it connects to;
- dock video output;
- every adapter and cable between the dock and monitor;
- monitor model and selected input;
- requested resolution and refresh rate if ChromeOS already shows the display.
Photograph the connections. Many docks place the computer-facing port beside downstream USB-C ports, and a cable in the wrong socket can leave lights and peripherals working while bypassing the display route.
Do not write only Chromebook USB-C to dock to HDMI. The connector name does not state whether that port carries display output or how many displays the Chromebook supports.
Google says a Chromebook can connect to a monitor through HDMI, DisplayPort, DVI, VGA, or USB-C when the hardware provides the needed path. Google also tells you to match the ports in the Chromebook and monitor instructions before choosing an adapter.
Step 1: prove monitor power, input, and cable
Leave the dock out of the first proof.
Turn on the monitor and use its own controls to select the exact input you connected. HDMI 1 and HDMI 2 are separate inputs. A monitor can show No signal correctly when it is listening to the other socket.
Test the monitor and its existing cable from a known-good source that uses the same monitor input. Keep the cable and input together.
Read the result narrowly:
- an image appears, so the monitor, selected input, and cable can work in that known-good route;
- no image appears, so repair the monitor-side route before returning to the Chromebook;
- the image appears only with a different cable, so repeat the original cable once to confirm that the result follows it.
Do not buy a USB-C cable when the failed segment is HDMI. Replace only the cable a controlled substitution identifies. When the failed segment is USB-C, use the USB-C cable guide after matching the required display and data functions.
If the monitor manual requires a particular input mode, adapter type, or firmware, follow the exact model’s instructions. Do not copy a service procedure from a similar display.
Step 2: test a direct Chromebook display path
Connect the Chromebook directly to the proven monitor and input when the Chromebook and monitor manuals document a compatible route. Use the required USB-C display cable or a documented adapter.
Google’s Chromebook Help says to choose the adapter by matching the Chromebook output and monitor input. If you are unsure which Chromebook port to use, check the instructions included with the Chromebook.
Open Settings. Under Device, select Displays. If ChromeOS recognizes the external display, select the monitor name. Google documents controls for display size, resolution, orientation, and refresh rate after recognition.
The direct test creates two branches:
- Direct works. The Chromebook port, direct cable or adapter, monitor input, and ChromeOS can produce an image in this simple route. The docked section remains unproved.
- Direct fails. The dock is not the current variable. Confirm that the Chromebook port supports display output, use the correct direct cable or adapter, and check the exact Chromebook’s external-display support.
Some Chromebooks have more than one USB-C port with different documented roles. Test another port only when the Chromebook manual lists it as display-capable. Keep the cable, monitor input, and display mode fixed.
A direct HDMI port, where the Chromebook has one, tests a different physical route from USB-C DisplayPort Alt Mode. It can prove the monitor end without proving that the USB-C port carries video.
If you need a simple direct display for travel rather than a dock, keep the repair separate from shopping. The USB-C portable monitor guide and USB-C monitor guide apply only after you have confirmed the Chromebook’s output.
Step 3: check ChromeOS display state
With the known route connected, open Settings, Device, Displays.
Google says the external monitor appears by name after connection. If it appears:
- Select the external monitor.
- Confirm the intended resolution and refresh rate are listed.
- Choose a conservative mode documented by both the Chromebook and monitor for one test.
- Confirm whether the monitor uses the selected input.
- If you want mirroring, Google exposes
Mirror Built-in Displaywhen the monitor is connected. Leave mirroring off for an independent desktop.
If no external monitor appears, do not spend time changing its layout. Stay on the physical path and compatibility checks.
Check Settings, About ChromeOS and record the version. Google says ChromeOS checks for updates and may require a restart to finish an update. Use Check for updates, finish the supported restart when offered, reconnect the same route, and observe whether the monitor appears.
An update cannot add a display function the port lacks. It only brings the system to its supported software state.
For a work or school Chromebook, Google directs update problems to the administrator. Device policy can also limit changes. Do not enable developer mode, disable verification, Powerwash the device, or bypass management to repair a monitor.
Step 4: prove the dock upstream path
Return to the route that worked directly. Add only the dock.
- Disconnect extra USB devices, storage, network cables, and second displays.
- Connect the dock’s exact power adapter if the manual requires one.
- Use the dock maker’s specified upstream cable.
- Connect that cable to the dock’s computer-facing port.
- Connect it to the Chromebook port you proved or that its manual documents for display.
- Connect one monitor to one documented dock video output.
- Keep the same monitor cable and selected input.
Power delivery is not display proof. A dock can charge a Chromebook or run a mouse through ordinary USB while the host port lacks the required display path. The USB Power Delivery explainer keeps charging roles separate from video.
Watch for a ChromeOS message. Google specifically notes Cable may not support displays when a USB-C cable cannot support the monitor or dock connection. Use the cable that the dock or Chromebook maker specifies. Do not treat a charging cable as a display cable.
If the monitor appears through one Chromebook port but not another, the result follows the host route. Read the exact port specification.
If the monitor appears with the dock directly attached but fails once a KVM, extension, or adapter joins the path, the intermediate device changed the result. Check its exact video and ChromeOS support before keeping it.
Step 5: prove one dock output at a time
Use the monitor and cable already proved. Move that fixed pair between only the video outputs that the dock manual supports on ChromeOS.
For each output, record:
- printed port name;
- cable or adapter;
- whether the monitor appears in ChromeOS Displays;
- whether the panel shows an image;
- resolution and refresh rate shown after recognition.
A downstream USB-C port can provide data or charging without DisplayPort Alt Mode. Do not use it for a monitor unless the dock’s port map marks it for video.
If one HDMI output works and the other does not, read the output matrix before calling the second port faulty. It may share a display group, operate only in a named combination, or require a host capability your Chromebook does not provide.
The exact matrix also controls display count. Google says the number of external monitors varies by Chromebook and gives a general range of one to three, which is not a promise that every Chromebook drives three displays from every dock.
If the real need is several screens, diagnose the single failed path first. The current Chromebook dock shopping owner should be used only after you have the exact Chromebook display limit and requested modes.
Step 6: read exact Chromebook and dock documentation
Find the Chromebook maker’s specification or user guide for the exact model. Record:
- which ports carry display output;
- external display count;
- supported display modes where published;
- whether a dock or adapter type is recommended;
- update support state;
- any model-specific behavior when the built-in display is active.
Then read the exact dock manual:
- supported ChromeOS version;
- Works With Chromebook certification where stated;
- required host port functions;
- upstream cable and power requirements;
- native MST, Thunderbolt, or DisplayLink topology;
- allowed output pairs;
- display modes for one and multiple screens;
- firmware update method.
StarTech’s DK31C3MNCR is one exact Works With Chromebook example. Its datasheet says the host USB-C port must support the required display function, documents MST-based output combinations, and says ChromeOS can deliver automatic firmware updates for that product. Every one of those facts belongs to that model alone.
Targus gives a second exact example. The DOCK423 guide requires a USB-C Alt Mode host and documents dual HDMI MST output in ChromeOS. The two examples show why a dock labeled USB-C still depends on the host’s display function.
Do not borrow an output table from a dock with a similar shell or name. Hardware revisions can change controllers and port groups.
What Works With Chromebook does not replace
Works With Chromebook is useful compatibility evidence. Google points readers toward certified docks, and the StarTech example documents certification and ChromeOS update integration.
Certification does not replace the Chromebook’s display limit or the dock’s output matrix. Check all four items:
- exact dock model and revision;
- exact Chromebook model and ChromeOS support state;
- required host-port display function;
- requested monitor count, resolution, and refresh rate.
A certified dock can expose fewer displays on a Chromebook that supplies fewer streams. A compatible monitor can stay blank on the wrong input. Certification is a strong starting gate, not a promise for every topology.
The current USB-C dock guide and USB4 hub and dock guide serve broader hardware choices. For ChromeOS, prefer exact compatibility evidence over a longer port list.
Separate native display output from DisplayLink
Some docks use native DisplayPort paths. Others use DisplayLink USB graphics, and some products combine technologies.
Synaptics lists ChromeOS support for DisplayLink, but that statement does not prove your dock contains a DisplayLink chip. Confirm the technology on the exact dock support page.
For confirmed DisplayLink hardware, use the dock maker’s ChromeOS support instructions and version requirements. Do not install a Windows or macOS DisplayLink package on a Chromebook. ChromeOS manages supported components through its own platform path.
If the dock documentation does not name DisplayLink, stay with the native display route. Installing a browser extension or Android app cannot add missing display hardware.
When a confirmed need calls for USB graphics rather than a native path, the DisplayLink dock guide is the commercial handoff after the diagnosis.
Rebuild the smallest working path
Rebuild from the proof you collected:
- Select the correct monitor input.
- Connect the proven monitor cable.
- Connect it to the documented dock output.
- Power the exact dock as required.
- Use the specified upstream cable and computer-facing dock port.
- Connect to the Chromebook’s documented display-capable port.
- Finish any supported ChromeOS update.
- Open Settings, Device, Displays.
- Confirm the monitor name, then apply a documented mode.
- Add one peripheral or second display at a time.
Stop at the first addition that makes the monitor disappear, because the layer you just added is the one that changed the path.
| Final evidence | Decision |
|---|---|
| Monitor fails from every known-good source | Repair the monitor, selected input, or monitor-side cable |
| Monitor works directly but never through the documented dock route | Open a dock support case with exact models and route |
| One dock output works and another is unsupported in the matrix | Use the documented output |
| Chromebook manual does not list display output for the chosen port | Use a documented display-capable route |
| Different specified upstream cable restores the route | Replace the proven cable with the required type |
| Update or policy controls are unavailable on a managed Chromebook | Send the evidence to the administrator |
| Exact Chromebook and dock documents do not support the requested mode | Choose a compatible dock or lower documented mode |
If replacement is justified, compare the diagnosed need rather than buying the dock with the most sockets. The USB-C hub guide fits a light single-display setup. The 4K monitor guide applies only after the Chromebook and dock documents support the target display mode.
Frequently asked questions
Why does my Chromebook charge through the dock but show no monitor?
Charging, USB data, and display output are separate functions. The dock may receive power while the Chromebook port, upstream cable, or dock route does not provide the required display path.
Where are external-display settings on a Chromebook?
Open Settings, then Device, then Displays. Google says the external monitor appears by name after ChromeOS recognizes it. If it does not appear, stay on the cable, port, dock, and compatibility path.
Does every Chromebook USB-C port support a monitor?
No universal rule applies. USB-C names the connector. Check the exact Chromebook manual for display output on the physical port you use.
Will any USB-C charging cable carry monitor video?
No. Google says the USB-C cable used with a monitor or docking station must be fast enough to support that connection. Use the cable specified by the Chromebook or dock maker.
Does Works With Chromebook guarantee three external monitors?
No. Google says display count depends on the Chromebook. Certification helps with compatibility, but the exact Chromebook limit and dock output matrix still control.
Should I Powerwash my Chromebook to fix a docked monitor?
No. A factory reset erases local data and does not add a display function the port, cable, or dock does not provide. Prove the physical path, check exact compatibility, and finish supported ChromeOS updates instead.
Can I install DisplayLink software on ChromeOS?
Use DisplayLink guidance only when the exact dock confirms DisplayLink and follow that maker’s ChromeOS instructions. Do not install Windows or macOS packages, random extensions, or Android apps to create a display path.
Sources and methodology
Official sources were retrieved on July 28, 2026. Google controls ChromeOS display settings, cable warnings, and model-dependent monitor counts plus the supported update path. Exact StarTech and Targus manuals show how named ChromeOS docks still depend on host DisplayPort Alt Mode and model-specific output matrices. Synaptics controls the limited DisplayLink branch.
No Chromebook, dock, monitor, cable, or policy was physically tested. Plugable returned HTTP 429 and the Acer page did not return usable direct-CLI content, so neither controls a retained claim. No Windows-only repair step was repurposed.