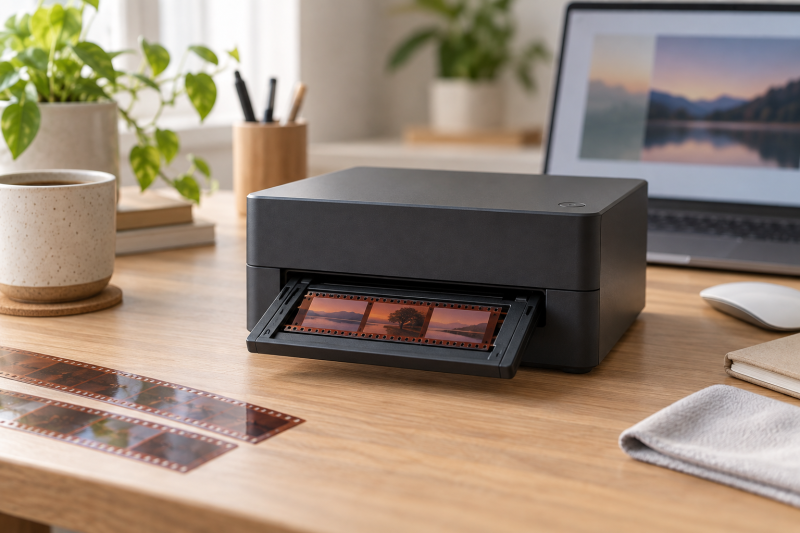
A shoebox of negatives is not a photo library until you can find, edit and back up the frames. The right scanner depends on whether you want carefully adjusted files from a few favorite rolls or fast JPEG previews from a family collection. Film holders, inversion software and review time count as much as the advertised dpi. A larger number on the box does not guarantee more detail from an old or poorly focused negative.
These five film scanners include calibrated 35mm, mixed-format flatbed, automatic strip and standalone workflows.
Choose a scanner for the file you need to keep. Preview speed comes second.35mm Film Scanners Compared
| Image | Product | Details | Check Price |
|---|---|---|---|
 | Plustek OpticFilm 8200i Ai | Film: 35mm negatives and slides Workflow: Manual dedicated scanner Output decision: Calibration and editing Buyer fit: Careful color archive | Check Price on Amazon |
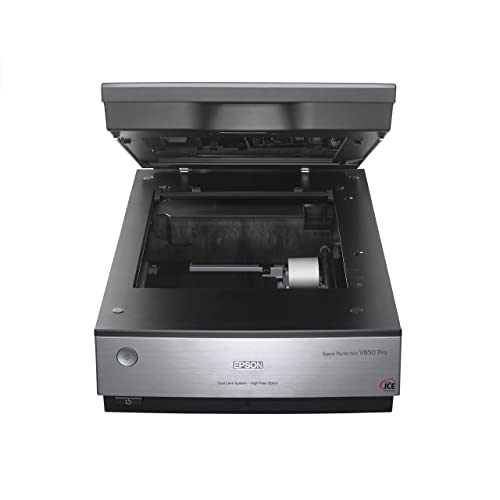 | Epson Perfection V850 Pro | Film: 35mm and larger film formats Workflow: Flatbed with film holders Output decision: Dual-lens film scan Buyer fit: Mixed-format archive | Check Price on Amazon |
 | Plustek OpticFilm 135i | Film: 35mm negatives and slides Workflow: Automatic strip holder Output decision: Desktop editing Buyer fit: Batch 35mm ingestion | Check Price on Amazon |
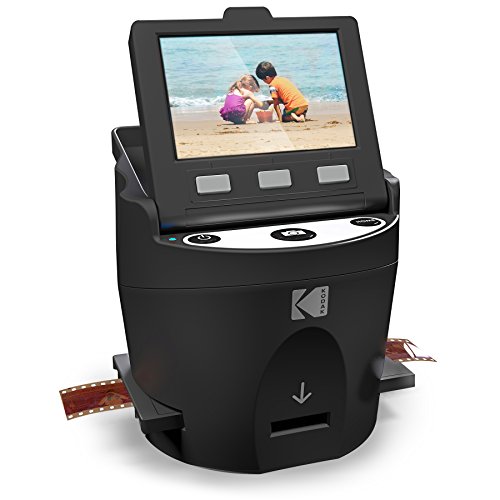 | KODAK SCANZA | Film: 35mm, 126, 110, 8mm listed Workflow: Standalone 3.5-inch screen Output decision: JPEG Buyer fit: Mixed legacy-film preview | Check Price on Amazon |
 | KODAK Slide N Scan | Film: 135, 110, 126 listed Workflow: Standalone 5-inch screen Output decision: JPEG to SD card Buyer fit: Simple on-device review | Check Price on Amazon |
1. Plustek OpticFilm 8200i Ai — Best for Careful Color Negatives
The OpticFilm 8200i Ai is a dedicated 35mm negative and slide scanner for someone prepared to adjust individual frames. Plustek advertises 7200 dpi, an IT8 calibration target and an infrared dust and scratch workflow for this model. That combination makes sense when consistent color and later editing count for more than getting through boxes quickly. The manufacturer-listed dpi is an optical specification, not a promise that every film stock or lens captured that much usable detail.
Color negatives need inversion and correction. The package names SilverFast Ai, but its title and bullets disagree about the included version. Check the box, license and operating-system support with the seller. An IT8 target can help calibrate a suitable workflow for color transparencies. It will not automatically correct faded negatives.
Infrared cleaning is useful on compatible color film, but silver-based black-and-white negatives can confuse that channel. Compare a pass without cleanup and inspect edges. Save the original separately from the edit on an external SSD for photographers with a separate backup. Triage a large collection before spending minutes on every frame.
Our Take Choose the 8200i Ai when you want to work carefully on a smaller selection of negatives. Verify the exact software version and test dust removal on your film type before scanning a whole collection.
- Dedicated 35mm film path.
- IT8 target listed with the Ai bundle.
- Infrared cleaning option for compatible film.
- Slow per-frame work for a large backlog.
- Listing conflicts on SilverFast version.
- Infrared cleanup may not suit silver-based black-and-white film.
2. Epson Perfection V850 Pro — Best for a Mixed Film Archive
Epson’s V850 Pro is a flatbed photo and film scanner rather than a dedicated 35mm slot. Its exact listing names 6400 dpi, dual-lens scanning and Digital ICE. Epson’s product page also describes film holders and a workflow for negatives, slides and larger film formats. The V850 Pro is the flexible choice when a box holds 35mm beside medium-format film, prints and other flat originals.
The holder is part of how the scanner makes the image. Keep film flat, clean the glass and confirm the strip is seated in the correct orientation before diagnosing softness. Epson’s manual distinguishes optical settings for film-holder and guide use. An upscaled output number is not a useful substitute for checking the scanned grain and edges. Test a dense and a thin negative before choosing one exposure setting for every roll.
Digital ICE may reduce visible defects on compatible film, but its performance is not a guarantee for every emulsion or damaged frame. A flatbed also occupies more desk space than a small dedicated scanner. Compare a representative 35mm frame at your actual print or display size. A photo-editing monitor helps inspect color and dust, but the screen cannot recover detail absent from the scan.
A flatbed makes sense for its desk space when you have mixed originals. It is not automatically the fastest or sharpest route for 35mm alone.Our Take Choose the V850 Pro for a collection that includes more than 35mm. Budget time for holders, glass cleaning and test scans rather than comparing only its advertised dpi with a dedicated scanner.
- Handles film and flat photo originals.
- Dual-lens and film-holder workflow documented.
- Digital ICE option listed.
- Large desktop footprint.
- Film flatness and clean glass need attention.
3. Plustek OpticFilm 135i — Best for Batches of 35mm Strips
The 135i is a dedicated automatic 35mm negative and slide scanner. Plustek lists a film holder that can take six strip frames or four mounted slides, plus up to 7200 dpi. With the automatic holder, you load a strip, set the scan, then review multiple captures. It is a better candidate than the manual 8200i Ai if your main problem is repeatedly feeding similar 35mm rolls into a desktop editing routine.
Automatic does not mean unattended quality control. Negative density, scratches, film curl and exposure vary across a strip. Inspect a preview the size of a contact sheet and spot-check sharpness before trusting the batch. Plustek mentions a newer optical revision in the listing features, but the mention does not prove which revision a delivered unit contains. Confirm the exact package if that revision affects your decision.
Keep the output in a folder named by roll and frame, then import only the keepers into your editor. If a USB-C card reader already feeds camera photos into the same library, keep film scan filenames distinct so imports do not collide. Save an unedited master before inversion, cropping or sharpening. A batch scanner saves repeated handling, not the judgment needed for good files.
Our Take Pick the 135i when most of your archive is 35mm strips and manual frame feeding is the bottleneck. Confirm software compatibility and delivered hardware revision, then inspect a whole test strip for consistency.
- Automatic 35mm holder workflow.
- Six-frame strip or four-slide capacity listed.
- Desktop files can enter an editing pipeline.
- Not a mixed-format flatbed.
- Delivered optical revision is not confirmed by the listing alone.
4. KODAK SCANZA — Best for Mixed Legacy-Film Previews
SCANZA is a standalone converter for 35mm, 126, 110 and listed 8mm-family film. Its exact offer describes a 3.5-inch screen and JPEG output. It suits a person who needs to discover what is on mixed family film before deciding which images deserve careful rescanning. The quick preview is its main advantage. It is not a substitute for a film lab or a desktop scanner with fine control when color fidelity and fine grain are the goal.
The seller advertises 14MP and 22MP modes. Do not read the larger output figure as proof of additional native optical detail. Look at a test JPEG at full size, especially faces, text and shadow detail. The small screen helps navigate the frames, but it is too small to approve a finished archive. Transfer the files and review them on a larger calibrated display before discarding or filing the negatives.
Film size adapters and the order of loading affect the result. Check that your exact reel or strip fits the included carrier without bending a fragile original. A frame cut too short may be harder to feed, and film orientation can produce mirrored images. If a roll proves valuable, keep the physical negative labeled and use a more controlled capture path for the final file.
Our Take Choose SCANZA for mixed old film when finding the frames to keep comes first. Treat the converted JPEGs as a practical catalog, then rescan important originals if the detail or color falls short.
- Multiple legacy film sizes listed.
- Standalone screen for frame-by-frame triage.
- Simple JPEG handoff.
- Small screen limits final quality review.
- 22MP output claim does not establish native detail.
5. KODAK Slide N Scan — Best for Large-Screen Standalone Review
Slide N Scan also converts film without a computer, but its distinguishing feature here is the 5-inch built-in display. The exact listing names 135, 110 and 126 film and output to an SD card. The screen and SD card output make it a straightforward choice when a family member wants to view a frame before saving it, or when the computer is not at the sorting table. The card is not included according to the listing. Check its supported capacity and format before ordering.
The larger screen is for selection, not reliable color grading. View a few exported JPEGs on the screen and then on your actual laptop or monitor. Compare edge detail and shadow separation with the source negative. A standalone conversion workflow often has fewer of the raw scan and inversion controls that desktop software provides. The trade may be acceptable if your goal is sharing and cataloging, but not if you need a print master.
Keep physical negatives in archival sleeves after capture and pair the saved files with a roll or box reference. An 8TB portable SSD can hold a large photo library, but an SD card and one external drive are still two working copies, not a tested backup. If a frame is important, compare the output with a dedicated 35mm scan before deciding it is finished.
Choose the larger screen for easier sorting, not because it makes the scan itself more detailed.Our Take Slide N Scan fits an uncomplicated review table without a computer. Its larger display is easier to navigate than SCANZA’s, while a dedicated scanner remains the stronger route for deliberate editing.
- 5-inch viewing screen.
- 135, 110 and 126 film listed.
- Direct SD-card file handoff.
- SD card must be supplied separately.
- JPEG workflow offers less scan control than desktop software.
Buying Guide
1. Decide whether this is a preview or a master scan
A preview and a master solve different problems. If hundreds of unidentified negatives are waiting in boxes, a standalone converter can reveal what is on them with little setup. If a few frames need printing or close editing, a dedicated 35mm scanner gives more control over capture and inversion. Do a small trial of both kinds of file before spending time on the entire archive. File size and advertised dpi alone do not tell you whether the grain, focus and shadows are actually preserved.
Match the scanner to the final use. A JPEG for social sharing can be entirely sufficient for a family album, while a restoration or larger print may justify careful manual scanning and a lossless master. The photo-editing monitor guide helps with the viewing side of that decision, but a monitor cannot fix an underexposed negative or scanner focus.
2. Check film holders, software and cleanup
The holder must fit your actual film. Confirm whether you have mounted slides, cut four-frame strips, six-frame strips or odd 110 and 126 originals. Flat film can scan differently from curled film. A holder designed for one strip length may be frustrating with short cut pieces. If you plan to handle fragile originals, check how the carrier grips them before trying to straighten anything by force.
Software support is part of the purchase. Verify the bundled license, current operating system and export formats before choosing the 8200i Ai or 135i. The 8200i Ai listing itself conflicts on its SilverFast version. Dust-removal tools can help with compatible color film, but traditional silver-based black-and-white needs a careful manual test. Save both a minimally processed capture and the edited result. Otherwise a cleanup mistake may be hard to undo.
3. Build an import routine that can be reversed
Use a roll and frame naming convention from the first scan. Include a box or sleeve identifier, film date when known, and a frame number. Preserve an unedited original beside the corrected version, and record major changes such as crop, inversion or color restoration. A USB4 external SSD makes a working library convenient, but convenience is not backup.
Prove that you can restore the archive. Copy masters to a second device or location and open random files from that copy. Keep SD cards only as transfer media. A USB-C SD card reader can simplify importing standalone conversions, but verify each transfer before clearing the card. Store the negatives safely. They remain an independent source if a digital edit or storage device fails.
FAQ
Does a higher dpi or megapixel number always produce a better film scan?
No. Film grain, camera focus, scanner optics, film flatness and processing affect how much detail a scan captures. A high output setting can create a larger file without revealing more information. Advertised megapixels on standalone converters can describe processed output rather than measured native optical resolution.
Compare one familiar negative from two workflows at the same display size. Look at fine edges, shadow separation and grain without applying aggressive sharpening. Keep a sensible master resolution and test a print if printing is your goal.
Can infrared dust removal clean every old negative?
No. It can help with compatible color film, but traditional silver-based black-and-white negatives often interfere with infrared cleaning. Deep scratches or damage in the emulsion may also remain. The 8200i Ai and V850 Pro list cleanup tools, but the exact result depends on the film and settings.
Start by gently cleaning film using a method appropriate to its condition, then scan one difficult frame with cleanup on and off. Compare small edges at full size. Preserve the untouched scan so you can redo the repair later.
Do I need to keep the negatives after making JPEGs?
Yes, if you want to preserve the photos. JPEG previews may be perfectly useful for discovery and sharing, but they may not contain enough editable detail or range for a future print. A software bug, wrong inversion or cropping decision can also affect a large batch.
Label sleeves to match digital roll and frame names, and store them in a suitable dry, stable environment. Keep a separate backed-up digital master. That leaves you the option to rescan a valuable frame when your tools or needs change.
Bottom Line
Plustek 8200i Ai is the deliberate color-negative choice, while Epson V850 Pro makes sense for more than one original format. Plustek 135i is the choice when repeated strip handling is the problem. KODAK SCANZA and KODAK Slide N Scan are simpler routes for discovering and sharing old frames. Test your own film and final file workflow before committing a full collection.