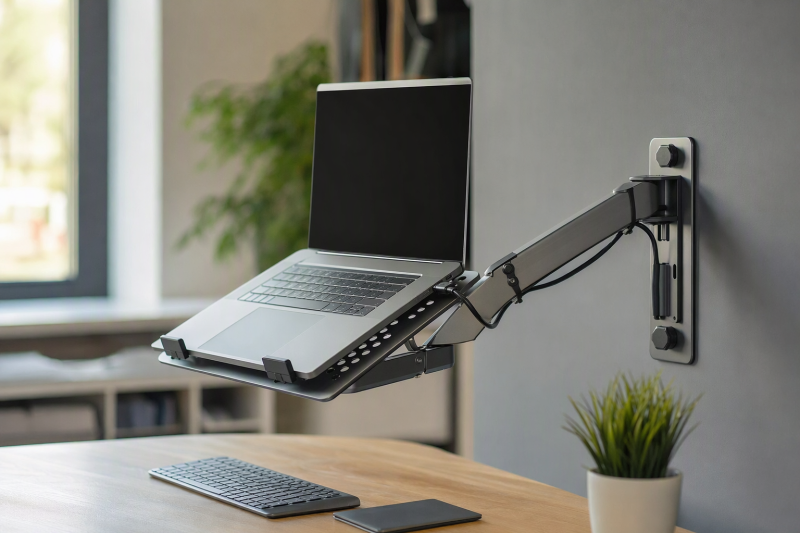
A wall arm can lift a laptop off a small desk and position it beside a monitor. The mount is not a decorating accessory. The wall must carry a moving arm and laptop safely. Start with wall structure, the device’s actual weight and the tray’s grip, then look at reach and tilt. Several listings explicitly warn against mounting into drywall alone.
These five exact Amazon US wall mounts provide different laptop-tray options for a fixed workstation. Installation and load capacity were not independently tested. Most also offer a VESA monitor mode, but the monitor mode is a separate mounting configuration from the laptop tray. For a desk that cannot be drilled or whose wall is unsuitable, our home-office monitor guide can help plan a freestanding setup instead.
Verify a stud, suitable masonry or concrete and the correct fasteners before purchasing. Do not use drywall alone when the product instructions rule it out.Laptop Wall Mounts Compared
| Image | Product | Details | Check Price |
|---|---|---|---|
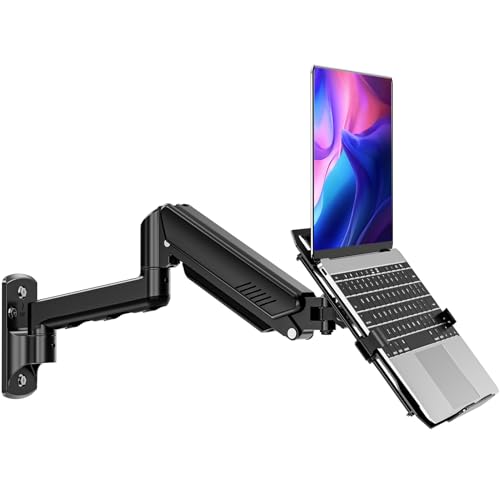 | ErgoFocus 2-in-1 mount | Laptop claim: 11-17 in; 4.4-22 lb Reach claim: 20.7 in Tray: Vented with adjustable clamps Best fit: Higher stated device load | Check Price on Amazon |
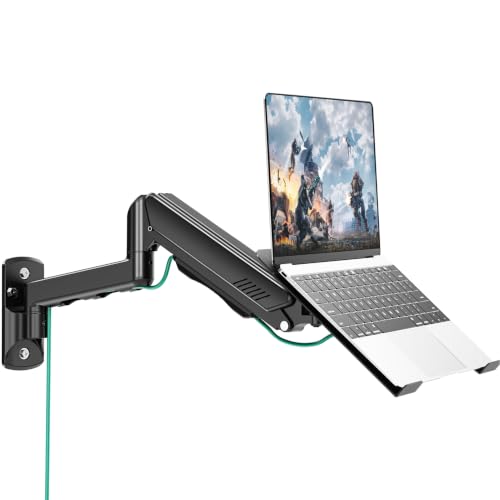 | MOUNT PRO 2-in-1 mount | Laptop claim: 11-17 in; 4.4-19.8 lb Reach claim: Not stated in checked bullets Tray: Vented with straps Best fit: Strapped laptop or VESA display | Check Price on Amazon |
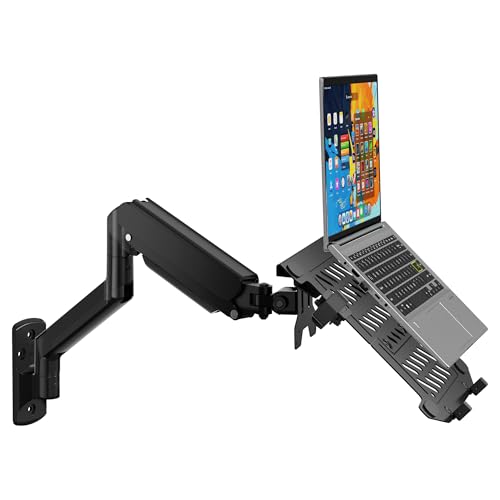 | WALI 2-in-1 mount | Laptop claim: 10-17 in; up to 15.4 lb Reach claim: 16.7-19.3 in Tray: Vented Best fit: Different laptop/monitor load limits | Check Price on Amazon |
 | UPGRAVITY gas-spring mount | Laptop claim: 12-17 in; 3.3-17.6 lb Reach claim: Up to 19.7 in Tray: 11.81 x 10.24 in; lip and strap Best fit: Lower minimum gas-spring load | Check Price on Amazon |
 | VIVO MOUNT-V001GL | Laptop claim: 10-15.6 in; 4.4-9.9 lb Reach claim: Not stated in checked bullets Tray: Vented adjustable clamps Best fit: Smaller laptop-only workstation | Check Price on Amazon |
1. ErgoFocus 2-in-1 Mount — Best Higher Stated Load
ErgoFocus lists 11-17-inch laptops weighing 4.4-22 pounds and a vented tray with adjustable clamps. That upper number is higher than the other picks here, but it is a seller claim for the mounted device, not proof of a particular wall installation. The arm’s stated reach is 20.7 inches, with vertical and tilt adjustment for placing a laptop near an external keyboard or monitor.
It also includes a VESA plate for compatible 75 x 75 or 100 x 100 mm monitors, but the laptop and monitor are alternative configurations, not two devices at once. The listing recommends wood studs, cement or concrete brick and says not to install into drywall alone. Use hardware suited to the actual substrate and check the arm’s clearance from shelves and walkways. The tray openings may leave some vent area clear, but cooling was not independently tested. Our USB-C docking guide covers connections this metal arm does not provide.
Our Take ErgoFocus has the highest stated capacity on paper. Confirm the laptop weight and the wall’s actual structural support before trusting a 22-pound marketing ceiling.
- 4.4-22-pound device window is clearly listed.
- Vented tray and adjustable clamps are described.
- Seller warns against drywall-only installation.
- High load claim depends on a suitable wall and fasteners.
- VESA display use replaces, rather than supplements, the laptop tray.
2. MOUNT PRO 2-in-1 Mount — Best Strapped Laptop Tray
MOUNT PRO says its wall arm handles 11-17-inch laptops from 4.4 to 19.8 pounds. The tray has adjustable straps as well as ventilation openings, and the arm includes cable routing. Straps can add retention when a laptop moves with the arm, but check their path across vents, ports and the lid. A strap that crosses a hot exhaust or plug is not an improvement.
The included VESA plate is for a monitor instead of the laptop tray, with 75 x 75 and 100 x 100 mm patterns named. The seller calls for mounting into a wood stud, cement or concrete brick and expressly says not drywall alone. Wall anchors and the tray’s ability to prevent a laptop sliding when tilted were not independently verified. Test the laptop at the intended angle before typing on it. Our USB-C hub guide covers port expansion, but do not let attached cables tug the arm.
Straps and tray slots are useful only when they leave the laptop’s vents and ports accessible.Our Take MOUNT PRO deserves a look when strap retention is a priority and the laptop is within its stated weight window. The wall substrate and strap route are primary safety checks, not installation footnotes.
- Adjustable tray straps are listed.
- Device weight range and VESA patterns are stated.
- Cable routing is integrated into the arm.
- Straps may interfere with particular vent or port layouts.
- Drywall-only mounting is explicitly ruled out.
3. WALI 2-in-1 Mount — Best Separate Load Windows
WALI’s listing separates up to 15.4 pounds for a 10-17-inch laptop from up to 22 pounds for a VESA monitor. That distinction is helpful. A monitor capacity should not be borrowed to justify a heavier laptop on a tray. The arm describes 16.7-19.3 inches of extension and tilt, swivel and rotation adjustments. Check the exact laptop tray’s width and retaining edges before treating the size range as a fit guarantee.
The listing describes a ventilated platform but also makes broad claims about cooling and posture. Temperature and ergonomics were not independently measured. A laptop with underside intake may need more clearance than a slotted metal tray provides. The product page excerpt does not give a complete wall-substrate instruction, so obtain the maker’s current manual before drilling. Our shared-desk dock guide can help with the screen and cable side of a fixed station.
Use the 15.4-pound laptop limit for the tray; the 22-pound monitor figure applies to a different configuration.Our Take WALI is a candidate when separate laptop and monitor limits help avoid a capacity mistake. Confirm the wall installation instructions and tray fit before mounting either device.
- Laptop and monitor load claims are clearly separated.
- Arm extension range is stated.
- VESA and laptop tray modes are both described.
- Current wall-fastener guidance must be checked separately.
- Cooling and comfort claims are not tested here.
4. UPGRAVITY Gas-Spring Mount — Best Lower Weight Start
UPGRAVITY quotes a 3.3-17.6-pound support window, starting lower than several other gas-spring arms here. Its laptop tray is stated as 11.81 x 10.24 inches, with a raised lip and strap, and the arm can extend to about 19.7 inches. These numbers help check both a lighter laptop and its physical footprint. A laptop below the minimum may not let a counterbalance arm stay in position.
The mount can also take a 75 x 75 or 100 x 100 mm VESA screen in place of the laptop tray. The listing specifically recommends wood studs, cement or concrete brick and warns against drywall-only installation. Vent slots in the tray are not proof that a given notebook stays cool with its lid closed or under heavy work. Leave cable slack through the arm’s movement range. Our USB-C docking guide covers the workstation connections separately.
Our Take UPGRAVITY is the first gas-spring model to check for a lighter device, as long as it still meets the minimum. Verify wall substrate, tray footprint and strap placement before installing.
- Lower 3.3-pound minimum is explicitly listed.
- Tray dimensions and strap are described.
- Seller warns against drywall-only attachment.
- Devices below minimum may not balance.
- Tray slots do not prove safe cooling for every laptop.
5. VIVO MOUNT-V001GL — Best Compact Laptop-Only Choice
VIVO describes a pneumatic wall arm for 10-15.6-inch laptops from 4.4 to 9.9 pounds. The laptop range is narrower than the 17-inch options, which can be useful for a small fixed workstation. The tray has adjustable clamps, rubber contact points and ventilation slots. The listed arm supports tilt, swivel and height adjustment so the laptop can sit beside, rather than on, a crowded desk.
The seller says the counterbalance needs at least 4.4 pounds to work properly. Check the laptop’s weight, including any case, and avoid assuming a 10-inch device automatically meets that minimum. The installation bullets describe wood studs or brick/concrete walls. Installation and maximum tilt with a laptop attached were not independently tested. For a separate large screen above the desk, our home-office monitor guide covers display selection, not wall support.
A smaller laptop can still fall below the counterbalance minimum. Confirm weight as well as diagonal size.Our Take VIVO fits a confirmed 10-15.6-inch laptop in the stated 4.4-9.9-pound window at a structurally sound wall. Its scope covers laptops, and you may not need monitor claims anyway.
- Narrow device size and weight window is stated.
- Adjustable clamps and rubber tabs are described.
- Wood-stud and masonry installation paths are named.
- Not listed for 17-inch or over-9.9-pound laptops.
- Underweight laptops may not balance the arm.
Buying Guide
1. Verify the Wall, Not Just the Arm
Identify the actual structural substrate at the exact installation point. Several sellers here specify wood studs, cement or concrete brick and warn against drywall alone. The anchor and fastener must match that substrate and the product’s instructions. A wall that looks solid from the paint side may conceal unsupported drywall or services. Do not drill blindly.
If you do not own the wall, get permission. The device moves outward from the wall, increasing force at the fasteners when the arm is extended. Plan the installation with the maker’s manual or a qualified installer if the structure is uncertain. An arm load rating does not certify the wall, screws or anchors.
2. Match Laptop Weight, Tray and Retention
Weigh the laptop and any case and check both the minimum and maximum load. Gas-spring or counterbalance arms may fail to stay in place when the laptop is too light, not only when too heavy. The ErgoFocus and MOUNT PRO windows start at 4.4 pounds, UPGRAVITY starts at 3.3 and VIVO requires at least 4.4. Use WALI’s 15.4-pound laptop ceiling, not its higher monitor number.
Then compare the laptop’s footprint to the tray and its clamps. A diagonal range does not show where the front lip, strap or clamps contact the chassis. Keep vents, ports and the lid hinge clear. Try the intended tilt cautiously with a hand near the device before trusting the retention system.
3. Leave Airflow and Cable Slack
Tray slots can leave openings, but cooling depends on the laptop’s own vent layout, workload and lid position. Do not claim that any perforated tray prevents overheating. Follow the laptop maker’s guidance for a closed display if the lid will be shut, and watch temperatures during a normal sustained task after mounting.
Plan power, video, keyboard and network cables for the full arm range. A taut plug can pull on the chassis or block rotation. These mounts are mechanical supports, not docks. Our USB-C docking guide addresses electrical expansion if you need it.
FAQ
Can I mount one of these straight into drywall?
Do not assume so. ErgoFocus, MOUNT PRO and UPGRAVITY expressly warn not to install into drywall alone. VIVO names a stud or suitable masonry path. For WALI, obtain the current maker instructions before selecting anchors.
Use the wall and fastener combination specified for the exact model. If you cannot confirm the substrate or permission to drill, choose a desk or floor support instead of risking a falling laptop.
Do these wall arms hold both a laptop and monitor at once?
The two-in-one listings describe alternative modes: a laptop tray or a VESA plate for a compatible monitor. They are not dual-device arms merely because both capabilities appear in the title. Verify the package’s parts and whether changing modes requires reassembly.
If you need both devices suspended simultaneously, choose hardware explicitly rated for two separate loads and wall attachment. Do not hang extra equipment from the laptop tray or cable channels.
Will a ventilated wall tray keep a gaming laptop cool?
A ventilated tray does not always keep a gaming laptop cool. Ventilation slots are only part of the airflow path. A gaming laptop’s intake and exhaust placement, wall clearance, lid state and workload all affect the airflow. None of these exact products was tested for temperature with a gaming laptop here.
Check the computer maker’s operating instructions and watch temperatures under a normal workload. If the tray, wall or straps block air, change the placement rather than assuming metal slots solve it.
Bottom Line
Choose a wall mount only after confirming a safe substrate, correct device weight window and a tray that holds the laptop without blocking vents. ErgoFocus has the highest listed laptop capacity here, UPGRAVITY starts at a lower load, and VIVO is a narrower laptop-only choice. The wall installation is as important as the arm.