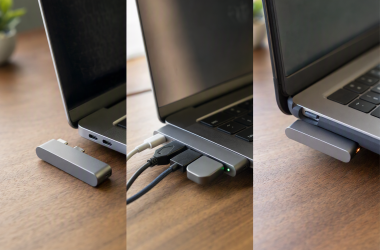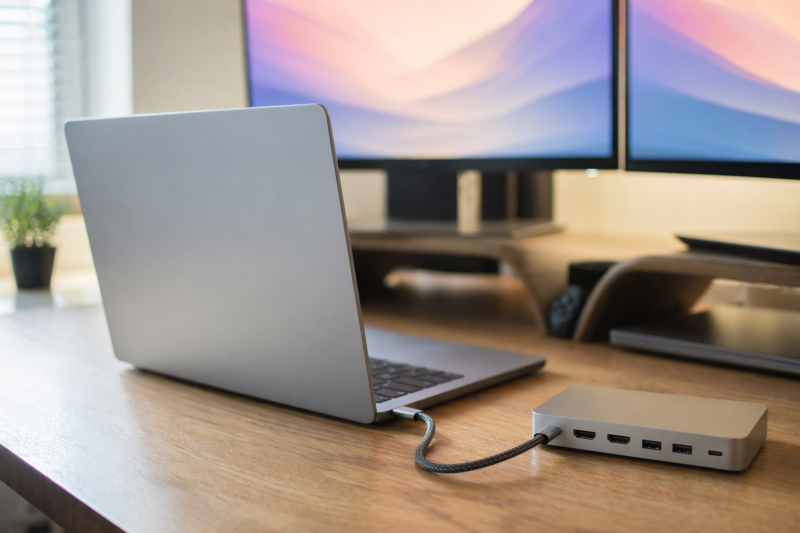
The Plugable TBT-UDM is the best docking station for most M4 and M5 MacBook Air owners because it provides two native HDMI outputs, useful desktop ports, and up to 100W charging without a display driver. The right answer changes for an M1, M2, or M3 Air, though. Apple’s display limit comes from the Mac, not the number of HDMI ports on a dock.
We researched 12 current docks and adapters, checked every selected product through Amazon PAAPI, and read their manufacturer specifications against Apple’s current technical documents. The nine main picks below cover one-display travel setups, native two-display desks, DisplayLink workstations, and port-heavy creative desks.
Recent Updates
July 2026: We built this guide around Apple’s current M1, M2, M3, M4, and M5 display documents, including its March 2026 MacBook Air display guide. We also checked the current macOS DisplayLink release, dropped discontinued Kensington candidates, and validated all nine main ASINs with both PAAPI SearchItems and GetItems.
Quick Picks by MacBook Air Setup
- Best overall for M4 and M5: Plugable TBT-UDM, for two native HDMI displays without a driver.
- Best premium dock: CalDigit TS4, for the widest mix of fast USB, Thunderbolt, card, and network ports.
- Best for two monitors on M1 or M2: Plugable UD-6950PDH, using DisplayLink Manager.
- Best for three physical display outputs: Anker Prime DL7400, with an important Mac resolution caveat.
- Best full dock for travel: OWC Thunderbolt Go Dock, which hides the power supply inside the dock.
- Best for creators: Sonnet Echo 20 SuperDock, with an internal NVMe slot and extensive audio connections.
- Best portable single-display adapter: Satechi USB-C Multiport Adapter V3.
MacBook Air Dock Comparison
| Image | Product | Details | Check Price |
|---|---|---|---|
 | Plugable TBT-UDM | Connection: Thunderbolt 4, 40Gb/s Mac display approach: Native; dual on M4/M5 or M3 with lid closed Host charging: 100W advertised, 96W certified Key ports: 2 HDMI, downstream TB4, 6 USB, SD/microSD, 1GbE Best for: Driverless M4/M5 dual displays | Check Price on Amazon |
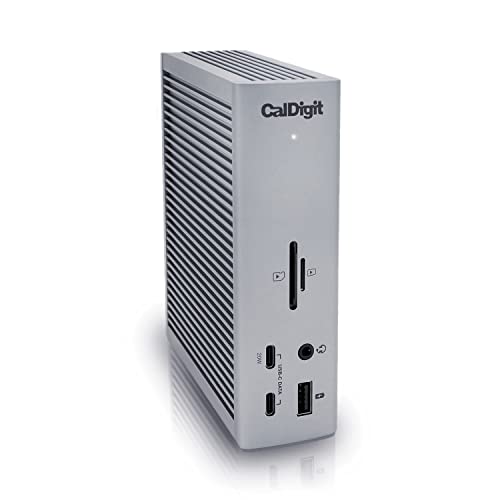 | CalDigit TS4 | Connection: Thunderbolt 4, 40Gb/s Mac display approach: Native; Apple host display limit applies Host charging: 98W sustained Key ports: DisplayPort, 2 downstream TB4, 8 USB, cards, 2.5GbE Best for: Premium port selection | Check Price on Amazon |
 | Plugable UD-6950PDH | Connection: USB-C, USB4, or Thunderbolt host Mac display approach: DisplayLink; driver required for dual 4K60 Host charging: 100W Key ports: 2 HDMI, 2 DisplayPort, 5 USB, cards, 1GbE Best for: Two displays on M1/M2 | Check Price on Amazon |
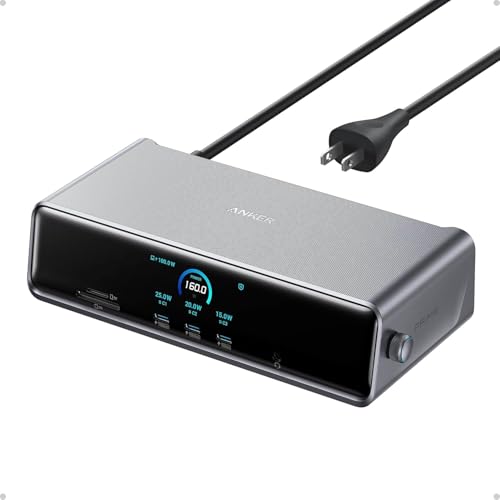 | Anker Prime DL7400 | Connection: USB-C, 10Gb/s Mac display approach: DisplayLink; verify exact three-screen Mac modes Host charging: Up to 140W under stated conditions Key ports: 2 HDMI, DisplayPort, USB-C/A, cards, 2.5GbE Best for: Three-output office desks | Check Price on Amazon |
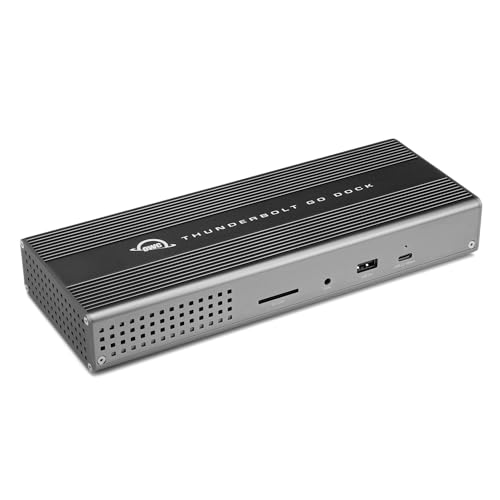 | OWC Thunderbolt Go Dock | Connection: Thunderbolt 4, 40Gb/s Mac display approach: Native; Apple host display limit applies Host charging: 90W Key ports: HDMI 2.1, 2 downstream TB4, USB, SD, 2.5GbE Best for: Travel with full desktop ports | Check Price on Amazon |
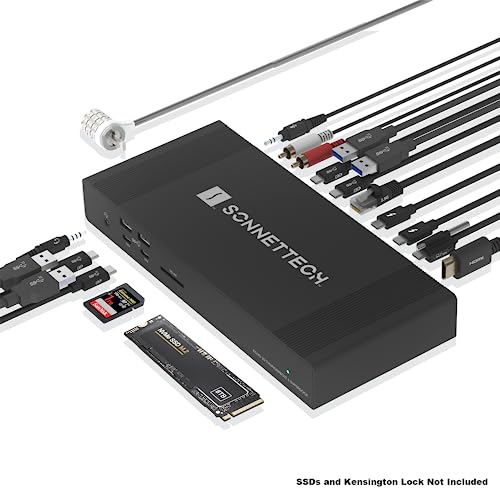 | Sonnet Echo 20 SuperDock | Connection: Thunderbolt 4, 40Gb/s Mac display approach: Native; Apple host display limit applies Host charging: 100W Key ports: HDMI 2.1, 8 USB, SD, NVMe slot, 2.5GbE, audio Best for: Creators and storage-heavy desks | Check Price on Amazon |
 | UGREEN Revodok Max 213 | Connection: Thunderbolt 4, 40Gb/s Mac display approach: Native; Apple host display limit applies Host charging: 90W Key ports: DisplayPort, 2 downstream TB4, 5 USB, cards, 2.5GbE Best for: Value full-size TB4 dock | Check Price on Amazon |
 | Belkin Thunderbolt 4 Core Hub | Connection: Thunderbolt 4, 40Gb/s Mac display approach: Native; monitors need TB or adapters Host charging: Up to 96W Key ports: 3 downstream TB4, USB-A Best for: Minimal Thunderbolt expansion | Check Price on Amazon |
 | Satechi USB-C Multiport Adapter V3 | Connection: USB-C DisplayPort Alt Mode Mac display approach: Native single HDMI display Host charging: Up to 85W output Key ports: HDMI, 4 USB data, UHS-II SD, 1GbE Best for: Portable single-display setups | Check Price on Amazon |
MacBook Air External Display Compatibility
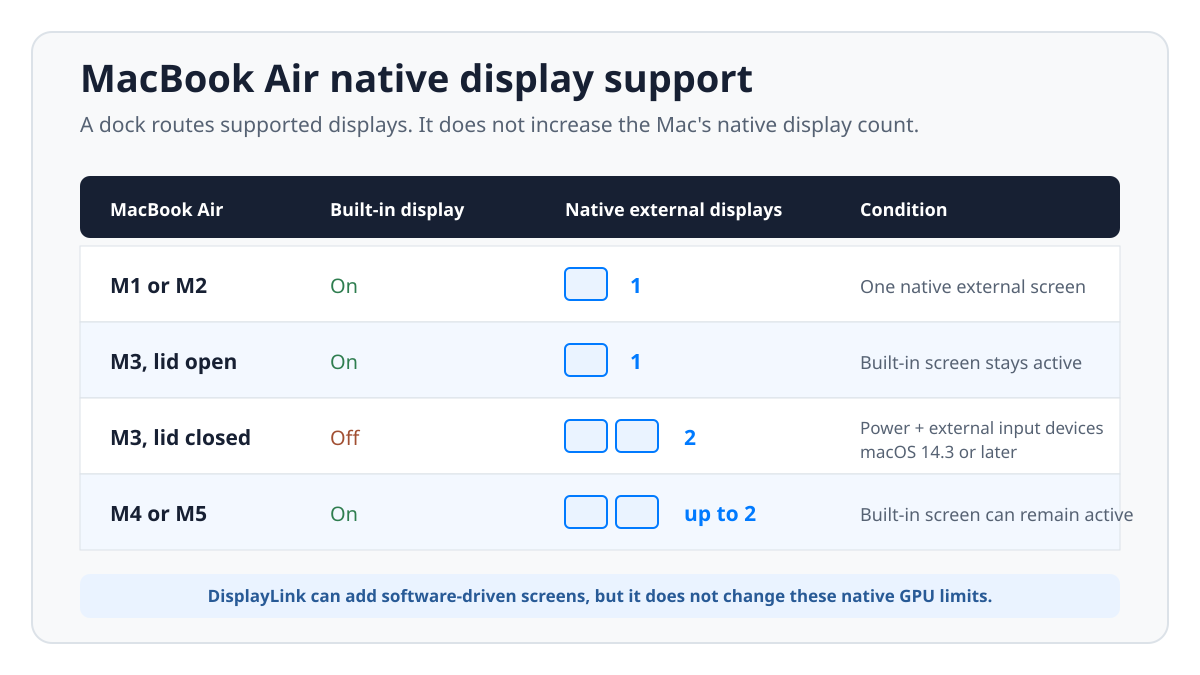
Your MacBook Air chip is the first specification to check, because it sets the native display count before any dock enters the picture. The matrix below follows Apple’s technical specifications for each generation and its current setup documents.
| MacBook Air | Native displays with lid open | Native displays with lid closed | Practical dock choice |
|---|---|---|---|
| M1 | Built-in display plus one external | One documented native external output | Native dock for one; DisplayLink for two external |
| M2, 13-inch or 15-inch | Built-in display plus one external | One documented native external output | Native dock for one; DisplayLink for two external |
| M3, 13-inch or 15-inch | Built-in display plus one external | Two external, with built-in display off | Native dual-output dock for clamshell; DisplayLink to keep the Air display active |
| M4, 13-inch or 15-inch | Built-in display plus up to two external | Up to two external | Native Thunderbolt dock for one or two |
| M5, 13-inch or 15-inch | Built-in display plus up to two external | Up to two external | Native Thunderbolt dock for one or two |
Apple permits the M3 dual-display setup with the lid closed, macOS Sonoma 14.3 or later, external power, and an external keyboard and mouse or trackpad. Open the lid and the second external screen goes dark or disconnects. Closing the lid on an M4 or M5 gains you nothing, because Apple says it does not raise the two-external-display limit.
Resolution is a separate question from display count. Apple’s current M4 and M5 guide lists up to 6K at 60Hz or 4K at 144Hz on each of two external displays, and that figure is a host ceiling rather than a promise. A dock with HDMI 2.0, a limited adapter, or a slower monitor can pull it down. For M3 in clamshell mode, Apple gives different maximums for the first and second display. We therefore never turn a dock’s headline resolution into a blanket MacBook Air promise.
Native Display Output or DisplayLink?
A native dock carries display data over Thunderbolt or USB-C DisplayPort Alt Mode and uses the Mac’s own display engines. It needs no graphics driver, it keeps the normal macOS video path intact, and it is our first choice whenever the Mac already supports the number of screens you want.
DisplayLink takes a different route entirely. Our guide to the best DisplayLink docking stations compares the current hardware choices. The software captures desktop frames, compresses them, and ships them as USB data to a DisplayLink chip inside the dock. An M1 or M2 Air can therefore drive two independent external office displays, at the cost of installing DisplayLink Manager and granting macOS screen-recording permission. Synaptics listed DisplayLink Manager 16.1 on May 22, 2026 for macOS Sonoma 14, Sequoia 15, and Tahoe 26.
Choose DisplayLink to solve a display-count problem, not because it is a better version of native video. Plugable notes that HDCP-protected content is not supported on its DisplayLink outputs, and warns that gaming, 3D work, some full-screen video, and video editing may not behave as expected. For documents, spreadsheets, browser windows, email, and chat, it works well. Native video remains the safer choice for protected streaming, color work, motion-sensitive tasks, and the fewest software dependencies.
Which MacBook Air Dock Should You Buy?
| Choose this dock | If you want |
|---|---|
| Plugable TBT-UDM | Two native HDMI displays from an M4, M5, or closed-lid M3 |
| CalDigit TS4 | The richest premium port selection and 98W charging |
| Plugable UD-6950PDH | Two 4K office displays from an M1 or M2 Air |
| Anker Prime DL7400 | Three display connectors and a DisplayLink-centered office station |
| OWC Thunderbolt Go Dock | A full dock without a separate power brick |
| Sonnet Echo 20 SuperDock | Audio, fast networking, many USB devices, and internal NVMe storage |
| UGREEN Revodok Max 213 | A less elaborate full-size Thunderbolt 4 dock |
| Belkin Thunderbolt 4 Core Hub | Three downstream Thunderbolt ports in a small powered hub |
| Satechi USB-C Multiport Adapter V3 | One HDMI display and travel-friendly everyday ports |
Table of Contents
- Plugable TBT-UDM, best overall for M4 and M5
- CalDigit TS4, best premium dock
- Plugable UD-6950PDH, best dual-monitor dock for M1 and M2
- Anker Prime DL7400, best for three display outputs
- OWC Thunderbolt Go Dock, best travel desktop dock
- Sonnet Echo 20 SuperDock, best for creators
- UGREEN Revodok Max 213, best value Thunderbolt 4 dock
- Belkin Thunderbolt 4 Core Hub, best minimal Thunderbolt hub
- Satechi USB-C Multiport Adapter V3, best portable dock
1. Plugable TBT-UDM — Best Overall for M4 and M5 MacBook Air
The Plugable TBT-UDM is our default recommendation for an M4 or M5 MacBook Air desk. It has two HDMI 2.0 outputs, and Plugable explicitly documents driverless dual 4K at 60Hz for those Air generations. It also supports two native displays from an M3 Air in the closed-lid setup Apple approves. An M1 or M2 Air can use the dock happily, but only one external screen will light up, because this is not a DisplayLink model.
The 13-port layout covers ordinary office needs without dragging you back into a drawer of adapters. Plugable lists one downstream Thunderbolt 4 port, a USB-C data port, four USB-A ports, UHS-II SD and microSD slots, Gigabit Ethernet, and audio, alongside the two HDMI outputs. The dock advertises 100W charging with 96W certified delivery, which leaves plenty of headroom for a MacBook Air to negotiate the rate it actually supports.
It is the better buy than the TS4 when your real goal is plugging two ordinary HDMI monitors straight into the dock. You pay for that in slower Gigabit Ethernet and fewer premium expansion options. If you own an M1 or M2 and you need two screens, skip it and read the DisplayLink Plugable below.
Our Take
Buy the TBT-UDM for the cleanest two-HDMI, one-cable M4 or M5 Air setup. It handles the everyday desk requirements without a display driver, and it is unusually honest about which Mac generations get what.
- Native dual HDMI support documented for M4 and M5 Air
- No DisplayLink driver or screen-recording permission required
- UHS-II card readers and six useful USB connections
- Two-year Plugable warranty
- M1 and M2 remain limited to one external display
- Gigabit Ethernet trails 2.5GbE-equipped premium docks
2. CalDigit TS4 — Best Premium MacBook Air Dock
The CalDigit TS4 is the premium pick when your peripherals matter as much as your monitors. CalDigit lists 18 ports, among them two downstream Thunderbolt 4 connections, DisplayPort 1.4, three 10Gb/s USB-C ports, five 10Gb/s USB-A ports, UHS-II SD and microSD readers, 2.5Gb Ethernet, and several audio connections. Its 98W sustained host charging covers the whole Air family.
Display behavior, as always, comes from the Mac. On an M4 or M5 Air, the TS4 can sit at the center of a native two-display setup with suitable Thunderbolt, USB-C, or DisplayPort connections. An M3 gets two native external displays only with the lid closed. M1 and M2 get one. CalDigit publishes a host-specific display table, and that table is a far better basis for buying than the maximum modes in an Amazon title.
The TS4 pays off when SSDs, cameras, card media, audio gear, and fast wired storage all pass through your desk during a normal week. It is less convenient if both of your monitors take HDMI only, because there is no built-in HDMI port, so you would need compatible adapters or a Thunderbolt display path.
Our Take
Choose the TS4 when one dock has to run a full desktop rather than just two monitors. The port mix and the 2.5GbE earn the premium position on a demanding M4 or M5 Air desk.
- Eighteen ports cover storage, cards, networking, and audio
- Every USB data port runs at up to 10Gb/s
- Two downstream Thunderbolt 4 ports aid expansion
- 98W sustained host charging
- No built-in HDMI connection
- More dock than a simple office desk needs
3. Plugable UD-6950PDH — Best Dual-Monitor Dock for M1 and M2
If you own an M1 or M2 MacBook Air and you need two independent external office displays, the Plugable UD-6950PDH is the answer. It uses DisplayLink instead of the Mac’s native display engines, and Plugable rates the two active outputs for up to 4K at 60Hz. Two HDMI and two DisplayPort connectors let you match whatever inputs your monitors have, though the dock drives two displays at a time rather than all four connectors at once.
Plugable also lists 100W charging, five USB ports, UHS-II SD and microSD readers, Gigabit Ethernet, and audio. It connects through a USB-C, USB4, or Thunderbolt host port, so what you are paying for is the DisplayLink solution and a practical port set, not a pure Thunderbolt data path.
The software requirement decides whether this dock is right for you. You have to install DisplayLink Manager, allow screen-recording access, and keep the driver current after every major macOS change. Plugable discloses no HDCP support on these outputs, and cautions against treating the dock as a gaming, 3D, or video-editing solution. For spreadsheets, web apps, writing, and communications, those compromises cost you nothing you will notice.
Our Take
This is the most direct route from an M1 or M2 Air to a two-monitor office. Buy it for productivity screens, and keep native video for protected streaming and graphics-sensitive work.
- Adds two independent office displays to M1 and M2
- HDMI and DisplayPort choices simplify monitor matching
- 100W charging plus card readers and Ethernet
- Current Plugable macOS driver guidance
- Requires DisplayLink software and screen-recording permission
- No HDCP support over DisplayLink outputs
- Not our choice for gaming or video production
4. Anker Prime DL7400 — Best for Three Display Outputs
The Anker Prime DL7400 goes after large office setups with two HDMI connections, one DisplayPort connection, DisplayLink, a front status screen, and active cooling. Anker’s current product page lists macOS 13.5 or later and M1 through M5 Mac compatibility. The 14-port design also brings 2.5Gb Ethernet, SD and microSD slots, several USB-C and USB-A connections, and audio.
The Mac verdict here has to be narrower than the headline suggests. The live Amazon title frames triple 4K at 60Hz around Windows laptops, while Anker’s manufacturer page lists Mac compatibility. We can verify three physical video connectors and DisplayLink support, and we will not treat triple 4K on a Mac as established for every Air generation. Confirm the exact three-screen resolution combination with Anker before buying if that mode is the reason you want the dock.
Anker advertises up to 140W host charging when its PD 3.1 and front-port conditions are met. A MacBook Air will request only the power it supports, so the large number is not a charging-speed reason by itself. The dock is most compelling for a fixed office that values many outputs, fast Ethernet, and clear status information.
Our Take
The DL7400 is a capable DisplayLink office command center. Mac buyers should buy it for the port layout, and only after confirming their exact three-display mode. It is not our default two-screen pick.
- Two HDMI ports plus one DisplayPort connection
- 2.5Gb Ethernet and both full-size card slots
- Status display exposes charging and connection information
- Anker lists current M1 through M5 compatibility
- Exact triple-display Mac resolutions need confirmation
- DisplayLink driver remains part of the setup
- 140W figure brings little benefit to a MacBook Air
5. OWC Thunderbolt Go Dock — Best Travel Desktop Dock
The OWC Thunderbolt Go Dock is the full desktop dock we would take between workspaces. Its power supply lives inside the enclosure, so your packing list is the dock and an AC cable, with no separate brick to forget. OWC lists 11 ports and 90W host charging, which is enough to run a MacBook Air desk through a single Thunderbolt cable.
The connection set covers HDMI 2.1, two downstream Thunderbolt 4 ports, USB-C and USB-A, 2.5Gb Ethernet, an SD reader, and audio. That puts it much closer to a permanent desktop dock than to a pocket hub. The integrated supply cuts cable clutter, and it also makes the dock itself bigger than the compact Satechi adapter later in this guide.
OWC publishes high display ceilings, and it also states plainly that the computer decides the number and the modes. Apply the Apple matrix instead. One native external display on M1 and M2, two on M3 only with the lid closed, and up to two on M4 and M5. The Go Dock uses no DisplayLink, so it has no way around those limits.
Our Take
Pick the Go Dock when you want desktop-grade ports in several locations and you are tired of carrying a power brick. It is a native dock, so its predictable behavior arrives together with Apple’s display limits.
- Integrated power supply simplifies frequent packing
- HDMI 2.1 plus two downstream Thunderbolt ports
- 2.5Gb Ethernet and SD card reader
- 90W host charging
- Larger than a bus-powered travel adapter
- Cannot exceed the Air’s native display count
6. Sonnet Echo 20 Thunderbolt 4 SuperDock — Best for Creators
The Sonnet Echo 20 earns its place with connections other docks leave out. Sonnet lists 20 interfaces, including four 10Gb/s USB-A ports, four 10Gb/s USB-C ports, HDMI 2.1, two downstream Thunderbolt 4 ports, 2.5Gb Ethernet, UHS-II SD, RCA line outputs, a combination headphone and microphone jack, and a separate microphone input. An internal M.2 NVMe slot lets the dock hold your storage instead of adding another box to the desk.
Sonnet rates host charging at 100W and lists macOS 14 or later, Tahoe included. The native display path follows Apple’s count for each Air generation. Sonnet’s current display table explicitly lists base M1, M2, and M3 Macs as one-display systems and M4 as a two-display system. It had not added an M5 row by our research date, so an M5 buyer should lean on Apple’s two-display host rule and confirm the exact monitor path with Sonnet.
This is the specialist choice for a photographer, editor, podcaster, or musician who will use the storage and audio connections. A general office user would pay for ports they may never touch.
Our Take
Choose the Echo 20 when the dock has to replace separate storage, audio, card, and network adapters. The internal NVMe slot is the feature that most clearly sets it apart from an ordinary Thunderbolt dock.
- Internal M.2 NVMe slot adds hidden desktop storage
- Eight 10Gb/s USB data connections
- Unusually broad analog audio selection
- 2.5Gb Ethernet and 100W host charging
- Excessive for a keyboard-and-monitor office
- Current Sonnet display table does not name M5
7. UGREEN Revodok Max 213 — Best Value Thunderbolt 4 Dock
The UGREEN Revodok Max 213 is the value-oriented full Thunderbolt 4 dock on this list. UGREEN specifies a 40Gb/s host link, 90W charging from an included 180W supply, DisplayPort 1.4, two downstream Thunderbolt 4 ports, one 10Gb/s USB-C port, four USB-A ports, 2.5Gb Ethernet, SD and microSD 4.0 readers, and audio.
A 13-port set like that competes directly with pricier desktop docks, and it never wanders into the Sonnet’s specialist audio and storage territory. It suits an M4 or M5 Air desk that needs fast wired networking, card imports, several USB accessories, and two native display paths. The M3 restriction and the M1 and M2 one-display limit still apply.
UGREEN ties its single-8K language to Windows on the current page, so we do not carry that promise across to macOS. For a MacBook Air, pick your monitors from Apple’s limit and from the exact DisplayPort or Thunderbolt path you intend to use. Anyone who needs two direct HDMI sockets will find the Plugable TBT-UDM simpler.
Our Take
The Max 213 is the practical middle ground between a basic hub and a high-end workstation dock. Buy it for the 2.5GbE, the fast card slots, and native Thunderbolt expansion, and not for a headline 8K figure.
- Strong 13-port desktop selection
- 2.5Gb Ethernet and fast SD 4.0 readers
- Two downstream Thunderbolt 4 ports
- 90W charging with included power supply
- No direct HDMI output
- Advertised 8K mode is not a Mac promise
8. Belkin Thunderbolt 4 5-in-1 Core Hub — Best Minimal Thunderbolt Hub
Belkin’s 5-in-1 Core Hub is built for a desk that already runs on Thunderbolt devices rather than legacy ports. Belkin’s official specification maps one upstream Thunderbolt 4 connection to the Mac, three downstream Thunderbolt 4 ports, and one 10Gb/s USB-A port. It supplies up to 96W to the host, and up to 15W from a downstream Thunderbolt connection.
Those three downstream ports can feed compatible displays, SSDs, adapters, or a daisy chain, and the included 150W supply gives them a stable power budget to draw from. On an M4 or M5 Air, two suitable monitor paths can work natively. M3, M2, and M1 behavior still follows the Apple matrix, and Belkin’s generic dual 4K ceiling is not permission to ignore the host limit.
This is not a conventional all-port dock. It has no Ethernet, card reader, HDMI, DisplayPort, or audio jack, so many monitors need USB-C connections or active adapters. That spare layout is the appeal when you already own Thunderbolt storage and displays. If you need common office ports in one purchase, choose the TBT-UDM or Max 213.
Our Take
Buy the Belkin when three powered downstream Thunderbolt ports are the whole point. Its small, focused layout is excellent for modern peripherals and poor company for a drawer of older cables.
- Three downstream Thunderbolt 4 connections
- Up to 96W host charging
- Supports a six-device Thunderbolt daisy chain
- Compact five-port design
- No Ethernet, card reader, or audio
- No direct HDMI or DisplayPort connector
9. Satechi USB-C Multiport Adapter V3 — Best Portable MacBook Air Dock
The Satechi USB-C Multiport Adapter V3 is the sensible travel choice when you need one monitor and not a complete powered workstation. Its single HDMI port keeps the display decision simple across every MacBook Air generation. Satechi’s current compatibility page includes M5 Air models, and it limits the relevant Mac path to 4K at 60Hz rather than treating the 8K figure in the product name as a universal promise.
Satechi lists four USB data ports, three of them rated up to 10Gb/s, plus UHS-II SD and Gigabit Ethernet. The USB-C power input accepts up to 100W and passes up to 85W to the host. Connect a charger when you want one-cable power, or use the adapter for its bus-powered data functions while you are moving.
This device sits on the hub side of the line in our comparison between docks and hubs. It lacks the downstream Thunderbolt expansion, second display path, and large power supply of a desktop dock. That makes it easier to pack and less suitable for a permanent two-monitor desk. Our best USB-C hubs guide covers more compact alternatives.
Our Take
Choose the Satechi when one HDMI display, Ethernet, an SD card, and fast USB data all have to fit in a travel pouch. Do not buy it for a two-monitor setup.
- Small single-display travel design
- Four USB data ports and UHS-II SD
- Gigabit Ethernet in a compact adapter
- Up to 85W passthrough output
- Only one external display connection
- No downstream Thunderbolt port
- Needs your USB-C charger for passthrough power
How Many Monitors Can Your MacBook Air Actually Run?
Start with the chip, then count how many external displays have to stay active at the same time. An M1 or M2 Air has one native external display output. A dock with two HDMI ports may mirror an image, leave one port inactive, or fall back some other device-specific way, and it cannot conjure a second native desktop out of nothing. Buy one good native monitor, or buy a DisplayLink dock.
M3 is the strange middle generation. It supports the built-in display plus one external screen in normal laptop use. Apple allows two external screens only once you close the lid, connect power, and use external input devices on macOS Sonoma 14.3 or later. If you want two external displays and the built-in display all at once, DisplayLink is the practical route.
M4 and M5 support the built-in panel plus up to two external displays. Apple’s current guide also lets a supported hub or daisy chain carry two displays through one Thunderbolt port, which changes your cabling and not your maximum count. If you are coming from a Pro model, read our separate best docking stations for MacBook Pro, because those chips play by different display rules.
Native Displays vs DisplayLink: Which Should You Choose?
Choose native output whenever your Mac already supports the screens you need. You avoid a background graphics service, and you keep protected video, color workflows, and motion-sensitive work on the normal macOS display path. An M4 or M5 owner who wants two displays usually has no reason to add DisplayLink at all.
Choose DisplayLink when the screen count you want is higher than the native limit and the work is mostly desktop productivity. On an M1 or M2 Air, that means two independent external monitors. On M3, it can mean keeping the laptop display open alongside two external screens. DisplayLink Manager has to stay installed, authorized, and compatible with your macOS release.
For a wider selection across Windows and macOS, our best USB-C docking stations guide covers both driverless and software-driven models.
USB-C, Thunderbolt 4, and Thunderbolt 5 on a MacBook Air
USB-C names the connector and tells you nothing about the capability behind it. A portable USB-C adapter can carry one display over DisplayPort Alt Mode, along with USB data, Ethernet, cards, and passthrough power. That is a fine match for travel, though its shared data link and single display connector will start to pinch on a permanent desk.
Thunderbolt combines display, PCIe data, USB, and charging on one cable. M1 and M2 Air models expose Thunderbolt / USB 4 ports compatible with Thunderbolt 3 speeds. M3, M4, and M5 Air models use current Thunderbolt implementations, with the M4 and M5 specifications listing Thunderbolt 4. A Thunderbolt 4 dock brings 40Gb/s connectivity and certified expansion, and it still answers to the host’s display engines. Our Thunderbolt 3 vs 4 vs 5 guide explains the interface differences, and our USB4 explainer covers the related USB path.
A Thunderbolt 5 dock can fall back to whatever Thunderbolt speed the Air supports. It will not turn a Thunderbolt 4 MacBook Air into an 80Gb/s computer. Buy one for a future host, or for a feature only that dock has, and not for a bandwidth increase you will never see on the Air you own today.
How Much Dock Charging Does a MacBook Air Need?
A dock’s power rating describes the maximum it can offer, not what the Mac has to accept. USB Power Delivery negotiation lets a MacBook Air ask for a level it supports. A 90W, 98W, 100W, or 140W-capable dock will all power an Air, and the biggest number cannot force extra watts into the computer.
More dock wattage does not automatically make a MacBook Air charge faster. The Mac model, its current charge state, the power profile the dock exposes, and the devices hanging off it all have a say. A high dock rating still earns its keep when the supply has to reserve power for bus-powered SSDs, phones, and downstream Thunderbolt devices.
Read the fine print under any advertised output. Plugable labels the TBT-UDM at 100W but states 96W certified delivery. Anker’s 140W mode carries PD 3.1 and front-port conditions. Satechi accepts 100W input but lists up to 85W to the host, because the adapter keeps some for itself. Those are normal engineering distinctions, and none of them is a reason to chase the biggest headline.
Which Ports Matter for Office, Photo, and Creative Work?
For a standard office, prioritize the monitor connector you already own, enough USB ports for input devices, wired Ethernet if Wi-Fi is inconsistent, and a front port for temporary storage. Two direct HDMI ports reduce adapter clutter. A 2.5Gb Ethernet port only helps when the network, switch, cable, and server can also exceed Gigabit speed.
Photographers should look for UHS-II SD support and not settle for any slot that happens to be SD-shaped. The TBT-UDM, TS4, and Satechi V3 list UHS-II readers. UGREEN lists SD and microSD 4.0. Creators working across several drives should count 10Gb/s USB ports and downstream Thunderbolt connections rather than counting total ports.
Audio users get unusual value from the Sonnet Echo 20, because it offers several analog routes and internal NVMe storage in one enclosure. A simple office user gets better value from fewer and more familiar ports. If your setup is display-led, our monitor guide for MacBook Pro explains USB-C and Thunderbolt monitor considerations that carry over to the Air.
What Should You Know About Clamshell Mode, Sleep, and Reconnection?
M3 dual-native-display support depends on clamshell mode, so plan the desk around an external keyboard, a mouse or trackpad, and connected power. Apple says opening the lid causes the second external display to go dark or disconnect. Expect that behavior. It is not evidence that the dock failed.
Display chains often take a few seconds to settle after wake, because the Mac, the dock, the adapters, and the monitors all renegotiate their links. Keep macOS and any DisplayLink software current, use certified cables within the recommended length, and connect monitors to the documented ports. When wake problems appear after a change, strip the chain back to one display, then add the second screen and the other devices one at a time.
Do not assume every dock firmware update is one you need. Follow the manufacturer’s instructions for your exact model, and never install Windows-only utilities on macOS. A direct cable test is still the fastest way to tell a monitor or adapter problem apart from a dock problem.
Frequently Asked Questions
Can an M1 or M2 MacBook Air use two external monitors?
Yes, though not as two native external displays. Apple documents one native external display for M1 and M2 MacBook Air. A DisplayLink dock such as the Plugable UD-6950PDH can add a second independent desktop through USB graphics, once you install DisplayLink Manager and grant its required screen-recording permission. That setup is best suited to office work. If protected streaming, video editing, 3D work, or gaming matters to you, use one native external monitor rather than treating DisplayLink as identical to the Mac’s GPU output.
Can an M3 MacBook Air run two external monitors with the lid open?
Not through Apple’s two-native-display mode. Apple supports the built-in display plus one external screen with the lid open. Its documented two-external-display setup requires the lid closed, power connected, macOS Sonoma 14.3 or later, and external input devices. Open the lid and the second external screen goes dark or disconnects. If you need the built-in display and two external desktops at the same time, use a compatible DisplayLink dock and accept its software requirements and its workload limits.
Do M4 and M5 MacBook Air need DisplayLink for two monitors?
No. Apple documents the built-in display plus up to two external displays on both M4 and M5 MacBook Air. A compatible native Thunderbolt dock is the better choice, because it uses the Mac’s normal display path and needs no DisplayLink driver. The Plugable TBT-UDM is our simplest direct-HDMI recommendation. The TS4, OWC Go Dock, Sonnet Echo 20, UGREEN Max 213, and Belkin Core Hub can all form native display setups too, with the right monitor connections and cables.
Will every two-port dock run two MacBook Air displays?
No. Count the Mac’s native display engines first, then check the dock’s technology and its output rules. Two HDMI sockets guarantee nothing on an M1 or M2 Air. Some USB-C docks rely on DisplayPort Multi-Stream Transport arrangements that macOS does not use for independent extended displays, and DisplayLink docks require software. Even on M4 and M5, the resolution and refresh rate you want has to fit the dock, the adapter, the cable, and the monitor path, as well as Apple’s host ceiling.
Is DisplayLink safe to install on a MacBook Air?
DisplayLink Manager is current manufacturer-provided software from Synaptics, and macOS controls its screen-recording permission. The real question is workflow fit, not whether it behaves exactly like a native display, because it does not. Keep the software updated for your macOS version, get it from Synaptics or from the dock maker, and understand that it captures desktop frames for USB transport. Avoid it for HDCP-protected playback, and for any job where latency, color handling, or graphics behavior has to match a native connection.
Is a Thunderbolt 5 dock worth buying for a MacBook Air?
Usually not for present-day bandwidth. The MacBook Air generations in this guide do not gain an 80Gb/s host link merely because the dock supports Thunderbolt 5. A TB5 dock can work at the Air’s compatible fallback speed, so it can make sense if you plan to replace the computer soon or need a dock-specific feature. For most Air desks, a well-matched Thunderbolt 4 dock costs less and already handles the Mac’s supported displays, storage, network, and charging needs.
How We Research and Select MacBook Air Docks
We began with Apple’s current technical specification pages for the 13-inch and 15-inch M1 through M5 MacBook Air models. We then used Apple’s dedicated M3 dual-display setup document and its March 2026 MacBook Air display guide to record the lid position, operating-system, power, and display-count conditions. We never transferred the rules from one chip generation to another.
For each dock, we read the current manufacturer page for its host interface, video technology, ports, charging, included power supply, compatibility notes, and warranty. We reduced display ceilings wherever the Mac, the port path, or the manufacturer’s own wording required it. We checked the DisplayLink recommendations against Synaptics’ current macOS release and against Plugable’s disclosed HDCP and graphics-workload limits.
Amazon PAAPI SearchItems found the candidate listings, and GetItems confirmed every exact ASIN used in the nine product boxes and the three honorable mentions. We excluded discontinued products, model mismatches, and any listing without a verified exact match. All of this is specification-led research, and none of it is a claim of hands-on lab testing. Prices stay live through the affiliate elements rather than being written into the article.
Honorable Mentions
- OWC 11-Port Thunderbolt Dock: The conventional desktop alternative to the Go Dock, offering broad Thunderbolt expansion without the Go model’s integrated travel-focused power design. It is still a native dock, so use the Apple generation matrix for display count.
- Satechi Thunderbolt 4 Slim Hub Pro: Worth a look when several downstream Thunderbolt connections matter more to you than card readers or a large legacy-port set. Monitor count still comes from the host MacBook Air.
- CalDigit TS5 Thunderbolt 5 Dock: The TS5 is a forward-looking dock with a wide desktop port set. A MacBook Air can use a compatible fallback connection, but it does not gain Thunderbolt 5 host bandwidth, so buy it for future plans rather than an immediate speed jump.
About the Author
The ThunderboltLaptop editorial team covers Thunderbolt, USB-C, laptop displays, docks, and related accessories. Our buying guides prioritize current host compatibility, manufacturer documentation, and exact product validation, so readers can match a device to the computer they already own.