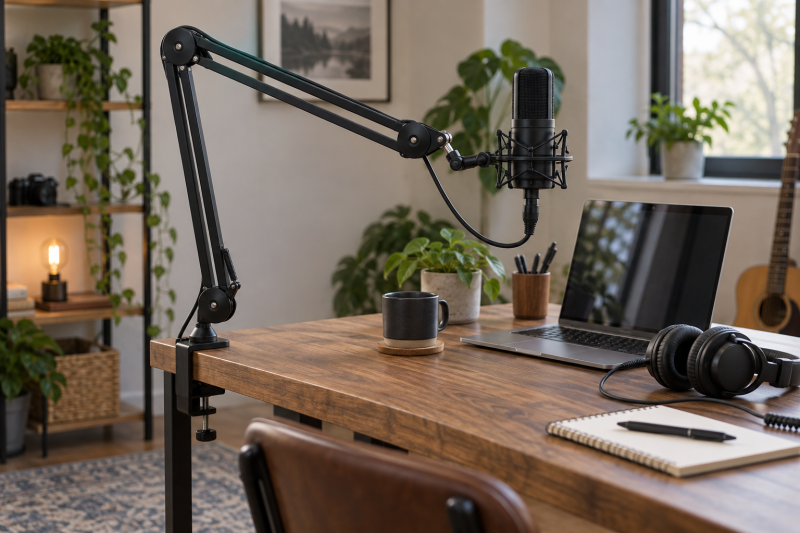
A microphone arm is only useful if it holds the mic in the right place without bouncing, blocking the screen or stressing the desk edge. Weigh the full microphone assembly, including shock mount and pop filter, before choosing a payload rating. Then measure the desk lip, the reach to your mouth and the path a cable takes when the arm moves. A strong arm attached to a weak clamp point is still a poor setup.
These six boom arms were selected from Amazon US listings with active New offers; availability can change. They include studio, low-profile, broadcast and heavier-load options. Stability and handling noise were not independently tested. Check supplied mounting hardware before altering a desk.
Choose by total loaded weight, usable reach and desk-mount clearance, not just by the arm’s advertised maximum payload.Desktop Microphone Boom Arms Compared
| Image | Product | Details | Check Price |
|---|---|---|---|
 | RØDE PSA1+ | Load: 0.25-1.2kg listed Mount: Clamp to 70mm desk listed Arm: Internal spring damping Buyer fit: General recording desk | Check Price on Amazon |
 | Elgato Wave Mic Arm LP | Load: Verify mic plus accessories Mount: Desk clamp; check lip clearance Arm: Low profile with cable covers Buyer fit: Clear camera view | Check Price on Amazon |
 | Elgato Wave Mic Arm Pro | Load: Up to 3kg listed Mount: Desk clamp; check clearance Arm: Gas spring Buyer fit: Heavy mic assembly | Check Price on Amazon |
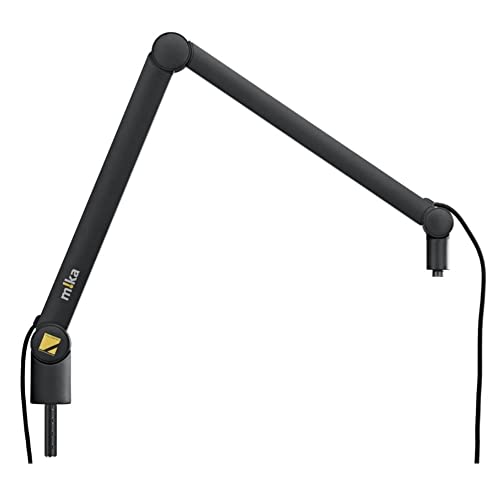 | Yellowtec YT3601 m!ka Arm | Load: Up to 2kg listed Mount: Check m!ka mount separately Arm: 31in, concealed wiring Buyer fit: Broadcast desk | Check Price on Amazon |
 | FIFINE BM66 | Load: Up to 2kg seller-listed Mount: Desk clamp Arm: 34.25in claimed reach Buyer fit: Heavier value setup | Check Price on Amazon |
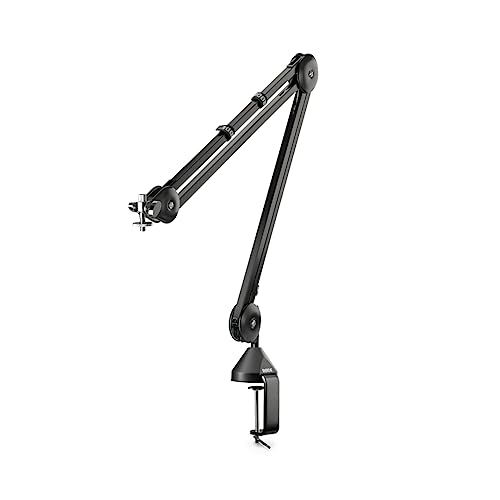 | RØDE PSA1 | Load: 700g-1.1kg listed Mount: Desk clamp included Arm: Parallelogram internal spring Buyer fit: Classic studio arm | Check Price on Amazon |
1. RØDE PSA1+ — Best All-Round Studio Arm
RØDE lists the PSA1+ for microphone assemblies from 0.25 to 1.2kg, with internal spring damping and a clamp for desks up to 70mm thick. The exact offer describes full rotation and integrated cable management. It is a good fit for a desk where the microphone needs to move between a close speaking position and a parked position without an exposed spring sitting in the camera frame.
Count everything the arm carries against the rating. Add the shock mount, pop filter, adapter and cable tension. An arm may be too stiff for a light mic or sag under a heavier assembly. Test full reach and parked positions. Both must hold without a hand on the arm.
The included desk clamp needs a stable edge with enough underside clearance. RØDE also documents a threaded desk insert, which is a different installation decision from clamping. If a studio monitor controller occupies the same desk corner, map cable and arm movement together. Route the cable so it doesn’t pull on the mic when the boom swings.
Our Take PSA1+ is the general-purpose choice when your complete microphone assembly falls inside its 0.25-1.2kg range. Check the desk lip and test the arm at full extension before deciding the installation is finished.
- 0.25-1.2kg load range listed.
- Internal damping targets movement noise.
- Clamp limit and cable routing documented.
- May not balance a lighter or heavier full assembly.
- Needs a stable clamping edge.
2. Elgato Wave Mic Arm LP — Best for a Clear Camera View
The Wave Mic Arm LP exact offer emphasizes a low-profile arm that sits below the shoulder line. It also lists all-metal construction and magnetic cable-channel covers. That shape is useful when a microphone must approach from below the frame of a webcam or camera rather than crossing a face or monitor. The clean on-camera silhouette is the reason to consider this model.
Low profile does not mean universal clearance. A monitor stand or dock can block the path. Mark the mic’s ideal position, then measure travel from the clamp and clearance below each display. Check Elgato’s current payload and clamp limits with your accessories. The retrieved Amazon bullets do not establish a weight figure.
Magnetic channel covers can hide a cable while keeping it serviceable. Leave enough slack at both pivots so the cable does not tug on a USB or XLR connector. A low arm that sweeps through your hands is a poor fit.
The low silhouette is an advantage for the camera shot only if the arm can reach the mic position without colliding with the monitor or your hands.Our Take Choose Wave Mic Arm LP for an on-camera desk where a conventional elevated boom would cross the shot. Verify the complete load and test the travel around your actual screens before buying.
- Low-profile visual path.
- Magnetic cable covers.
- Metal construction listed.
- Monitor and keyboard clearance can limit placement.
- Exact load limit needs separate confirmation.
3. Elgato Wave Mic Arm Pro — Best for a Heavy Mic Assembly
Elgato’s Pro offer lists gas-spring movement and support for up to 3kg including accessories. It is the heavier-load option when a microphone, shock mount, pop screen and other attached hardware exceed the useful range of a lighter arm. The exact listing calls it low profile, so it can also serve an on-camera desk. But more capacity is not automatically better for a light microphone that cannot counterbalance the spring.
Weigh the assembly and check the minimum useful load. A heavy mic may sit well. A small USB mic may rise or drift. Test full extension. Gas-spring smoothness is a listed feature, not proof that desk vibration or cable bumps will be inaudible.
The desk clamp carries a larger potential load than a light arm, so inspect the desk material and the underside around the clamp. A hollow particleboard edge or a narrow lip can be the failure point. If you also use a headphone distribution amplifier, separate its headphone cables from the boom’s moving microphone lead. Check that the arm parks without covering controls.
Our Take Wave Mic Arm Pro is a strong candidate for a heavy microphone rig. Do not buy it only for the headline capacity. Confirm balance with your lightest and heaviest intended setups.
- Up to 3kg load claimed.
- Gas-spring repositioning.
- Low-profile desk layout.
- May not balance a very light mic.
- Heavy setup makes clamp and desk strength critical.
4. Yellowtec YT3601 m!ka Arm — Best for a Broadcast Desk
The Yellowtec YT3601 exact offer describes a 31-inch aluminum arm with an internal coil spring and support for microphones up to 2kg. Concealed wiring and compatibility with the m!ka system make it attractive for a permanent broadcast desk where arm movement and cable appearance count every day. The 31-inch figure is an arm dimension, not a guarantee it reaches your ideal mouth position from any clamp point.
The Amazon features establish m!ka compatibility but not which desk insert, clamp or pole is included. Plan the matching Yellowtec mount separately after measuring the desk. Without it, the arm may not be usable on recording day.
Like other premium arms, the stated 2kg capacity is an upper bound, not proof that every lightweight microphone balances. Route the cable through the intended joints and leave service slack before locking a permanent desk layout. If a studio monitor controller and multiple hosts share the desk, rehearse arm travel so microphones do not collide.
Confirm the exact Yellowtec mounting part separately. The arm offer does not establish a complete desk mount.Our Take YT3601 makes sense for a planned broadcast installation built on the m!ka system. It is less straightforward for a casual clamp-on desk until the mount and total installed cost are verified.
- 2kg upper load listed.
- Concealed wiring and m!ka integration.
- Aluminum build and internal spring.
- Mount inclusion is not established by the exact offer.
- Permanent installation needs more planning.
5. FIFINE BM66 — Best Heavy-Metal Value Arm
FIFINE’s BM66 exact listing describes an all-metal arm rated up to 2kg, with a desk clamp, hidden cable channels and thread adapters for several microphones. The seller claims a reach up to 34.25 inches and smooth one-hand movement. The BM66 is the less specialized option for a heavier mic when you want a complete clamp-on package rather than a broadcast ecosystem.
Check the shock-mount adapter and mic angle. The 2kg load still includes filter and cable pull. Test full extension with the mic attached. A clamp can hold at the middle of its reach but twist farther out. Confirm the clamp fits the desk lip.
The cable covers are meant to keep the setup tidy. Check that they don’t pinch a USB lead or force a sharp XLR bend. A smooth movement claim does not prove the arm is silent on your desk. Make a short recording while moving the arm and tapping the keyboard.
Our Take BM66 is a candidate for a heavier microphone on a straightforward desk. Test its claimed reach and load with your full assembly and clamp location.
- 2kg seller-listed upper load.
- Clamp and thread adapters described.
- Concealed cable channels.
- Full-extension stability needs testing.
- Seller movement and noise claims are untested here.
6. RØDE PSA1 — Best Classic Spring Arm
The original PSA1 is a parallelogram studio boom arm with internal springs. Its exact offer describes repositioning a microphone while keeping its orientation, a useful trait for podcast and voice desks. It is a separate product from PSA1+, not a second color or bundle of the same arm. Choose it when the traditional arm shape and a compatible microphone assembly fit the desk.
The retrieved PSA1 offer lists a microphone load range and a desk clamp. Check the original PSA1 manual and supplied hardware; do not transfer PSA1+ specifications to it. Test both a light USB mic and a heavier dynamic mic with its shock mount.
Allow space for the arm to swing over a keyboard or monitor edge. Route the cable where a pivot cannot pull it out of the connector. A USB audio interface can sit on the same desk, but place it beyond the boom’s parked path.
Our Take PSA1 is a classic choice of studio arm if its exact specs fit your mic and desk. Prefer the PSA1+ when its clearly listed load and damping features are part of the decision.
- Traditional parallelogram microphone positioning.
- Internal spring design.
- Separate familiar RØDE arm option.
- Do not assume PSA1+ specifications apply.
- Needs a full load and clamp check.
Buying Guide
1. Weigh the complete microphone assembly
Payload includes more than the microphone body. Add shock mount, pop filter, adapter and cable pull. A high maximum does not guarantee balance with a light mic. Check both lower and upper supported loads, then test at full extension, where the arm is under the most strain.
A stable position counts for more than a large number. Put the mic at speaking distance and let go. It should neither drift down nor rise toward your face. Repeat with the arm parked and the cable connected. If the mic changes position when you move the cable, allow more slack or choose a different route. Do not tighten random joints beyond their intended adjustment to mask an incompatible load.
2. Measure the clamp point and movement path
Check the desk edge from above and below. A thick top may fit the advertised clamp span while a skirt, drawer rail or metal frame blocks the clamp plate. Particleboard or a thin overhang may need reinforcement or another mounting point. A drilled insert is a more permanent choice and should be approved before the desk is altered. Measure reach from the actual clamp point, not from a product photo.
Map the whole arc. Mark the microphone’s live and parked positions, then trace the arm past monitors, laptops and chair movement. A low-profile arm may cross keyboard hands, and a high arm may block a camera. With a teleprompter setup, a clear sightline is especially important. Rehearse with the exact desk objects in place.
3. Keep movement and cables out of the recording
Cable management must allow rotation. Hidden channels can look clean while putting strain on USB sockets or XLR connectors. Leave slack at pivots and keep the cable away from the spring and clamp. Move the arm through its full travel while monitoring the microphone. Any connector crackle or cable rub needs fixing before a long take.
Test vibration from the desk. A boom arm lifts the mic off a desktop stand but does not isolate a clamp from keyboard taps or bumps. Record a short voice sample while typing, moving the arm and touching the desk. Compare with a different clamp location or shock mount if needed. The best-looking arm is not the best recording choice if it adds audible handling noise.
FAQ
Can I use a boom arm with any microphone?
Not automatically. The microphone assembly needs to fall within the arm’s usable load range, and the mount thread must fit directly or through a correct adapter. A shock mount can add meaningful weight, while a light USB mic may not counterbalance a spring designed for heavier gear.
Weigh the actual assembled setup and check the offered adapter threads. Then test at full reach with the cable attached. A listing that names your microphone brand does not prove every accessory combination will balance.
Is a low-profile arm always better on camera?
No. It can keep the boom below the face and screen, but it may swing through keyboard space or hit a monitor stand. The best placement depends on desk depth, camera angle and where the microphone must sit relative to your mouth.
Use tape or a mock arm path before ordering. Check both the recording position and the parked position, including cable movement. A conventional arm above the frame may be cleaner for some desks.
Will a boom arm stop keyboard vibration from reaching the mic?
It can change the path of vibration, but a desk clamp still shares the desk’s structure. The arm’s joints, shock mount and microphone sensitivity all affect what the microphone picks up. Seller claims of quiet movement are not an independent acoustic test in your room.
Record a short sample while typing and moving the arm. If taps remain audible, adjust the clamp location, microphone distance or shock mount, and compare before spending more on a different boom.
Bottom Line
RØDE PSA1+ is the clearly specified general studio arm. Elgato Wave Mic Arm LP is the pick for a low boom, while Elgato Wave Mic Arm Pro is the pick for a heavier assembly. Choose Yellowtec YT3601 for a planned m!ka installation. FIFINE BM66 is a metal clamp-on alternative, and RØDE PSA1 is a separate classic. The correct arm is the one that balances your entire mic setup on your actual desk.