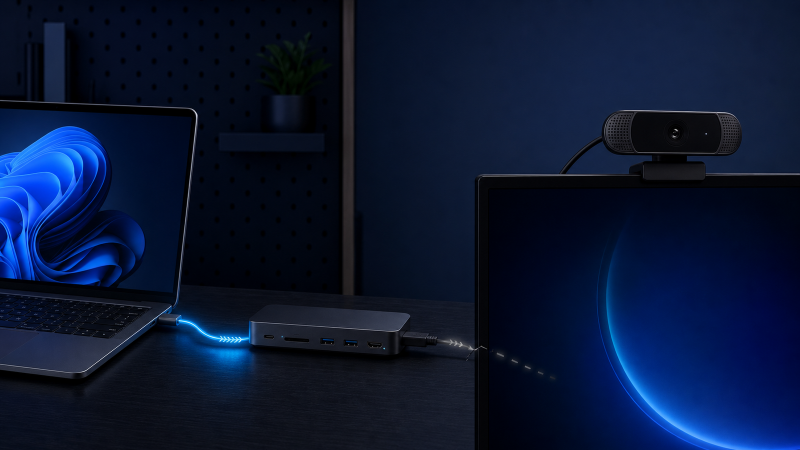
If other USB devices work through your USB-C dock but an external webcam does not, connect the same webcam straight to the computer before you change anything in Windows. Then connect it alone to one documented dock data port. On each route, record whether it shows up in Settings > Bluetooth & devices > Cameras, Device Manager, and the Windows Camera app.
The direct comparison separates a webcam or Windows problem from a problem in the docked data path. Camera permissions and the camera a meeting app has selected only matter once Windows sees the camera. A privacy toggle cannot repair a webcam that Windows never detects through the dock.
The steps below cover an external USB webcam. They do not cover the laptop’s built-in camera, a capture card, a dead dock, or every downstream USB port failing at once.
Match the camera state
| What you see | What it proves | Next check |
|---|---|---|
| The webcam works directly but is absent through the dock | The camera can be detected on one route | Keep the webcam fixed and isolate dock port, upstream link, adapter, and other devices |
| The webcam appears in Windows Camera settings through the dock | Windows sees a camera on the docked route | Test the Windows Camera app, then permissions and camera selection |
| Windows Camera works, but one meeting app has no video | The dock and the Windows camera path already work | Select the right camera in that app and check its access |
| The webcam is absent directly and through the dock | The dock is not isolated | Follow the webcam and Windows camera path |
| Keyboard and mouse work, but the webcam disappears when a capture device or drive is added | Basic dock USB works and the added device changes the state | Remove it, repeat once, then read the exact dock documentation |
| Several dock functions drop or reconnect together | The fault is wider than one webcam | Leave this guide and diagnose the whole dock path |
Do not uninstall every USB controller, remove all camera devices, edit the registry, or install a driver scanner. Each of those changes several layers before you know which route failed.
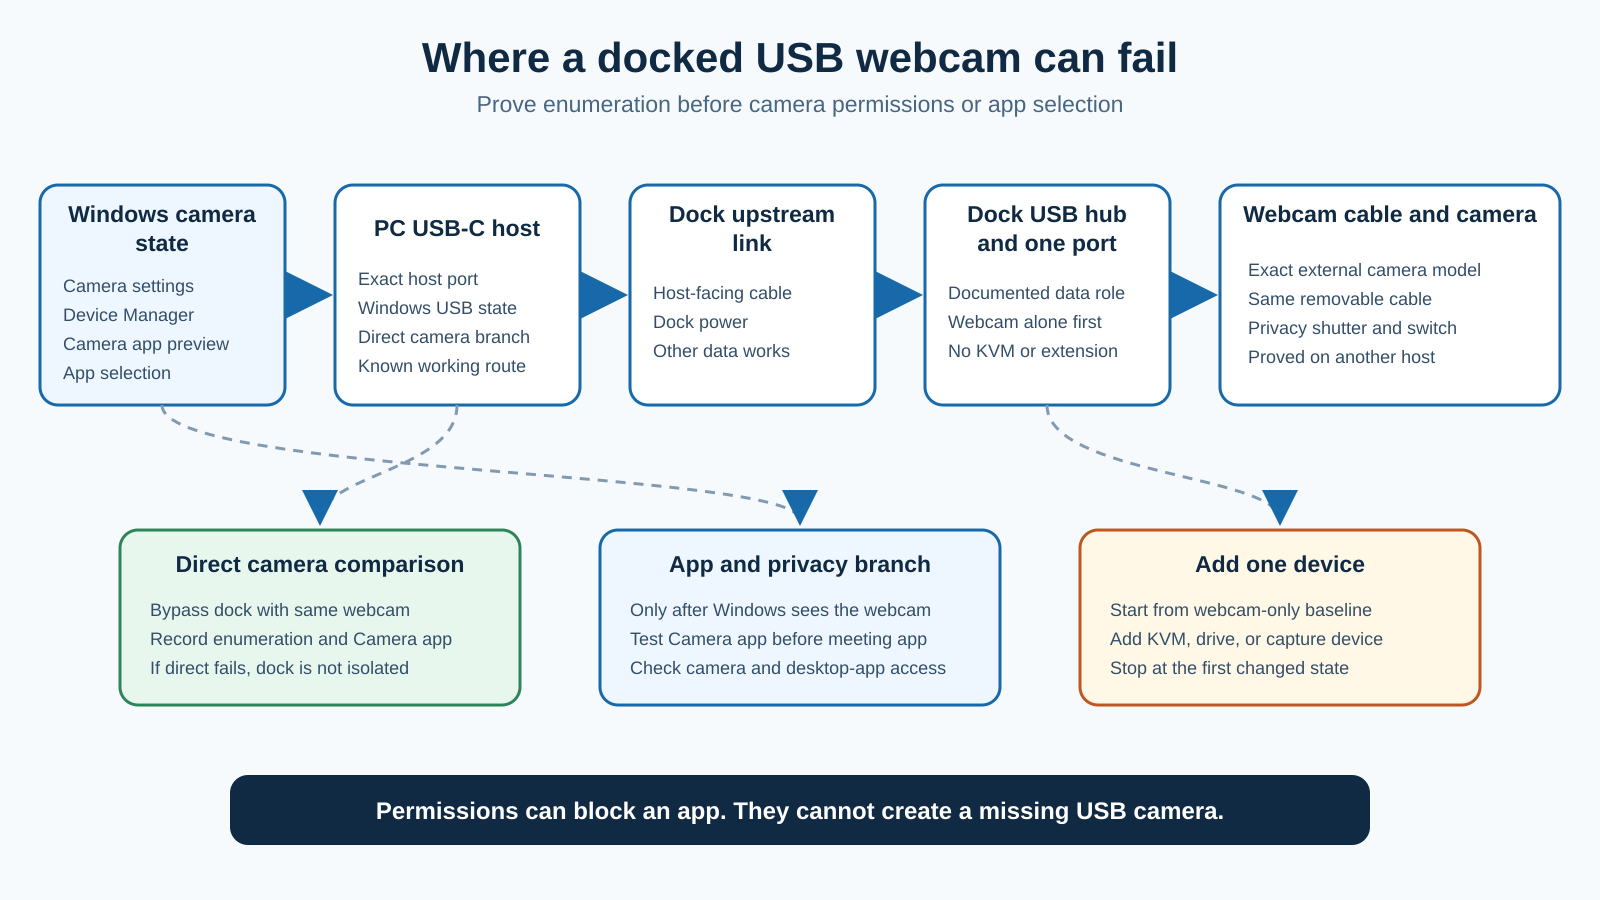
Use the shortest controlled sequence
- Record the webcam, dock, host port, camera cable, adapters, and apps.
- Close any app already using the camera.
- Connect the webcam directly to the computer.
- Confirm one simple USB data device works through the dock.
- Remove extensions, KVMs, adapters, storage, and unrelated peripherals.
- Connect only the webcam to one documented downstream data port.
- Check Camera settings, Device Manager, and Windows Camera, in that order.
- Check privacy and the meeting app only after Windows sees the camera.
- Use Windows Update and exact maker support after the route is isolated.
- Replace or escalate only from a result you can repeat.
Step 1: identify the webcam and the whole route
Record the webcam’s full model and any removable cable or USB receiver. Then record the dock’s full model, its power supply, the upstream host cable, and the downstream port you are using.
Write the route out in one line:
PC host port -> dock host cable -> dock -> downstream port -> adapter or extension -> webcam cable -> webcam
Everything after the dock can change the result, so remove every optional adapter, extension, KVM, monitor hub, and detachable cable for the first docked test.
Check the dock manual for port roles. A USB-C socket on a dock can be upstream host input, power input, downstream data, a video-capable output, or a charge-only port. USB-IF guidance treats USB Type-C as the name of the connector rather than proof of any function.
If you do not know what the port can carry, the Windows USB-version guide helps you record what Windows reports. A speed label does not promise the webcam will work.
Step 2: prove the webcam directly
Take the dock out of the camera route and connect the webcam to a documented USB data port on the computer itself.
If the cable is removable, use the same one for the direct and the docked test, and do not add an extension or a KVM.
Microsoft’s camera guidance tells owners of an external camera to secure its USB connection, try another USB port, and test the camera on another device. Do those one at a time.
Check three things:
- Does the camera appear under Settings > Bluetooth & devices > Cameras?
- Does it appear under Cameras, Imaging devices, or Sound, video and game controllers in Device Manager?
- Does the Windows Camera app show a preview?
If the webcam is absent directly, leave the dock out of it. A dock cannot explain a device that also fails on the direct route, so check the camera cable, the privacy shutter, any physical switch, another computer, and the camera maker’s official support.
If the direct route works, screenshot the camera name and its Device Manager entry, so you know exactly what to watch for when you move the webcam to the dock.
Step 3: prove basic dock USB data
Reconnect the dock with its documented power supply, upstream cable, and host-facing port, then remove every downstream device.
Connect one known-working wired keyboard or mouse to the port you plan to use for the webcam. Confirm that Windows receives input, then remove it.
A working input device proves that one dock port and the upstream route can pass basic USB data, but it proves nothing about the webcam or its cable. A charging phone or a receiver light proves power, not a usable data connection.
If no simple USB device works on any dock port, the problem is wider than the webcam, so diagnose the dock’s downstream USB ports as a whole. If the whole dock is absent, or several functions disappear together, use the Thunderbolt and USB4 whole-device guide when the host path is Thunderbolt or USB4.
Step 4: connect the webcam alone through the dock
Use one documented downstream data port and connect no other peripheral. Wait for Windows to react, then check the same three places you recorded for the direct route.
The camera appears in all three places
The docked USB path is working. Move on to app access and camera selection. Do not change the dock firmware or the host cable.
The camera appears in Device Manager but not in Camera settings
Microsoft notes that some cameras do not appear on the Camera settings page. Use the exact Device Manager name and status, then test Windows Camera. Absence from Settings alone is not proof of a failed dock port.
The camera is absent everywhere through the dock
Keep the webcam and its cable fixed, move it to another documented downstream data port, and repeat once. If one port works and another does not, record both physical port positions and contact the dock maker.
If every dock port fails for the webcam while a simple input device works, try the webcam on another computer and check the maker’s exact USB and power requirements.
The camera keeps appearing and disappearing
Remove adapters, extensions, KVMs, and unrelated peripherals, and keep the webcam on its own. Stop if a connector is loose, hot, deformed, or damaged. Do not keep moving a damaged plug to reproduce the fault.
For a removable host or camera cable, compare one cable you know is suitable in the same route. The USB-C cable testing guide can document data behavior, but a storage transfer does not prove webcam stability. Use the USB-C cable guide only after the cable is isolated.
Step 5: check Camera settings and Device Manager
Open Settings > Bluetooth & devices > Cameras.
Under Connected cameras, select the webcam when it appears. Microsoft says Windows starts the camera and shows a preview for supported cameras. A working preview proves that Windows can use the camera through the current docked route.
Check Disabled cameras. If the webcam is listed there, enable it only if you are authorized to. Microsoft notes that this needs administrator access, and that some controls can affect more than one camera.
Then open Device Manager. Watch the camera entry while you disconnect and reconnect only the webcam. It may sit under:
- Cameras
- Imaging devices
- Sound, video and game controllers
Open Properties and record Device status. Do not assume every webcam uses the same name or the same category, and do not uninstall the camera as a first repair.
If Device Manager shows an error code, save it and use Microsoft’s guidance for that code. Do not read a warning as “bad driver” without reading the status.
Step 6: use Windows Camera before a meeting app
Close the meeting app first, so two programs are not competing for the same camera, then open the Windows Camera app.
Windows Camera shows a preview
The external webcam and the docked Windows camera path both work. Microsoft recommends testing another app, because a camera that works in Windows Camera and nowhere else points at that app’s settings. Reopen the meeting app, choose the exact external webcam, and check its access.
Windows Camera lists another camera
Use the camera switch control to choose the external webcam when the app offers one. A laptop’s built-in camera can stay the default even when the external camera is connected.
Windows Camera reports no camera
Go back to Camera settings and Device Manager. Permissions may still matter, but a missing hardware entry needs the direct and docked comparison first.
Windows Camera is black while the camera stays listed
Check for a physical privacy shutter, a lens cap, a camera switch, and the webcam maker’s own app or support. A black picture after Windows has already detected the camera is not evidence of a dead dock port.
Step 7: check privacy and the selected camera
Open Settings > Privacy & security > Camera.
Microsoft separates several controls:
- Camera access controls access for the whole device
- Let apps access your camera controls Microsoft Store apps
- an individual Store app may have its own toggle
- Let desktop apps access your camera controls desktop apps as a group
Many meeting apps and browsers are desktop apps. Microsoft says they do not get individual toggles in the Store-app list, so keep the desktop-app control separate.
Do not change a policy your organization manages. Contact the administrator when a setting is locked, or the device belongs to a school or an employer.
Once access is allowed, open the meeting app’s audio and video settings and select the external webcam by its exact name. Do not pick a capture card, built-in camera, virtual camera, or monitor camera by mistake.
A meeting app may also need microphone access when the webcam has a microphone. Camera and microphone access are separate Windows controls, so a working image with no audio is not a webcam data-port failure.
Step 8: add other dock devices one at a time
Go back to the working webcam-only setup. Add the keyboard, mouse, storage, receiver, capture device, or KVM one item at a time.
Record the first addition that changes the camera state. Remove it, repeat once, then read the exact dock and device documentation. One result does not prove the dock has run out of bandwidth.
If a KVM or USB switch is the item, check that it supports the webcam’s USB path and that the right host is selected. The USB-C KVM guide is a replacement route only once the switch is proved to be the limit.
If the webcam sits on a desk with a gaming laptop, the gaming laptop dock guide compares port count and host support once the current dock is isolated.
Step 9: update in the safe order
Use Settings > Windows Update first, then check the optional updates that match your exact camera, computer, or dock hardware.
Then visit the official support pages for:
- the exact computer model
- the exact dock model and revision
- the exact webcam model
Read the release notes and the prerequisites. Keep power stable during a maker-approved dock firmware update. Do not install a generic USB driver, a package meant for a similar dock, or a driver from an aggregation site.
Microsoft puts camera-driver rollback and reinstall later in its own procedure. Use either only when the webcam also fails directly, when Device Manager supports the action, or when the maker tells you to.
Step 10: use only a power cycle the dock maker documents
Some dock makers publish exact power-isolation steps. Keep them scoped to the product family they name.
Plugable’s current docking-station article tells owners of supported Plugable docks to:
- Disconnect the downstream peripherals.
- Disconnect the host.
- Disconnect dock power.
- Wait at least one minute.
- Reconnect dock power.
- Reconnect the host.
- Reconnect the peripherals.
Do not copy Plugable’s timing to another dock. Open the exact maker’s page, follow only the sequence it documents, and do not add button holds from a forum.
Escalation and replacement boundary
| Controlled result | Who to contact | Evidence to provide |
|---|---|---|
| The webcam works directly but is absent on every dock data port | Dock maker | Webcam and dock models, upstream cable, power supply, port matrix, camera state |
| The webcam fails directly and through the dock on two computers | Webcam maker | Camera model, cable, Device Manager status, Camera app result |
| One dock port works and another does not with the same webcam | Dock maker | Physical port positions and the repeated result |
| The camera works in Windows Camera but not in one meeting app | App support or administrator | Selected camera, app version, camera access state, policy context |
| The webcam fails only when a KVM, extension, or another device is added | Added-device maker or dock maker | Working baseline, exact added item, repeated state change |
| The dock is unsupported, or isolated as faulty | Replacement route | Host protocol, webcam and peripheral count, display needs, charging requirement |
If the dock is isolated, compare replacement requirements in the USB-C docking station guide, the Thunderbolt docking station guide, or the portable USB-C hub guide. Choose the protocol from the host specification, not the shape of the connector.
Frequently asked questions
Why does my webcam work directly but not through my USB-C dock?
The direct result proves the webcam works on one host route. Keep the webcam and its cable fixed, remove the other dock devices, and test one documented downstream port. What remains in the path is the dock port, the internal hub, the upstream link, the host port, and any adapter.
Why does Windows Camera work but Teams, Zoom, or another app does not?
The docked camera path works. Select the exact external camera in the meeting app, then check Camera access, app access, and desktop-app access. A policy your organization manages may need an administrator.
Can a dock charge my laptop while its webcam data path fails?
Yes. Charging and downstream USB data are separate functions. Use one proven keyboard or mouse to confirm the port carries data before you test the webcam.
Should I uninstall the webcam driver?
Not first. Compare the direct and docked routes, check Windows Camera, and record the Device Manager status. Use Windows Update and the exact maker’s guidance before any rollback or reinstall.
Can a USB extension or KVM stop a webcam from working?
It can change the route. Remove it for the webcam-only baseline, then add it back on its own. A state change you can repeat isolates that route under the conditions you tested. It does not prove every unit of that product is incompatible.
Why is the camera missing from Camera settings but present in Device Manager?
Microsoft notes that some cameras do not appear on the Camera settings page. Test Windows Camera and record the exact Device Manager entry instead of reading that absence as a dead dock port.
When should I replace the dock?
Replace or service it after the same proven webcam works directly or through another supported dock, fails across the original dock’s documented data ports, and the dock maker’s own support path neither restores nor explains the state.
Sources and Methodology
Current official sources were checked on July 28, 2026. Microsoft documents external-camera connection, another-device comparison, Camera app testing, USB-port comparison, and Device Manager categories, connected and disabled camera controls, camera and desktop-app access, and USB-C connection states. Plugable supplies a current, exact-vendor example of a dock power cycle.
No webcam, dock, cable, app, or computer was tested. The method compares direct and docked detection, confirms Windows Camera before app settings, and adds one part of the route at a time. It does not promise that a driver, a cable, or a dock replacement fixes every camera.

![[All Fixes] Discord Push to Talk not Working](https://thunderboltlaptop.com/wp-content/uploads/2020/12/All-Fixes-Discord-Push-to-Talk-not-Working-380x250.png)