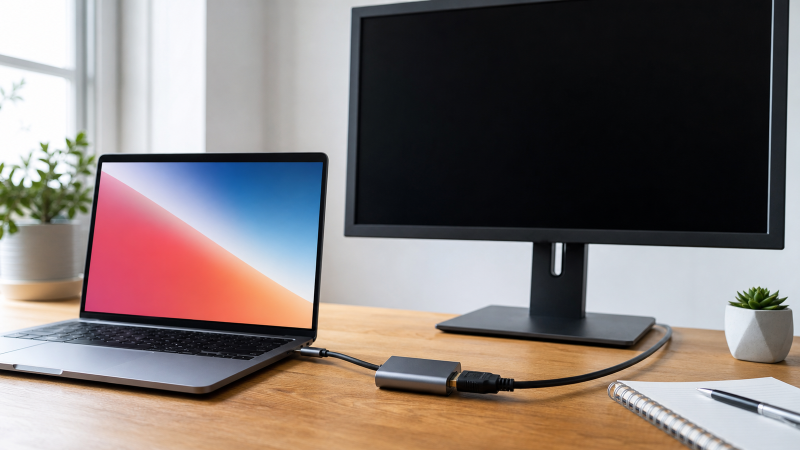
Follow the picture from where it starts to where it should land, and a no-signal USB-C-to-HDMI adapter usually gives itself away. The signal has to leave the laptop’s USB-C port as video, get turned the right way round by the adapter, travel the HDMI cable into the display input you selected, and finally survive the mode Windows asks for. Those are the four physical links in the chain, in order, and a break in any one of them shows up as the same black screen. So walk the chain from the source outward, with the dock, switch, receiver, extension, and second display taken out, until a plain desktop appears. A native USB-C monitor, wired straight over USB-C with no adapter in the middle, is a different chain, and the USB-C monitor troubleshooting guide is the one for that.
Matching connector shapes settle nothing about video output or conversion direction. Both facts live in the computer’s port documentation and the adapter’s manual, and no Windows setting can supply either. Windows only picks among the modes the current chain already offers it, so it cannot invent DisplayPort Alt Mode, turn a one-way converter around, or lift an adapter’s ceiling. The steps below fix an adapter you already own.
Link 1: does the USB-C port send video out at all?
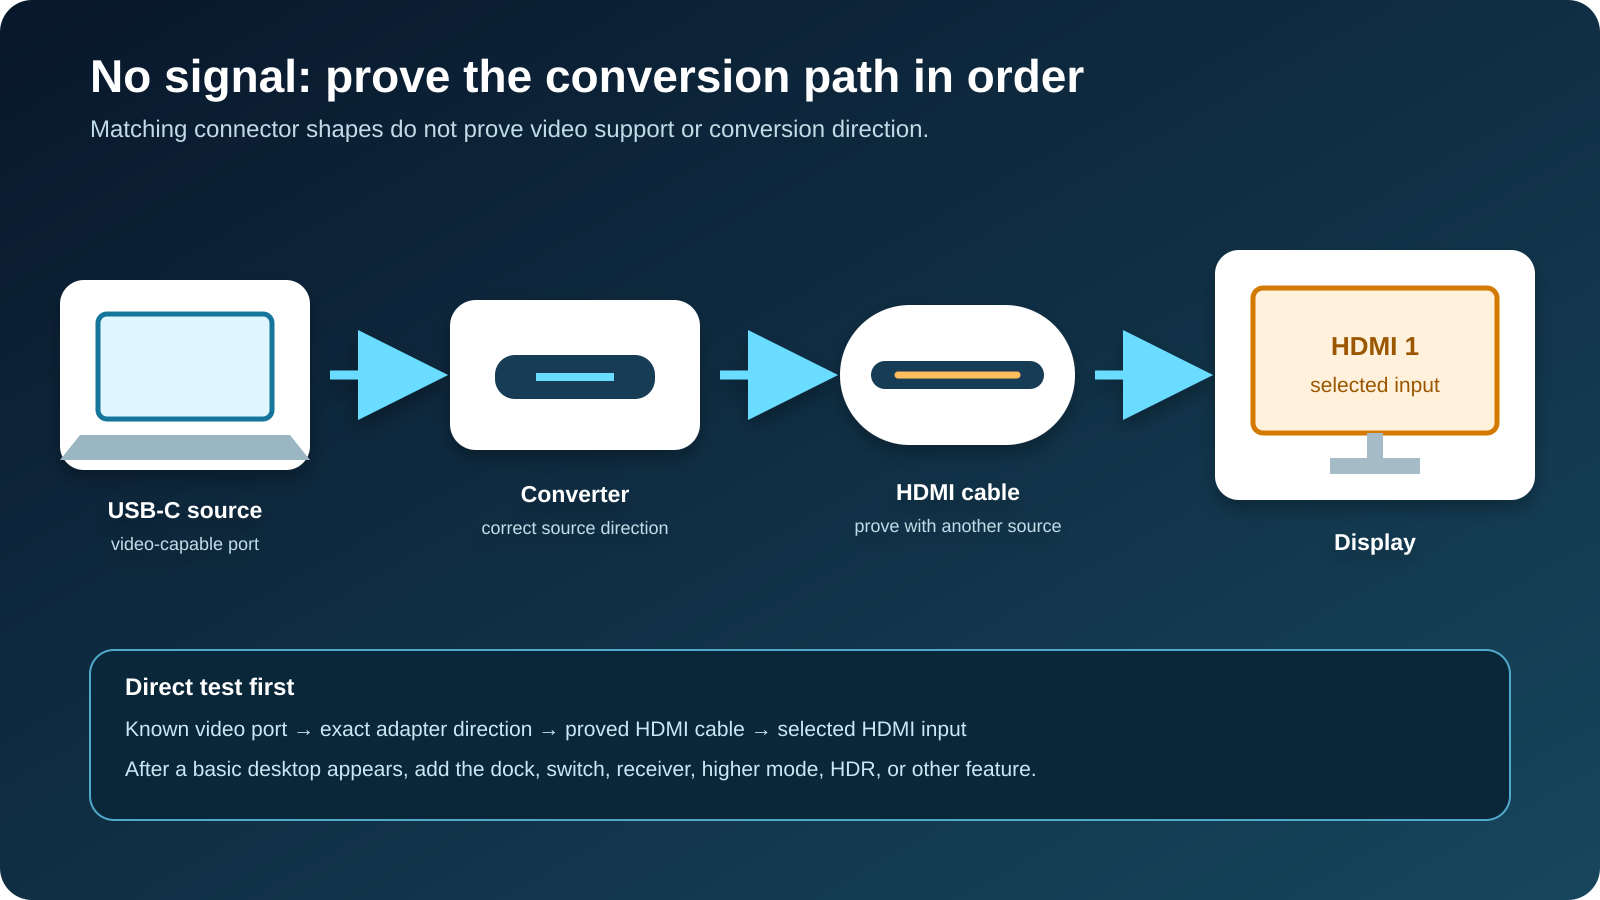
The signal has to begin somewhere, and this is it. The tell for a dead first link is that no adapter works from this port, or the adapter works from one USB-C port and not from another beside it. The check costs a few minutes of reading, nothing more. Find the computer model, open the maker’s specification, port diagram, or manual, and match the USB-C port by its side and position. Look for one of these capabilities spelled out:
- DisplayPort Alt Mode;
- DisplayPort over USB-C;
- Thunderbolt with display support;
- a USB4 port with the maker’s documented display output.
A USB symbol, a charging symbol, or the connector shape itself is not enough. USB-IF describes USB Type-C as the connector, and USB data generation, USB4, charging, and display output are separate capabilities a maker has to state. Microsoft’s Surface USB-C Travel Hub page is a scoped example: Microsoft requires a host USB-C port that supports Alt Mode before that hub’s HDMI output can be used, which shows why the source port must supply the video path a converter expects.
If the documentation does not confirm video on that port, work through the USB-C DisplayPort Alt Mode check. No driver setting turns a data-only port into a display output. When one USB-C port works and another does not, hold the adapter, HDMI cable, display, input, and Windows mode fixed and compare against the port map, because two ports on the same laptop often route differently and only the maker’s diagram says so. If no port is documented for video, stop treating the adapter as the thing to repair. A computer that lists no video-capable USB-C port is not faulty, it is simply built that way, and the port map plus the output you need settles this link on its own. A different display architecture, not a new adapter, is what solves it.
Link 2: the adapter’s direction and required source
The clue for a wrong second link is that the source port carries video but a plain direct connection still shows nothing, often because the converter is being used the wrong way round. Identify the cable or adapter model and read the maker’s current product page, manual, or help article for:
- the source connector and the source device it expects;
- the display-side connector;
- whether the product is one-way or bidirectional;
- the required host feature;
- whether any software is required;
- the supported display modes;
- any stated restriction for docks, switches, or receivers.
Do not infer direction from the plugs, because a physical fit does not establish which way the product converts. A product labelled USB-C to HDMI normally describes a USB-C source feeding an HDMI display, and only the manufacturer documentation settles it for your model. Connecting an HDMI source to the HDMI side may be entirely outside what the product supports. Separate native video adapters from USB graphics adapters while you read: a native adapter expects a video signal the host’s USB-C display path already provides, while a USB graphics product has its own documented technology and may require software. Installing DisplayLink software for an ordinary Alt Mode adapter does not create the missing source signal, and it adds a variable you must remove later. Write the direction down in plain words: laptop USB-C source, to adapter, to HDMI cable, to monitor HDMI input. Avoid generic firmware files, and never flash a package built for a product that merely looks similar.
The three questions the whole chain asks live here: what is the source, what is the destination, and which way the signal has to convert. A laptop that sends DisplayPort out over USB-C to an HDMI screen wants a straight USB-C-to-HDMI converter, a DisplayPort destination changes the part, and a Thunderbolt source is its own case, which the Thunderbolt-to-HDMI adapter guide and the USB-C-to-DisplayPort guide cover. Because Thunderbolt and USB4 share the USB-C shape without being the same label, the USB4 versus Thunderbolt 4 guide settles which one your laptop actually has before you match a product to it.
Link 3: the HDMI cable and display input
The clue for a broken third link is a No signal message on the display even though the source and adapter check out. Take the USB-C computer and the adapter out of this test completely, connect the same HDMI cable to another known-good compatible HDMI source, and use that same display input. Select the input by hand, because automatic input switching can choose a different source and tell you nothing. Confirm an ordinary image such as a desktop or a console menu; you do not need the highest refresh rate or HDR here.
- The HDMI cable and input work from another source. Keep that pair fixed for the adapter test.
- The same
No signalresult appears. The USB-C adapter is not in question yet, so try another known-good HDMI cable or another input. - An image works only on a different HDMI input. Check the display manual for input-specific features and conditions.
Inspect the HDMI connectors for damage or strain and make sure each plug is fully seated, and stop using a connector that is hot, loose, deformed, or damaged. HDMI Licensing Administrator maintains versioned specifications and named cable programs, and those labels help you compare a requested feature once the basic route works. A cable label alone settles nothing about the USB-C source port, the converter, or the chain as a whole, so do not replace a cable you have already cleared while the USB-C side is still unverified. If this link is where it breaks, though, the owner is clear: an HDMI input or cable that stays dark from another known-good source is the display maker’s to answer, or a new HDMI cable, and the second-source result is the thing that shows it.
Link 4: the Windows display mode
With each link cleared, assemble the direct path and nothing else: the computer’s video-capable USB-C port, the adapter in the direction its manual gives, the cleared HDMI cable if the adapter has an HDMI socket, and the cleared HDMI display input. Remove the USB-C dock or hub, the HDMI switch, any AV receiver or soundbar passthrough, the KVM, extension cables, couplers, capture devices, and the second external display. Power the display, and power the adapter if it has a documented power input, because a charging port on an adapter does not feed the display path unless its instructions say so.
Now open Settings, System, Display, expand Multiple displays, and choose Detect, which Microsoft documents as the control for asking Windows to look for another connected display. If the display appears, choose Identify. Press Windows key + P and choose Extend for a normal second desktop; Microsoft also lists PC screen only, Duplicate, and Second screen only, and PC screen only can hide a display that is working correctly. If Windows lists the display and the monitor stays black, select its rectangle, open Advanced display, and choose a resolution and refresh rate the display, the adapter, and that input all document. Microsoft’s USB-C troubleshooting page may show a Display connection might be limited warning; record the exact message if you see it, because Microsoft links it to a possible mismatch among the PC, cable, display, connected device, and port without naming which one failed. If Windows makes a connection sound and no display appears, open Device Manager only to record what changed, since many native video adapters never appear as a separately named USB peripheral and the absence of a friendly name is not evidence of failure.
Start at a conservative mode
Aim for a stable desktop image, not the highest mode the box promises. Choose a resolution and refresh rate every documented part of the route supports, and keep HDR, variable refresh rate, high color depth, and audio-receiver passthrough out of the first test. Once it holds, change one thing at a time: raise the refresh rate, return to the stable mode, raise the resolution, return again, then enable HDR, and only then add audio or receiver routing. Record the first condition that removes the picture. A higher mode failing does not mean the adapter is dead, because the combination may sit outside what the source, adapter, HDMI cable, display input, or an intermediate device documents. Do not turn a mode question into a cable purchase; the high-refresh cable guide covers full-path capability and is useful after a basic image exists, not instead of one. If the path works and then fails after sleep or a restart, record the exact power-state transition and rebuild the same direct route. This is the point for a model-specific update, once the direct route is isolated and before you add anything back: run Windows Update, then read the release notes on the exact computer, GPU, adapter, or display support page for external-display fixes, USB-C or Thunderbolt compatibility, graphics-driver corrections, and firmware named for your model, applying one at a time on stable power and rebuilding the direct route to see what each changed. Do not install a DisplayLink package for a native adapter, and do not disable sleep across the whole system to mask one failed resume.
When the direct route works but a device does not
If the direct adapter-to-display route is solid and the picture only disappears once a dock, switch, or receiver is in the middle, that device is the boundary. Add a single device back. For a USB-C dock, use the documented host-facing port and host cable, connect dock power when the manual requires it, use one HDMI output, leave other displays and USB devices disconnected, and note the Windows mode again. If the host cable is detachable and you substitute one, match the data and display requirements rather than charging wattage, which the USB-C cable guide explains. For an HDMI switch, receiver, soundbar, or KVM, add it after the adapter, reuse the HDMI cables you have cleared, select the exact input and output on the device, keep the conservative mode, and confirm the direct connection still works after you remove it. If the image disappears only while the device is present, repeat the change once, then compare the mode and feature requirements across it, because a switch or receiver in the middle has to support the same signal the two ends agreed on. A route that runs clean direct and only fails with the box in place points straight at that box. When that box is a dock and its own HDMI output cannot carry the mode the direct adapter already proved, dock choice is about output capability, not socket count: the USB-C docking station guide and the HDMI 2.1 dock guide sort docks that way, and a USB-C hub is the smaller version of the same choice, none of them chosen by an HDMI version label alone.
When the adapter really is the broken link
Buy a new adapter only after the chain has cleared everything above it: the host port is rated for the video you want, the HDMI input and cable both work from another source, the adapter is running in its stated direction, the basic mode you are after sits inside what the adapter and display allow, the direct connection still fails, and a second known-good adapter works in that same fixed route. If the second adapter fails the same way, the adapter was never the broken link, so go back to the host port and the settings rather than buying a third.
When the direct path really does fail with a video-capable port, a cleared HDMI pair, and the correct direction, the adapter is the broken conversion link, the one part that could not convert in a route where every other link checked out. A high mode that fails on its own is a different case, because nothing is broken there unless one part lists that mode, so hold each component to its own rated ceiling.
Frequently asked questions
Why does my USB-C-to-HDMI adapter say no signal?
The display has not accepted a usable signal on the selected input. Confirm the host port’s video capability, the adapter’s direction, the HDMI cable and input, and then the Windows projection mode, in that order.
Does every USB-C port support HDMI adapters?
No. The port has to provide the video path the exact adapter requires. Check the computer maker’s port map for DisplayPort Alt Mode, Thunderbolt display capability, or another explicitly documented display output.
Can I use an HDMI-to-USB-C cable in reverse?
Only when the manufacturer states that the product supports your source and display direction. A physical fit is not evidence that the reverse route works.
Why does Windows detect the display while the monitor stays black?
Part of the route has enumerated, and the selected input or the display mode can still be wrong. Select the exact HDMI input by hand and drop to a conservative supported mode.
Should I install a USB driver for a USB-C-to-HDMI adapter?
Follow the exact adapter documentation. A native Alt Mode adapter does not become compatible through a generic USB driver, and USB graphics products have separate hardware and software requirements.
Can an HDMI switch or receiver cause no signal?
Yes, because a switch or receiver changes the route and the supported feature set. Confirm the direct adapter-to-display path first, then add that device back at a basic mode.
Does charging through the adapter prove it is working?
No. Charging shows some power behavior and nothing else. It does not establish host video output, conversion, HDMI cable operation, or input selection on the display.
Sources
Three owners answer three different questions here: the computer maker whether a USB-C port is video-capable through Alt Mode, the adapter maker which direction it converts, and HDMI Licensing Administrator what the HDMI cable and mode allow. Microsoft’s USB-C troubleshooting page frames the host-and-chain mismatch, with the Windows display controls in its multiple-monitor guide and external-monitor troubleshooting. Its Surface USB-C Travel Hub documentation is a scoped example that needs Alt Mode on the host. USB-IF’s USB Type-C language guidelines name the connector. HDMI feature and cable-program scope comes from HDMI Licensing Administrator’s specifications overview and cable resources. Direction, supported modes, firmware, and compatibility are whatever each product’s current documentation states.