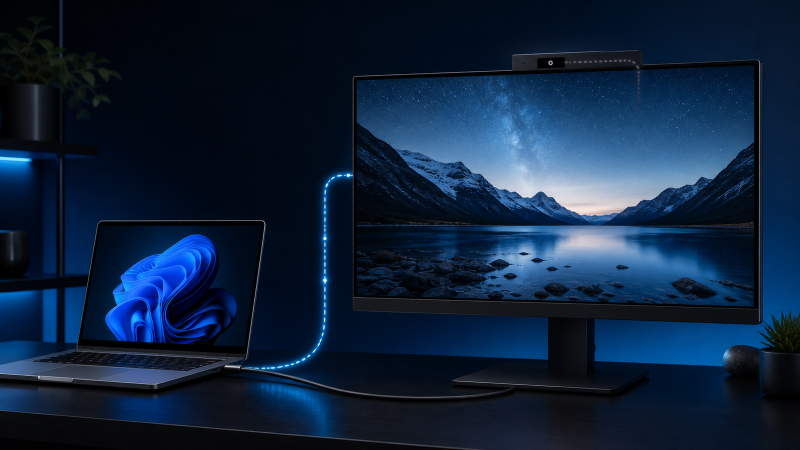
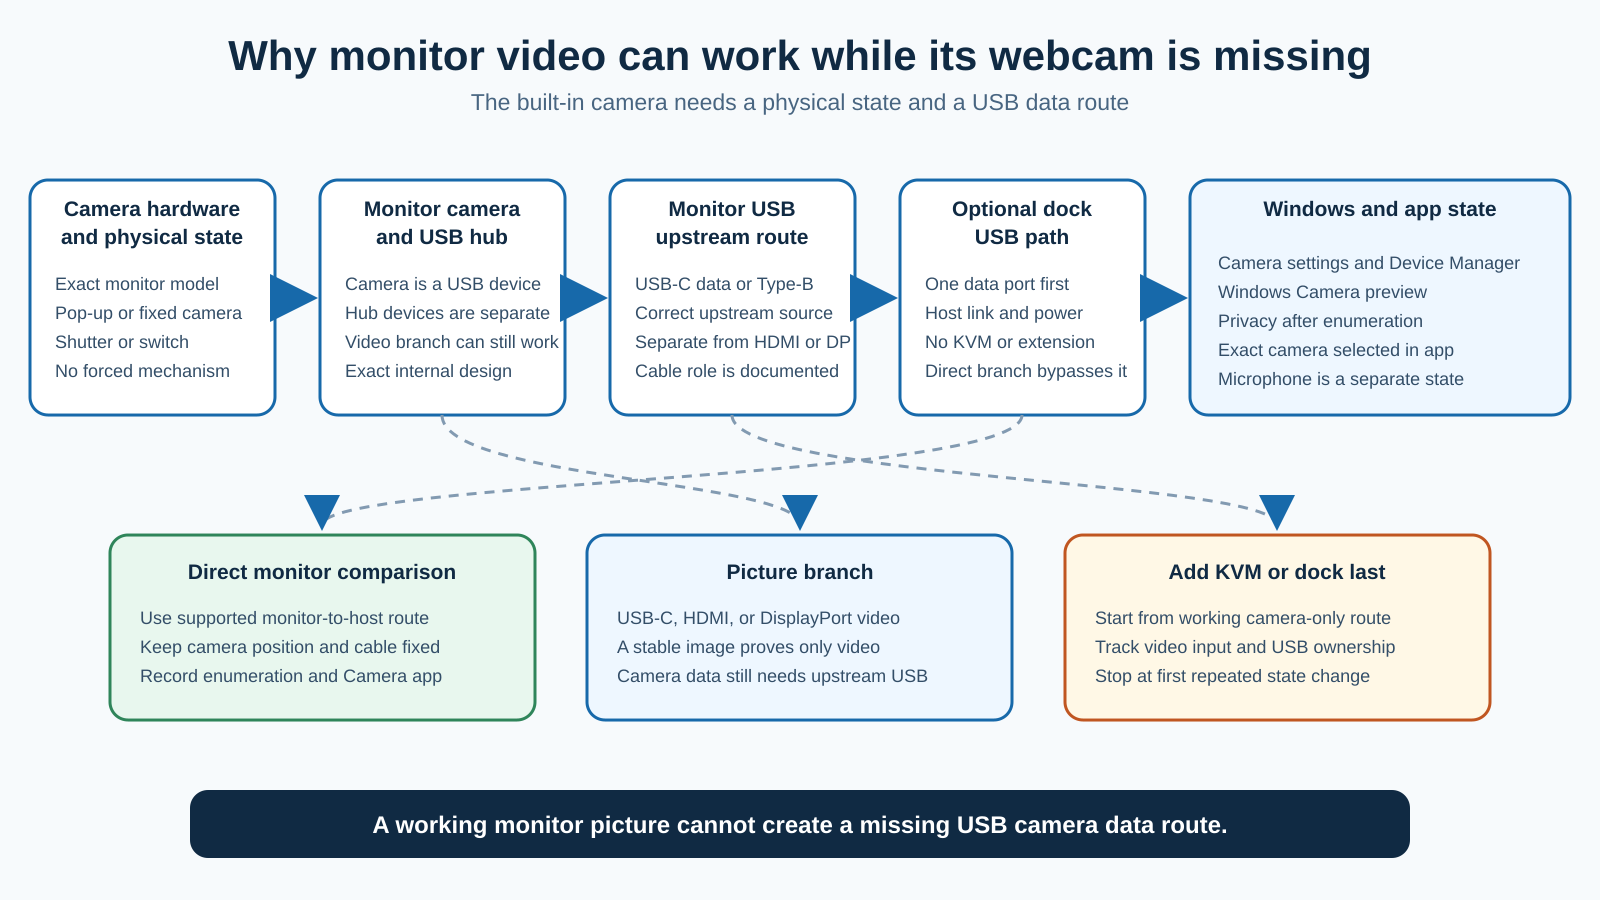
If your USB-C monitor shows a stable picture but its built-in webcam is missing in Windows 11, check the camera’s physical state and the monitor’s USB upstream data route first. A working picture proves the video route. It does not prove that the camera inside the monitor has a USB data connection to the computer.
Find the exact monitor manual. Confirm that your model includes a camera, put any documented pop-up camera or privacy shutter in its usable position, and identify how the monitor sends camera data upstream. A direct USB-C input can carry video and data together on a supported monitor. HDMI or DisplayPort usually needs a separate USB upstream connection for the monitor’s USB devices, but the exact manual decides the route.
The steps below cover a camera built into the monitor. They do not cover a separate webcam plugged into a dock, a laptop camera, a monitor with no picture, camera quality, or a microphone-only fault. If the monitor image is missing, use the USB-C monitor connection guide first.
Match the monitor-camera state
| What you see | What it proves | Next check |
|---|---|---|
| The picture works, but no monitor camera appears anywhere in Windows | Video works, but the camera data route is not established | Check the camera hardware state and the monitor USB upstream path |
| The camera appears in Device Manager but not in Camera settings | Windows has some camera enumeration | Test Windows Camera and read Device status |
| Windows Camera shows the monitor camera | The monitor camera and current USB route work | Check app access and the selected camera |
| Windows Camera works, but one meeting app does not | The hardware route works outside that app | Check privacy, desktop-app access, and the app’s camera choice |
| The camera works through direct USB-C but not through a dock | The monitor camera works on one route | Keep the monitor fixed and isolate the dock host and data path |
| The HDMI picture works, but the camera appears only after USB upstream is connected | Video and camera data use separate cables on that route | Keep both documented connections |
| Several monitor USB devices fail along with the camera | The fault is wider than the camera | Diagnose the monitor USB hub or upstream route |
Do not uninstall every camera or USB controller, edit the registry, or disable privacy controls. Preserve the camera’s exact state while you identify the missing route.
Use the shortest safe sequence
- Record the monitor model, camera name, selected video input, USB upstream port, cables, dock, and app.
- Prove from the exact manual that the monitor includes a camera.
- Put the camera, shutter, or physical switch in its documented usable state.
- Identify whether camera data uses the same USB-C connection or a separate USB upstream cable.
- Check Settings > Bluetooth & devices > Cameras.
- Check Device Manager and Windows Camera.
- Check camera privacy and app selection only after Windows sees the camera.
- Compare a supported direct monitor route with the docked route.
- Add a KVM, extension, or second host only after the camera works alone.
- Use exact maker support or replacement only after a repeated comparison.
Prove the camera hardware and physical state
Start with the full monitor model, including its size and suffix. Similar monitor names can refer to a plain display or a video-conferencing version with a camera.
Open the official specification and manual. Look for the camera type, physical controls, USB upstream port, supported connection diagrams, and any listed camera software.
Some monitor cameras pop up from the top edge. Others have a shutter, a camera-disable switch, or a motorized position. Use only the control described for the exact model.
Dell documents one exact example for the S2422HZ and S2722DZ. The built-in camera must be in its popped-up position, and the required USB data route must be connected. The pop-up step applies only to those models. Do not hunt for a latch on a monitor whose manual shows a fixed camera or another control.
Check the lens for a closed shutter or cover. Do not force a camera housing that does not move freely. If a mechanical part is stuck or damaged, stop and contact the monitor maker.
Draw the video and USB data routes separately
Write two lines:
Video: computer output -> optional dock -> monitor video input
Camera data: monitor USB upstream -> optional dock -> computer USB host
On a supported direct USB-C monitor, one cable can carry both routes. On another monitor, HDMI or DisplayPort carries the picture while a USB Type-B or USB-C upstream cable carries the camera and monitor hub data.
Dell documents that HDMI and DisplayPort carry audio and video for the monitor group in its USB downstream article, and that monitor USB devices need the upstream USB cable. Dell also notes that select USB-C monitor inputs can carry audio, video, and data. The exact model manual decides which case applies to you.
If you are unsure which USB-C port carries display video, use the DisplayPort Alt Mode guide. If the question is which USB device and connection speed Windows reports, use the Windows USB-version guide. Neither result proves that the camera itself works.
Connect the simplest supported route
When the monitor and computer have a documented direct connection, remove the dock, KVM, extension, video switch, second host, and extra USB devices.
For a one-cable USB-C monitor:
- Use the monitor’s upstream or host-facing USB-C input.
- Use the computer’s documented display-and-data port.
- Use the cable type the monitor manual specifies.
- Keep the camera in its usable physical state.
For an HDMI or DisplayPort picture:
- Keep the working video cable.
- Connect the required monitor USB upstream cable to the computer.
- Select the correct upstream source in the monitor menu when the manual provides one.
Wait for Windows to enumerate the monitor devices. Do not reconnect the cable several times in quick succession.
If the camera appears on the direct route, save the Camera settings name and the Device Manager entry. The direct result becomes the baseline for the docked comparison.
If the camera stays absent, check whether a simple USB device connected to the monitor hub appears in Windows. A working hub device proves that some monitor USB data reaches the host. It does not prove that the camera branch works.
Check Windows camera enumeration
Open Settings > Bluetooth & devices > Cameras.
Under Connected cameras, select the monitor camera if it appears. Windows can show a preview for supported cameras. Record the camera name. Under Disabled cameras, check whether the device is listed, but do not enable a camera when policy or ownership does not allow it.
Microsoft notes that some cameras do not appear on the Camera settings page, so keep a second observation in Device Manager.
Open Device Manager and look under:
- Cameras
- Imaging devices
- Sound, video and game controllers
Connect and disconnect only the monitor USB upstream route once while you watch those groups. Record the exact entry and its Device status. Do not uninstall it.
If a camera entry appears with an error code, save the code for the support case. The exact code is more useful than a general statement that the driver failed.
If no camera entry changes, return to the monitor’s physical state and USB upstream route. Privacy settings cannot create a USB device that Windows never enumerated.
Use Windows Camera before a meeting app
Close Teams, Zoom, browser meetings, and any monitor utility using the camera. Then open the Windows Camera app.
Windows Camera shows the monitor camera
The camera hardware, USB data route, Windows enumeration, and Camera app all work. Reopen one meeting app and select the same camera by its exact name.
Windows Camera shows another camera
Use the camera-switch control if the app offers one. A laptop camera can stay selected while the monitor camera is present.
Windows Camera reports no camera
Return to Camera settings and Device Manager. If the camera is absent there too, the app is not the first fault.
Windows Camera is black while the entry stays present
Check the physical shutter, camera position, lens cover, and exact monitor utility. A black preview after enumeration is a different state from a missing USB camera.
Check privacy after enumeration
Open Settings > Privacy & security > Camera only after Windows lists or uses the camera.
Microsoft separates:
- Camera access for the device
- Let apps access your camera for Store apps
- the individual Store-app choice
- Let desktop apps access your camera for desktop programs
Browsers and many meeting programs use the desktop-app control, so they may not appear as individual Store apps.
Do not change a setting managed by an employer or school. Ask the administrator when a control is locked.
Open the meeting app’s audio and video settings and choose the monitor camera by name. A virtual camera, laptop camera, capture card, or separate USB webcam can be selected instead.
The monitor microphone has its own Windows input and permission state. A working camera with a silent microphone is a different question from a missing camera.
Compare direct and docked monitor routes
Use this comparison only after the monitor camera works on a direct supported connection.
- Save the working camera name, video input, USB upstream route, and Camera app result.
- Insert the dock between the monitor data route and the computer.
- Use one documented dock host port and one documented downstream data port.
- Remove every other dock USB device.
- Check Camera settings, Device Manager, and Windows Camera again.
If the picture works but the camera disappears, inspect the camera data line, not the display line. Keep the monitor and camera state fixed. The changed parts are the dock host link, dock USB path, downstream port, and any added cable.
Move the monitor upstream cable to one other documented dock data port and repeat once. If one port works, record both physical port positions. Do not describe the whole dock as dead.
If several dock devices disappear together, the fault is wider than the monitor camera. Stop and diagnose the dock’s USB path or the whole dock.
When a removable USB-C cable is isolated, compare one documented cable on the same route. The USB-C cable testing guide can record data behavior, but a storage result does not prove camera stability. The USB-C cable guide is a buying handoff only after the cable is isolated.
Add KVMs and second hosts last
Return to the working camera-only route. Add the KVM, monitor USB switch, extension, or second computer one item at a time.
For a monitor KVM, record two paths:
- which input supplies the picture
- which upstream USB connection owns the monitor hub and camera
The screen can switch to one computer while the USB hub stays assigned to another. Use the monitor’s exact KVM mapping and upstream-selection menu.
If a KVM changes the camera state, remove it and repeat once. The result applies to that connection and that selected host. It does not prove that every KVM lacks camera support.
After isolation, the monitor KVM guide and the USB-C KVM guide can help with a replacement route. Check the exact upstream data design before you buy.
Use exact software and firmware support
Check Settings > Windows Update after the route is known. Then visit official support for the exact computer and monitor. Add dock support only when the dock changes the result.
Read release notes and prerequisites. Use a monitor utility only when the monitor maker lists it for the exact model and camera function.
Do not install a generic camera driver or a package from a download site, and do not remove every USB controller. Microsoft places camera rollback and reinstall after the simpler connection and app checks. Use either action only when the exact Device Manager state or maker support calls for it.
If the camera stopped after a named update, record the last working version and the current version. Contact the exact maker before a broad rollback or a Windows reset.
Interpret the result
| Repeated result | What it supports | Next action |
|---|---|---|
| The exact model has no camera | The assumed hardware is absent | Use another camera |
| The camera works after its documented physical control changes | Physical camera state was the changed layer | Keep the supported state |
| The HDMI picture works, but the camera needs USB upstream | Video and camera data use separate routes | Keep the documented upstream connection |
| The camera works directly but not through the dock | The docked USB data route changes the result | Contact dock support with both states |
| The camera works in Windows Camera but not in one app | Hardware and the Windows camera path work | Check privacy and app selection |
| One dock port works and another does not | The port choice changes the data route | Record positions and contact dock support |
| The camera and monitor hub devices all disappear | The fault is wider than one camera | Diagnose the monitor hub or upstream route |
If the integrated camera is isolated as faulty, contact the monitor maker with the physical state, route, Camera settings, Device Manager, and Windows Camera results.
If the monitor’s connection design cannot provide the camera and display route you need, compare an exact replacement in the USB-C monitor guide or the monitor docking guide. A category label does not prove the camera, microphone, KVM, or upstream behavior.
Frequently asked questions
Why does my monitor show video but its webcam is missing?
The picture follows a display route. The built-in camera is a USB data device inside the monitor. Check the camera’s physical state and the monitor’s USB upstream connection.
Does HDMI or DisplayPort carry monitor webcam data?
Do not assume it does. On the Dell monitor group covered by its support page, HDMI and DisplayPort carry audio and video, while monitor USB devices need an upstream USB cable. Use the exact manual for your model.
Can one USB-C cable carry both the picture and the camera?
It can, on a monitor, computer port, and cable that support video and USB data together. Confirm the monitor’s upstream USB-C input and the host port. The connector shape alone is not proof.
Why is the camera in Device Manager but not in Camera settings?
Microsoft notes that some cameras do not appear on the Camera settings page. Record Device status and test Windows Camera before you treat the Settings absence as a dead route.
Why does Windows Camera work but Teams or Zoom does not?
The camera route works for Windows Camera. Select the monitor camera in the meeting app, then check Camera access, Store-app access, or desktop-app access as appropriate.
Can a monitor KVM leave the camera connected to the wrong computer?
Yes, when video input and USB upstream ownership are separate. Read the exact KVM mapping, select the intended upstream host, and test the camera before you add other devices.
Should I uninstall the camera driver?
Not first. Prove the physical camera state, the USB upstream route, the Device Manager entry, and the Windows Camera result. Use rollback or reinstall only when Microsoft or the exact monitor maker supports it for the observed state.
When should I replace the monitor?
Replace or service it after the camera hardware and required USB route are confirmed, the camera fails on a supported direct connection, the same host sees other USB cameras, and exact monitor support cannot restore or explain the state.
Sources and Methodology
Current official sources were checked on July 28, 2026. Microsoft documents camera connection, Device Manager, Windows Camera, and official update paths, connected and disabled camera settings, camera and microphone privacy, and camera app permissions. Dell documents the physical camera and cable state for S2422HZ and S2722DZ and the video-versus-USB-upstream boundary for Dell monitors.
No monitor, camera, dock, cable, computer, or app was tested. The method keeps video and camera data separate, checks Windows enumeration before privacy, and compares one route change at a time.