Thunderbolt was developed by Intel and Apple, and macs have an excellent record of compatibility and ease of use when it comes to Thunderbolt devices. Starting with the 3rd version of the protocol (the one that uses the USB-C connector), Thunderbolt has become popular and was adopted by PC manufacturers as well.
OWC Thunderbolt 4 Hub Review
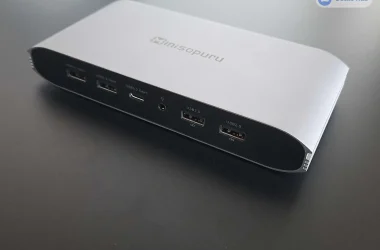
This compact dock from OWC was one of the first Thunderbolt 4 Docks released on the market.
It has the following ports:
- 4x Thunderbolt 4
- 1x USB 3.2 Type-A (10Gbps)
- 1x Kensington Lock
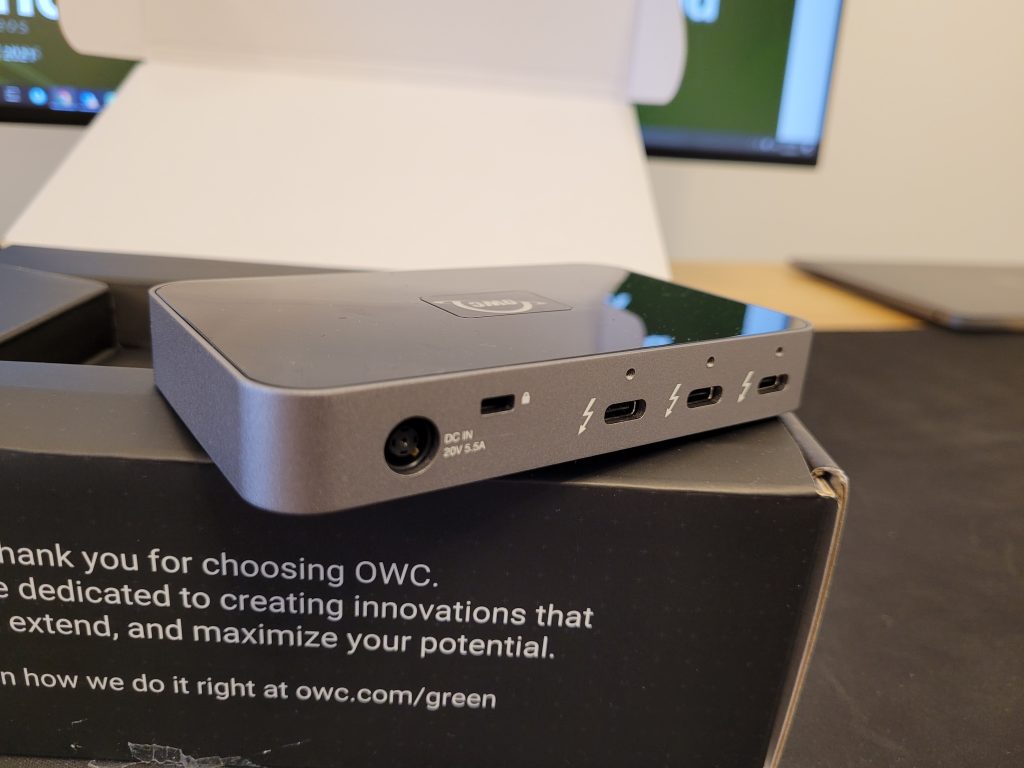
As you can see in the picture, the OWC Hub has holes above each port. OWC offers ClingOn custom cable stabilizers that prevent accidental disconnections. They work like VGA screw-in connectors. I didn’t have one to test how well it works, but I like the idea, as the USB-C connectors are pretty easily removed.
Power Output
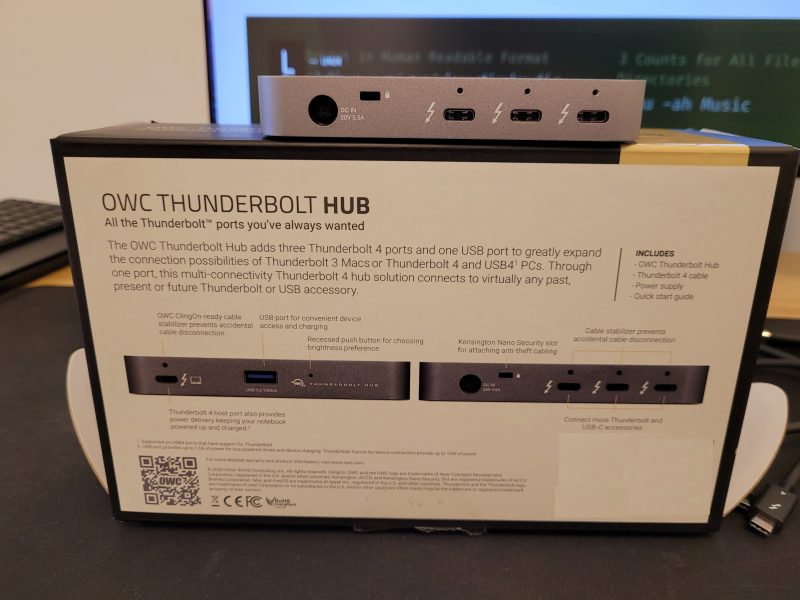
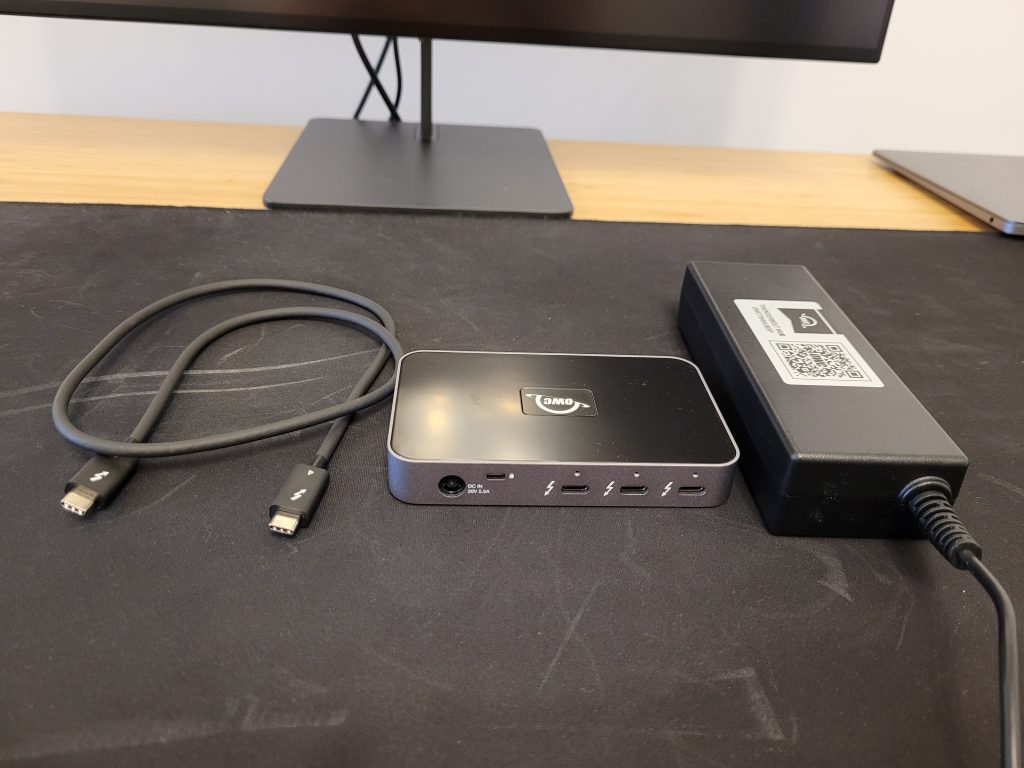
The box contains the Hub, one Thunderbolt 4 cable, and a 110W Power Supply. A large brick is needed as the dock provides power out of every port.
Out of the four Thunderbolt ports, one is used to connect it to the computer and it outputs up to 60W of power, allowing it to charge most ultrabooks.
The other three Thunderbolt ports output a maximum of 15W, and the USB-A one provides 1.5A – so, at 5V, that’s another 7.5W.
Daisy Chaining
Each Thunderbolt port support 3 independent daisy chains. Would’ve loved to go down this rabbit hole and do 3 x 3 daisy chain trees, but for now, I’ll just have to take their word because I lack the devices to get crazy with it.
Displays
It can support two 4K at 60hz screens, or one 5k/6k/8k display at 30hz. While testing the device, on Windows and Linux, I could only get 30hz with one 4k display.
On macOS, it worked at 4k 60hz out of the box. Not sure if this has something to do with my Thinkpad’s Thunderbolt 3 Port. If you managed to get 60hz on windows, please leave a comment telling me how you did it.
1. Installing OWC Thunderbolt 4 Hub on Linux
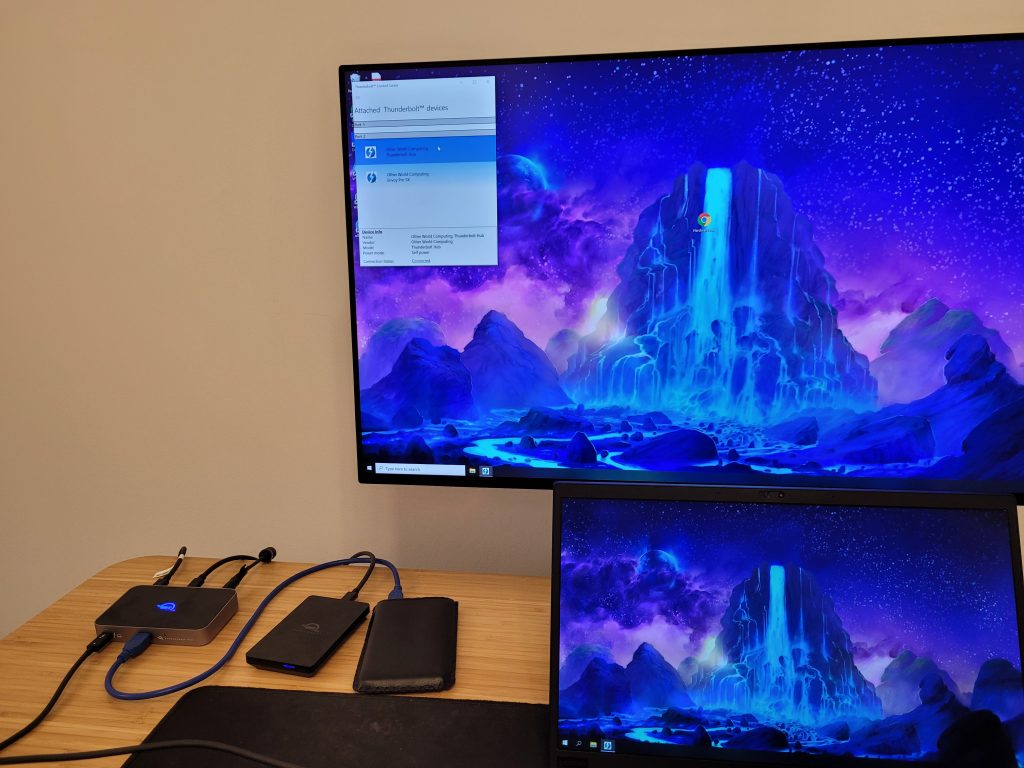
For this test, I’ve used Ubuntu 20.04. In the Hub I’ve connected:
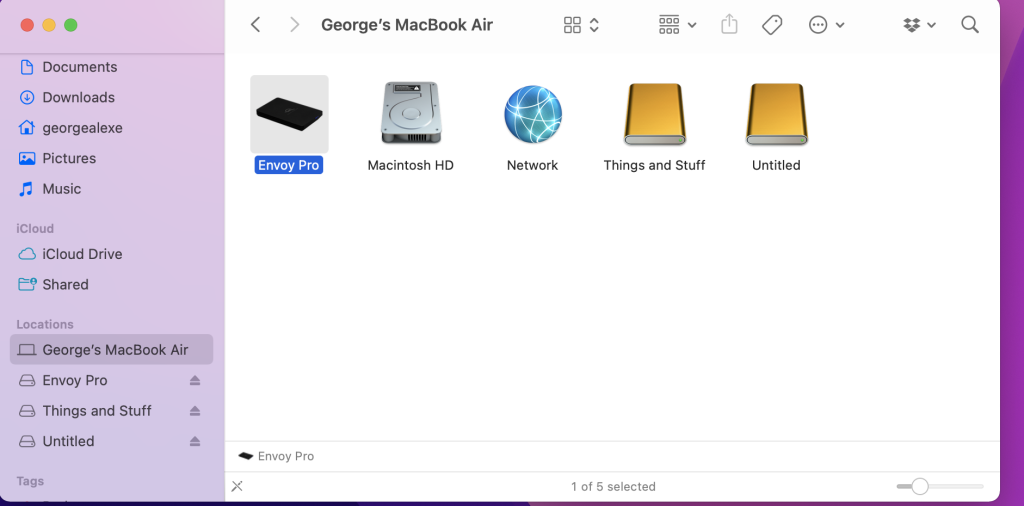
- 1 x Thunderbolt 3 Drive Envoy Pro SX
- 1 x SATA HDD via the USB-A port
- 1 x 4k Eve Sprectrum via Thunderbolt port
The OWC Hub is connected to a Thinkpad X1 Carbon 6th gen, that has two Thunderbolt 3 ports.
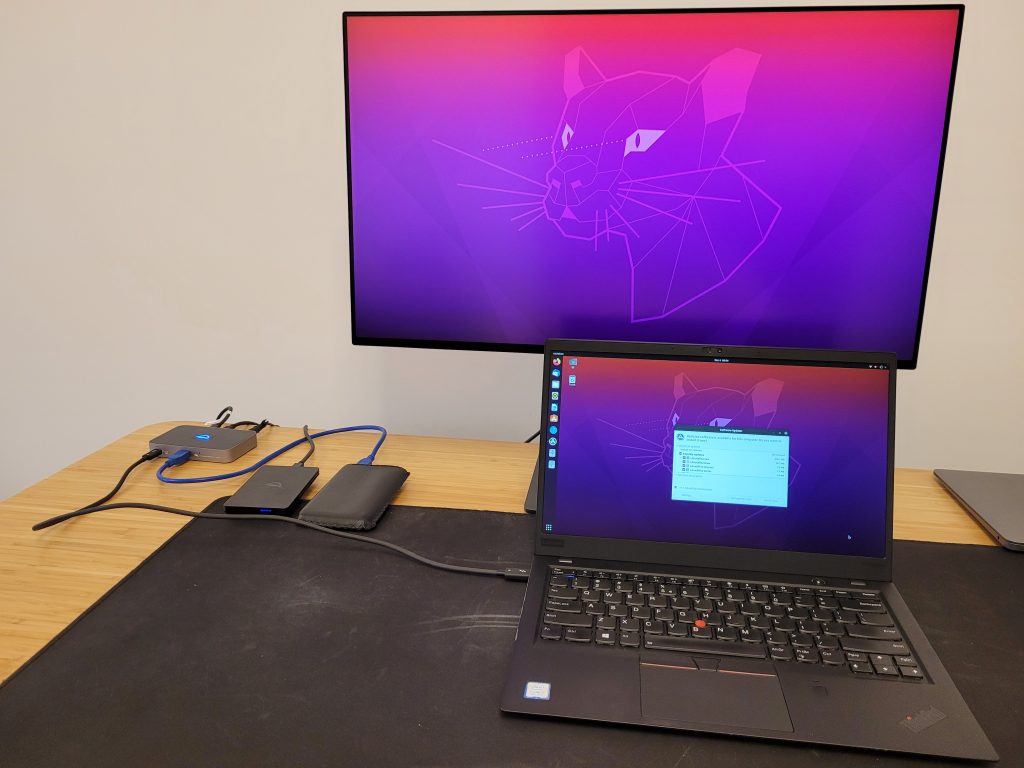
The USB-A HDD and display worked directly out of the box, not requiring any action on my part, but the Thunderbolt SSD was not accessible yet.
Even if there is no support for Thunderbolt, the OWC Hub still works as USB-C Dock.
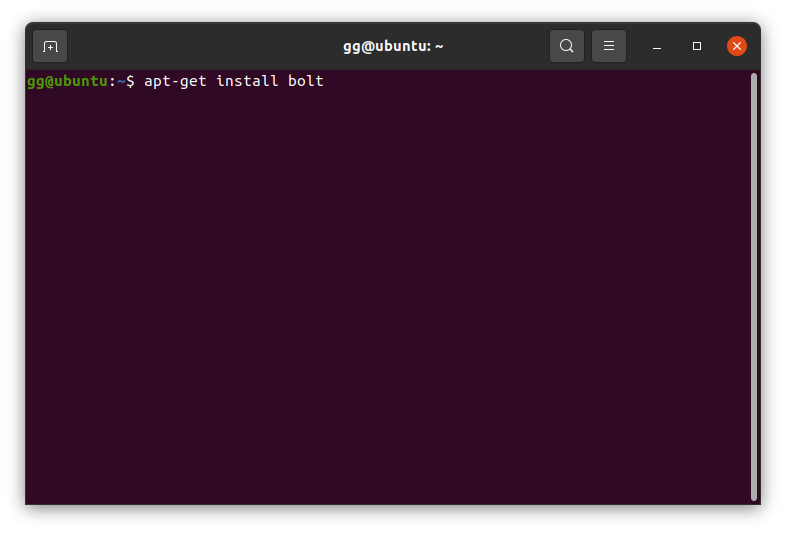
Installing bolt
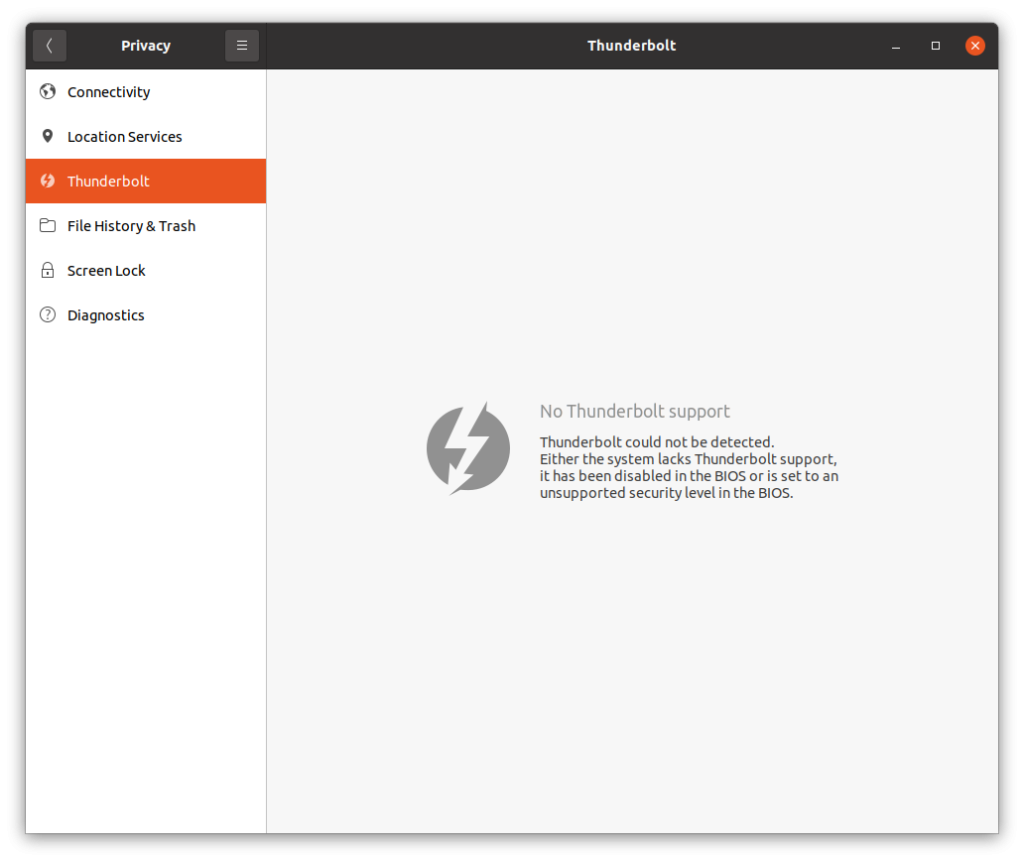
First, check if you have Thunderbolt support by going to Settings. If you can’t see the devices, you might need to install bolt
Open a terminal and type the following command: apt-get install bolt
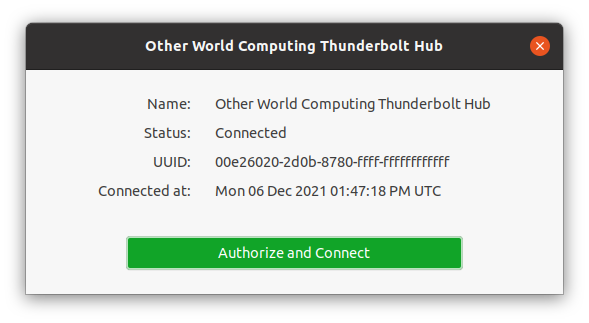
Now, go back to settings and authorize the devices:
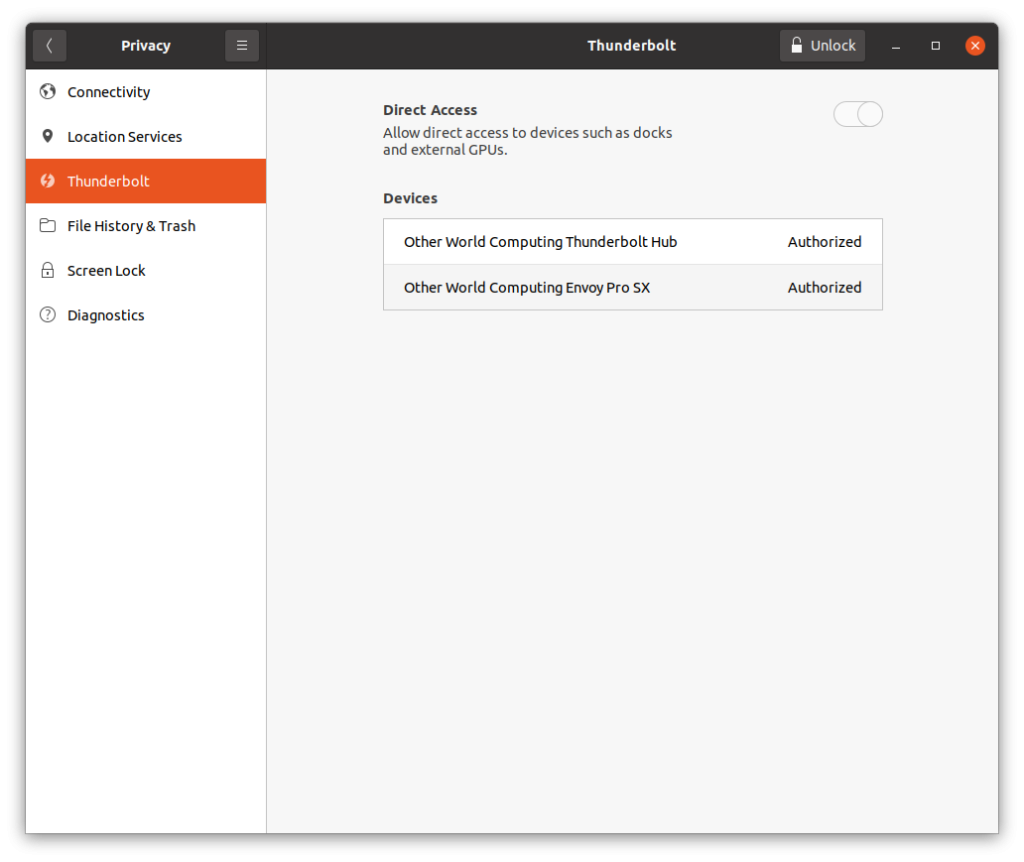
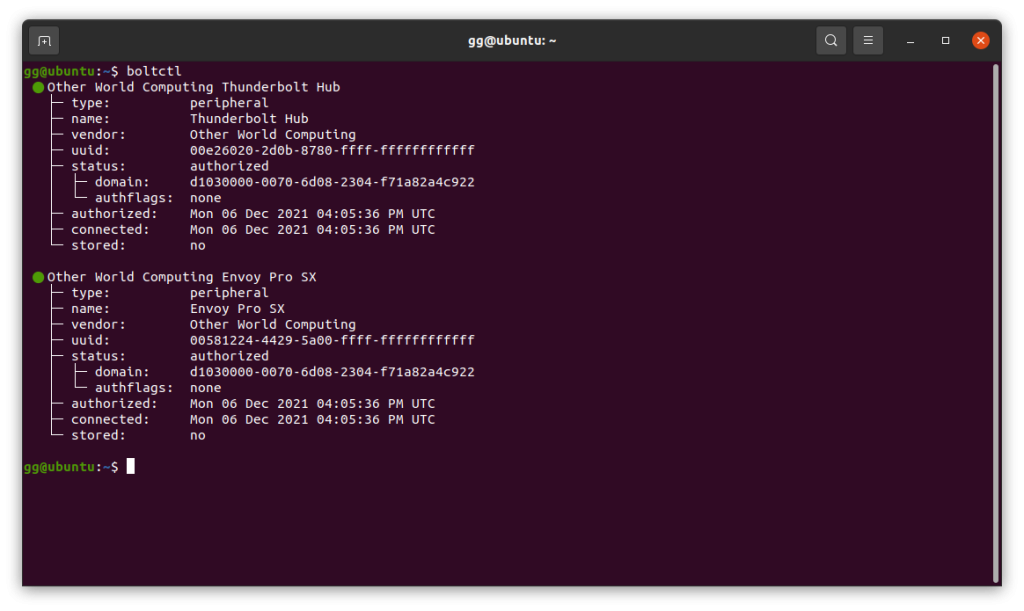
You can also check Thunderbolt connections from the terminal by using the boltctl command.
Although it wasn’t exactly plug-and-play, it was easy to install the hub. Once you have the Thunderbolt support installed, it should work with all other TB devices that you’ll connect in the future. Learn more about Ubuntu’s Thunderbolt support.
2. Installing OWC Thunderbolt 4 Hub on Windows
I’m using the same setup as before.
Like on Ubuntu, if this is the first time using the thunderbolt ports, you’ll have to install some drivers.
The Display and USB-A still work even without drivers, but in order to take full advantage of the thunderbolt features, we’ll have to download and install the latest drivers from Intel.
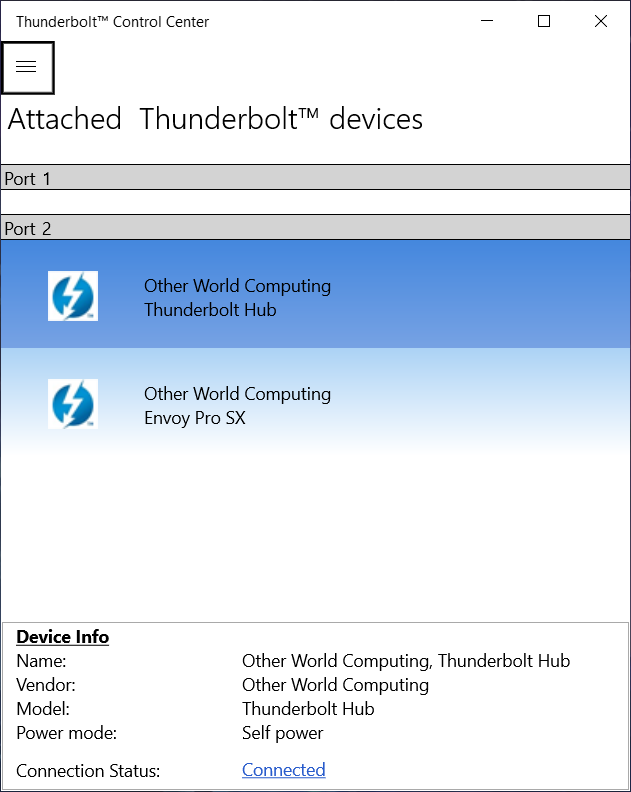
After installing the drivers, open Thunderbolt Control Center and authorize the devices.
You can also install the custom OWC Dock Ejector that allows you to safely remove all the dock-connected devices at the same time: https://www.owcdigital.com/products/dock-ejector
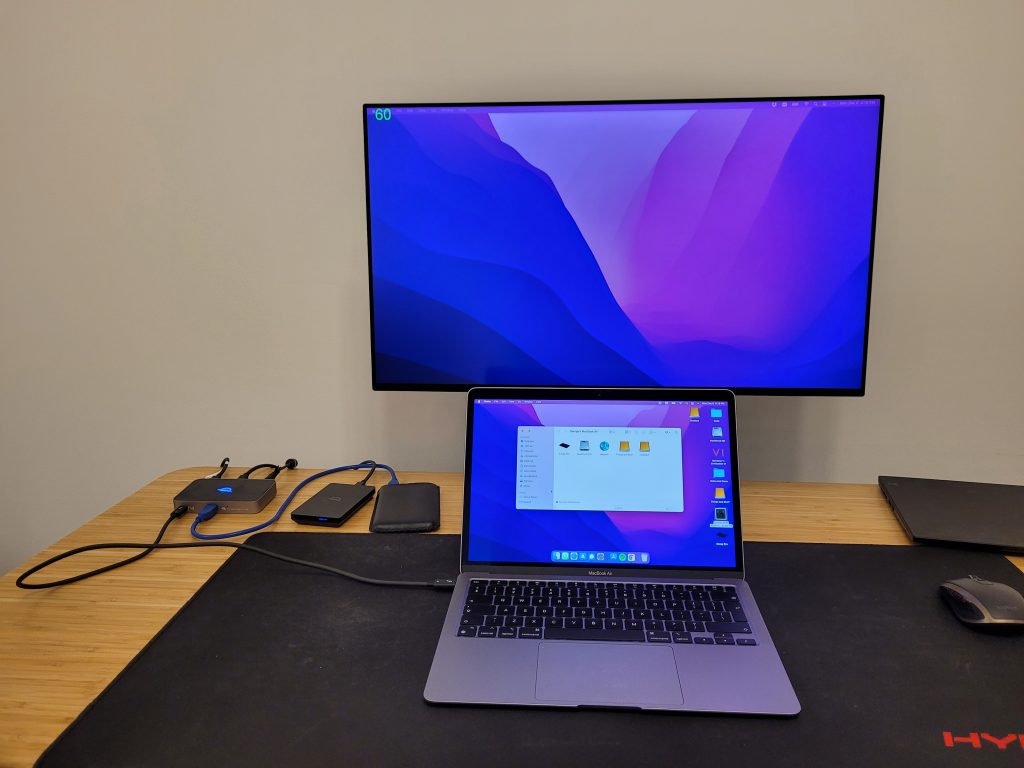
3. Installing OWC Thunderbolt 4 Hub on macOS Monterey
Using the same setup, on macOS, everything worked out of the box, and it managed to output 4k@60hz, as advertised.
There is a version of dock ejector for mac as well.