Remote desktop software is useful after the operating system loads. It cannot help when a machine is stuck in firmware setup, waiting at a boot menu, or unable to start its network service. A hardware KVM-over-IP device instead takes video from the host’s display output and sends keyboard and mouse input over USB. The useful distinction is pre-OS access, not simply another way to share a monitor.
These five exact Amazon US devices were selected from active New offers. They cover wired and wireless external boxes, a compact PiKVM, and an internal PCIe installation. The seller units were not connected to a test motherboard or exposed to the internet. Model-family documentation supports their remote-console roles. Whether the installation works still depends on your host’s video output, USB behavior, network and security setup.
Choose where the device will live first, then check how you will reach and power the host when nobody is on site.Hardware IP KVMs Compared
| Image | Product | Details | Check Price |
|---|---|---|---|
 | GL.iNet Comet GL-RM1 | Installation: External box Network: Ethernet BIOS access: Maker documented Buyer fit: Simple wired desk | Check Price on Amazon |
 | PiKVM V4 Mini | Installation: External box Network: Check setup BIOS access: Maker documented Buyer fit: PiKVM ecosystem | Check Price on Amazon |
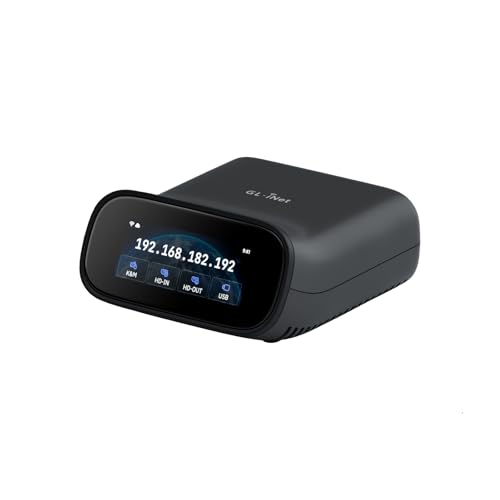 | GL.iNet Comet Pro GL-RM10 | Installation: External passthrough Network: Ethernet or Wi-Fi 6 BIOS access: Maker guide Buyer fit: Local monitor remains | Check Price on Amazon |
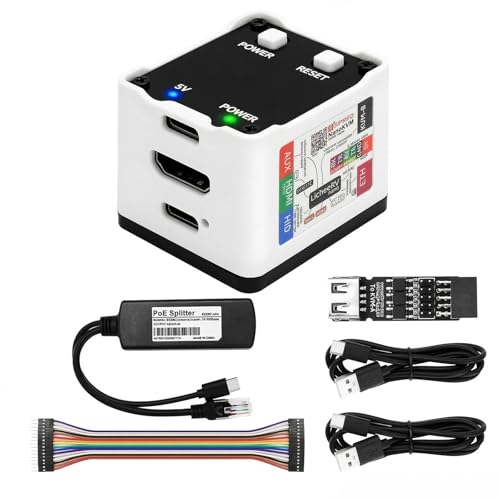 | Sipeed NanoKVM Full W | Installation: External compact Network: Check exact bundle BIOS access: NanoKVM guide Buyer fit: Small external setup | Check Price on Amazon |
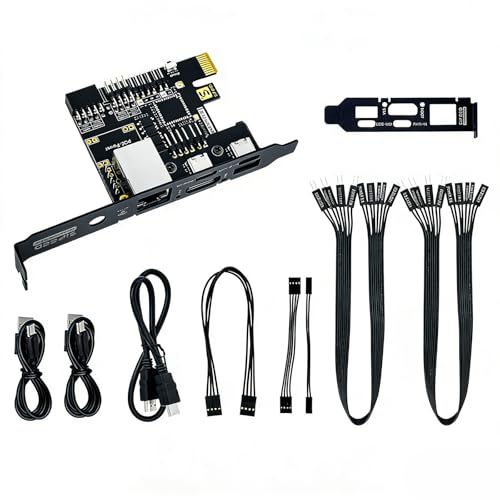 | Sipeed NanoKVM PCIe ETH | Installation: Internal PCIe bracket Network: Ethernet in offer BIOS access: Maker documented Buyer fit: Inside desktop chassis | Check Price on Amazon |
1. GL.iNet Comet GL-RM1 — Best Simple Wired Console
The GL-RM1 is an external box for reaching a computer’s console remotely. GL.iNet documents the Comet’s HDMI video, USB keyboard and mouse emulation, and Ethernet. Connect its video capture to the output the host uses at boot. A spare HDMI socket on a USB-C dock does not automatically carry firmware video from a headless machine.
The GL-RM1 is the simpler Comet choice when an Ethernet port is already near the host, because a wired path avoids planning wireless signal coverage in a closet or equipment rack. The remote interface is not a substitute for secure network access. Keep the device behind a trusted network or a properly configured private remote-access path, and apply supported firmware updates before exposing it to operators.
The important boundary is power control. Seeing a frozen BIOS screen and restarting a powered-off PC are separate tasks. GL.iNet’s ATX power functions need compatible accessory hardware and wiring unless the exact package includes them. The Amazon title does not prove your motherboard’s power pins are connected.
Our Take Choose the basic Comet when a network cable is available and remote keyboard, video and mouse access are the primary jobs. Budget separately for any power-switch accessory you need.
- Ethernet avoids a wireless link at the host.
- External installation does not occupy a PCIe slot.
- Maker documents pre-OS console access.
- Needs an available wired network connection.
- ATX power control depends on a separate compatible setup.
2. PiKVM V4 Mini — Best PiKVM Ecosystem Pick
PiKVM V4 Mini is the compact way into PiKVM’s documented remote-console ecosystem. PiKVM describes hardware video capture and USB keyboard/mouse emulation that work at the host’s boot and BIOS stages, where an operating-system remote-desktop client does not. Its documentation is detailed enough to plan a setup before ordering, including video, power and networking decisions.
The Mini does not promise that every computer will show every boot screen. The host must output video on the connected port during startup, and its firmware must accept the emulated USB input. A USB-C monitor on a regular desk is useful to observe the local output while configuring the KVM, but a remote console still needs its own capture connection.
Check the exact listing for supplied cables, power supply and any ATX or virtual-media accessory before assuming a complete remote-recovery kit is in the box. The PiKVM software and documentation are a good reason to consider this model, but the seller offer does not prove a tested workflow for booting remotely on your machine. Plan a local first-run test and a recovery route if network access fails.
A well-documented KVM ecosystem helps setup. It does not remove the need to test your host’s boot-time video and USB behavior.Our Take PiKVM V4 Mini fits someone who values its setup documentation and compact external hardware. Verify the sold bundle and host compatibility before depending on it for unattended recovery.
- PiKVM documents the pre-OS use case clearly.
- Small external hardware suits a single host.
- Broad setup documentation helps plan accessories.
- Exact included cables and power hardware need checking.
- Host boot-output compatibility still needs a local test.
3. GL.iNet Comet Pro GL-RM10 — Best for Keeping a Local Monitor
Comet Pro serves a different desk than the basic Comet. GL.iNet’s RM10 guide documents HDMI passthrough so a local screen can remain part of the installation while remote operators use the capture path. Passthrough helps when someone sometimes sits at the PC and sometimes needs to reach its boot menu from elsewhere. Check resolution and cabling requirements for both the local screen and remote capture path rather than assuming every display mode passes through unchanged.
The Pro also offers Wi-Fi 6 in addition to wired networking. Wi-Fi may help where a network jack is unavailable, but radio coverage in a metal cabinet can be poor and a wireless connection adds another failure mode. An Ethernet-equipped USB-C monitor could provide a network path for a laptop, yet it is not a direct substitute for a stable link to an IP KVM attached to a separate desktop.
As with the RM1, remote power control is not inherent in an HDMI cable. Check the exact listing for the required ATX accessory and verify that your host case exposes compatible front-panel connections. If a system is powered down with no accessory wired, this device cannot create a BIOS screen to capture. Design for safe remote access as carefully as you design the cable route.
Our Take The RM10 is the better Comet when local and remote use must coexist, or when wired network placement is difficult. Do not pay for its extra connection options if the simpler wired RM1 covers the job.
- HDMI passthrough supports a local display.
- Ethernet and Wi-Fi 6 broaden placement options.
- Maker guide covers remote-console installation.
- Wireless adds a signal and security dependency.
- Power switching still needs compatible accessory wiring.
4. Sipeed NanoKVM Full W — Best Compact External NanoKVM
NanoKVM Full W is a small external remote BIOS console. Sipeed’s guide describes video capture and USB input for pre-OS operation, while the Full family has more connections than Mini. Check exactly which accessories the seller includes.
Compact hardware helps beside a mini PC or a densely cabled bench, but cable planning is more important than the box dimensions. Identify the host’s active HDMI output, a dependable USB connection, the KVM’s own power source and an appropriate network path. A multiport USB-C hub can organize peripherals at a desk, but do not silently put it in the only USB path you rely on to reach firmware setup.
Sipeed documents ATX power hardware for some NanoKVM Full setups. The documentation is not proof that this precise marketplace bundle contains every power-control part. Check photos and packing list, then verify the front-panel wiring on site. The Full W offer may be appealing for flexible installation, but only a tested arrangement of cables and network earns the label “unattended recovery.”
Confirm the exact Full W bundle before promising remote power control. BIOS video and ATX switching are different connections.Our Take NanoKVM Full W suits a tight external installation when you can check the included parts and build the wiring deliberately. Treat it as a small KVM, not a complete recovery guarantee.
- Small external form factor.
- Sipeed documents pre-OS remote-console use.
- Full family offers more setup flexibility than Mini.
- Bundle contents require exact-offer verification.
- Small size does not reduce cabling or security work.
5. Sipeed NanoKVM PCIe ETH — Best Internal Desktop Install
The NanoKVM PCIe ETH is remote-console hardware that installs inside a desktop chassis. Sipeed’s PCIe documentation describes the internal-card arrangement, and the exact offer identifies an Ethernet-connected PCIe version. The internal card can keep a workbench cleaner than an external box hanging from several cables, but it limits the product to a suitable desktop with physical space and the right internal connections.
An internal card is not automatically connected to every onboard signal. Check the maker’s wiring diagram for the host’s video feed, USB emulation, power and network. The video check is especially important on a PC with a discrete GPU. Confirm which display output is active at boot, then connect the KVM to that path. A USB4 external SSD may be useful for moving files, but it cannot replace access to the firmware console when storage or boot order goes wrong.
The PCIe form factor also changes serviceability. A remote office cannot easily move this card between computers, and installing it may require opening the case and routing internal leads. Verify slot clearance, case warranty terms and whether the offered package includes the required cables. Treat PCIe ETH as a deliberate permanent install, not the first choice for occasional troubleshooting of many unrelated machines.
Our Take NanoKVM PCIe ETH is for a desktop that merits a tidy permanent remote-console install. External devices are easier to move or troubleshoot if you support multiple hosts.
- Internal card can reduce external desk clutter.
- Exact offer identifies Ethernet networking.
- Maker documents the PCIe installation path.
- Requires a compatible desktop and internal wiring.
- Less portable between hosts than an external box.
Buying Guide
1. Trace the video and USB paths before buying
Pre-OS video must exist at the connected output. A KVM cannot capture a screen the motherboard or GPU never sends to its HDMI input. Check where your target computer displays its boot logo and BIOS, especially if it has both integrated and discrete graphics. If a laptop uses a USB-C charger or dock, do not assume its USB-C video remains active during firmware setup. Test that particular computer locally first.
USB emulation is the other half of access. Attach the KVM to the host port that accepts keyboard input in setup, then test entry into BIOS, boot-device selection and recovery menus. Some firmware behaves differently across USB ports or boot states. Record the working port and cable so a later desk rearrangement does not silently remove your recovery path.
2. Separate remote console from remote power
A powered-off host sends no video. Remote KVM can show a crashed or rebooting system if the capture path is live, but switching on a fully off desktop may require an ATX power accessory connected to its front-panel header. Verify that accessory’s compatibility and inclusion in the exact seller package. Do not infer it from a product-family demonstration or a vague “remote management” title.
Plan the unattended failure cases. Test a normal restart, a forced power cycle where supported, loss of network, and recovery after the KVM itself loses power. A simple USB-C power meter can help diagnose a USB-powered accessory’s supply, but it does not establish safe ATX wiring. Keep a local hands-on fallback for hardware faults and failed firmware updates.
3. Put security and placement into the decision
Treat an IP KVM as a privileged management endpoint. Anyone who reaches its interface may be able to type at a boot prompt or see sensitive screen contents. Use a protected network or vetted private-access method, change default credentials, apply supported updates and restrict accounts. Do not open the device directly to the public internet simply to avoid VPN setup.
Placement affects reliability. Wired Ethernet is easier to reason about in a rack. Wi-Fi may be useful at a shared desk but needs proven coverage. External boxes can be moved to another host, while a PCIe card is neater in one desktop. Check local monitor needs, cable reach and remote operator procedures before choosing. The best KVM is the one that works during your actual outage, not the one with the most ports on a listing.
FAQ
Can one of these show BIOS if normal remote desktop is broken?
Yes, showing BIOS remotely is the purpose of a hardware IP KVM. It captures the host’s physical video output and sends keyboard and mouse input over USB, so it does not depend on a working Windows, Linux or macOS remote-desktop service. All five model families here document the pre-OS console role.
It still needs video at boot on the connected output, accepted USB input, power for the KVM and a reachable network. Test the exact host locally before trusting the setup for an unattended machine. A KVM cannot repair a failed graphics output or network link by itself.
Does KVM-over-IP let me turn on a fully powered-off PC?
Video and USB capture alone cannot turn on a fully off PC, because a fully off PC produces no BIOS image. Some devices can drive an optional ATX power-control accessory wired to the desktop’s front-panel header, but included hardware varies by exact offer and host compatibility.
Check the package contents and maker wiring instructions, then test the power action in person before depending on it remotely. Also confirm the KVM and network equipment remain powered when the computer is off. If the entire site loses electricity, a KVM alone will not restore it.
Should I choose an external box or a PCIe card?
It depends on the machines you support. One fixed tower in a secure room favors the internal approach, while mixed laptops and desktops favor an external box.
An external Comet, PiKVM or NanoKVM is easier to move among hosts and usually simpler to inspect on a workbench. It does add visible cables and needs somewhere to sit. A PCIe NanoKVM can make a permanent desktop installation tidier, provided the chassis has room and its internal signals can be connected. Either way, check the required video, USB, power and network connections, not just the physical mounting style.
Bottom Line
The Comet GL-RM1 is the wired external choice. PiKVM V4 Mini is the pick for PiKVM’s documentation. Comet Pro keeps a local display. NanoKVM Full W fits a small external install, while NanoKVM PCIe ETH stays inside a desktop. Verify video at boot and USB behavior, and separate optional power control from console access.