After a few days of unproductive emails back and forth, I’ve realized that I’m not making any progress and I’ve started researching forums on how to fix this common error.
Turns out it only takes about 15 minutes to do it yourself.Table of Contents
The issue: “Laser Unit Error 1”
The Laser Distance Sensor (the spinning-orange-camera-thing) is not moving anymore. This prevents the robot from vacuuming and it stops.
The official support department recommended that I try moving it with a pen, just in case it is stuck. This did not fix the issue, but I guess it was worth a shot.
The Fix
After researching a bit, I found out that it most common cause for the laser unit error is either a stuck electrical engine or a broken electrical engine. Before ordering new parts, I’ve decided to try jump-starting the engine.
New engines can be found on Amazon, such as this one (Amazon Link), but I recommend first trying to jump-start yours.
Ok, no more fooling around, it’s time to open the beast.
If you decided that labor is not for you, and you’d rather get a new, upgraded, self-emptying model, check out our article https://thunderboltlaptop.com/self-emptying-robot-vacuums/
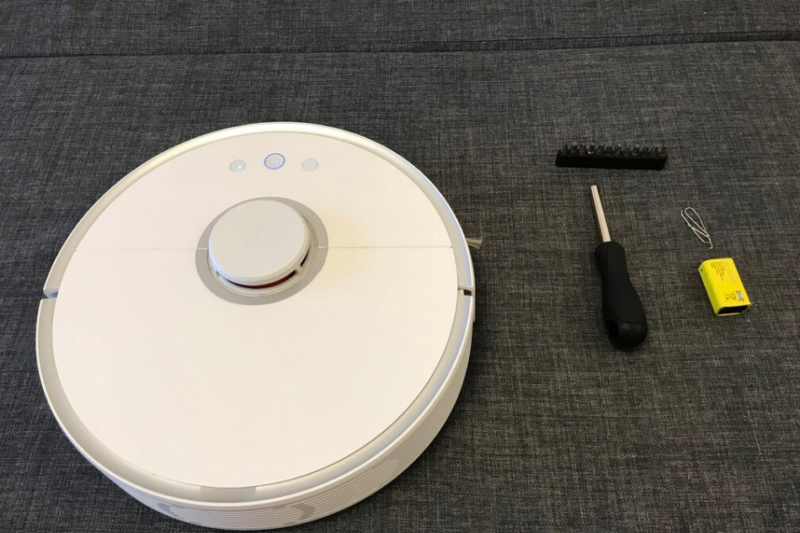
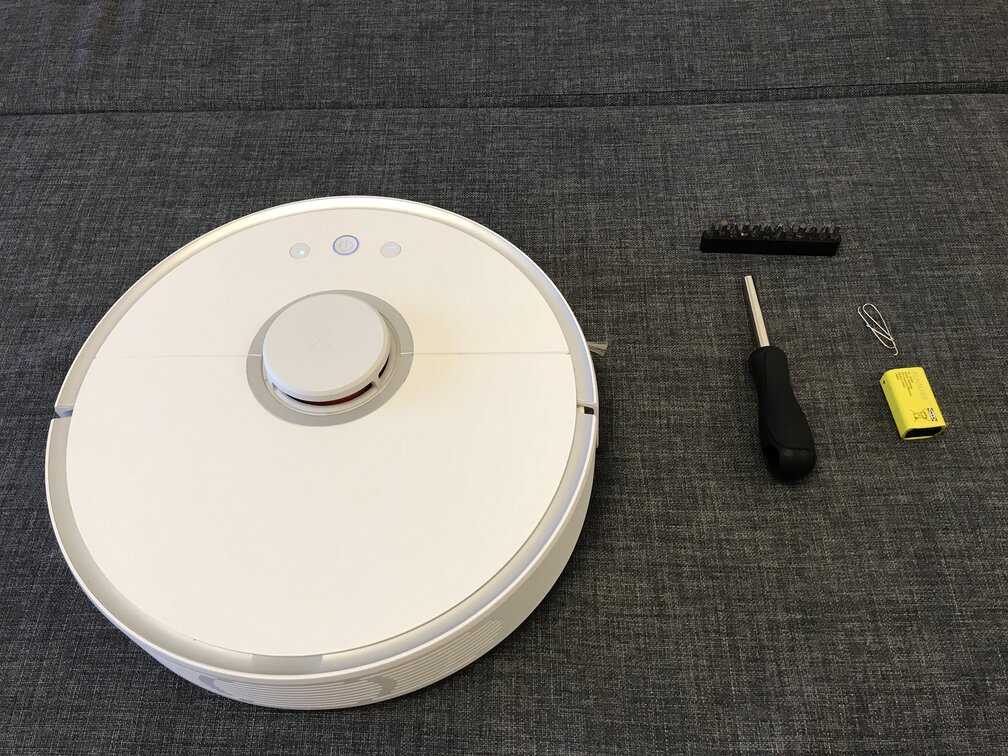
Step 1. Get your tools
The tools needed are in the image: a Philips screwdriver, one 9v battery, 2 paperclips (or wires if you have some)
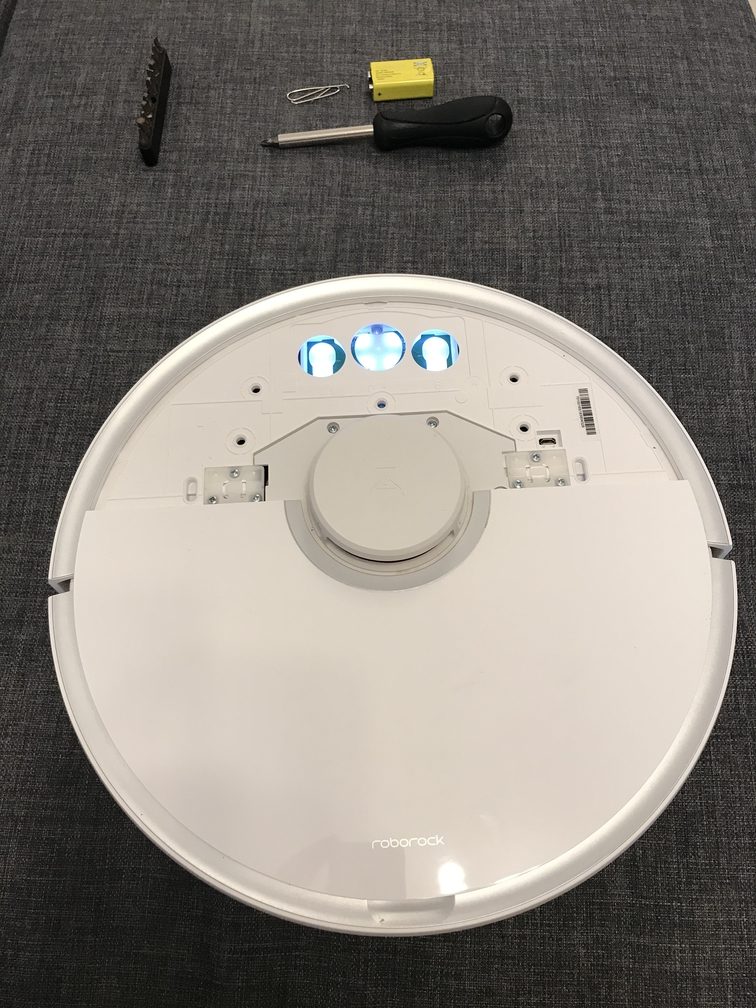
Step 2. Remove the Top Lid
The top part is not screwed in so you can just pull it out. Make sure you’re gentle about it.
Step 3. Unscrew the 8 Marked Screws
In order to gain access to the motor, we’re going to need to remove several screws and void our warranty in the process. If you’re not ready to give up your warranty then stop now.
Warning, this will void your warranty.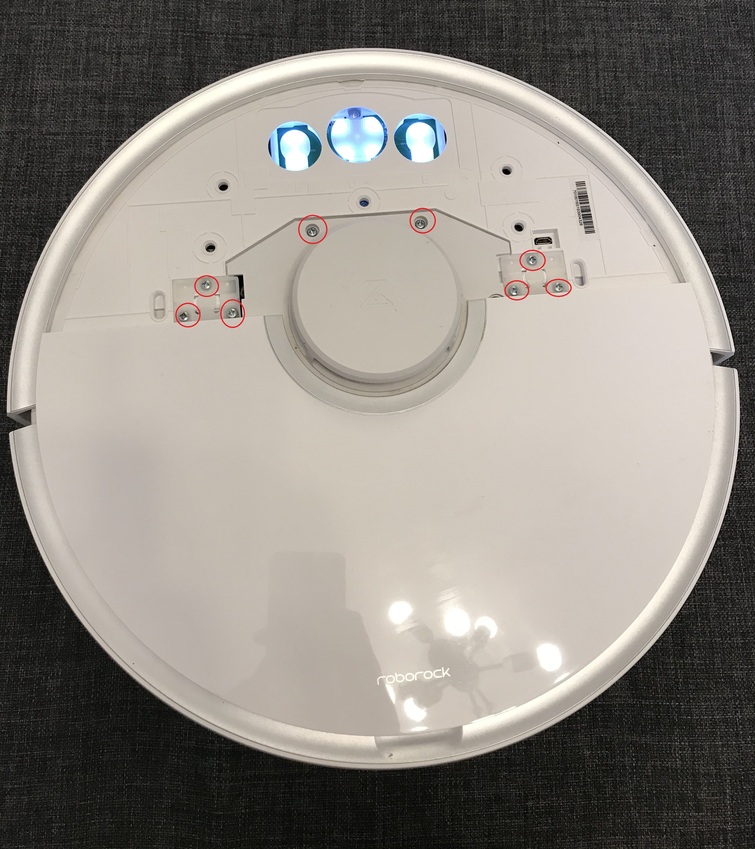
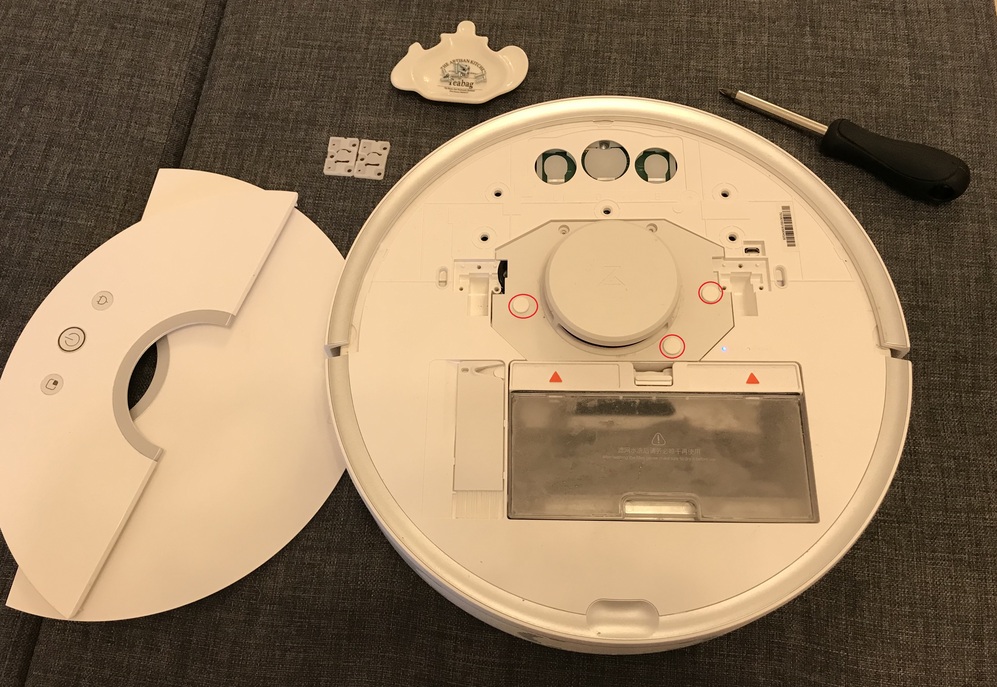
Step 4. Remove the bottom lid
After removing the screws, the bottom lid can now be removed. The next screws are covered with 3 rubber caps. Use a paper clip or the screwdriver to remove them.
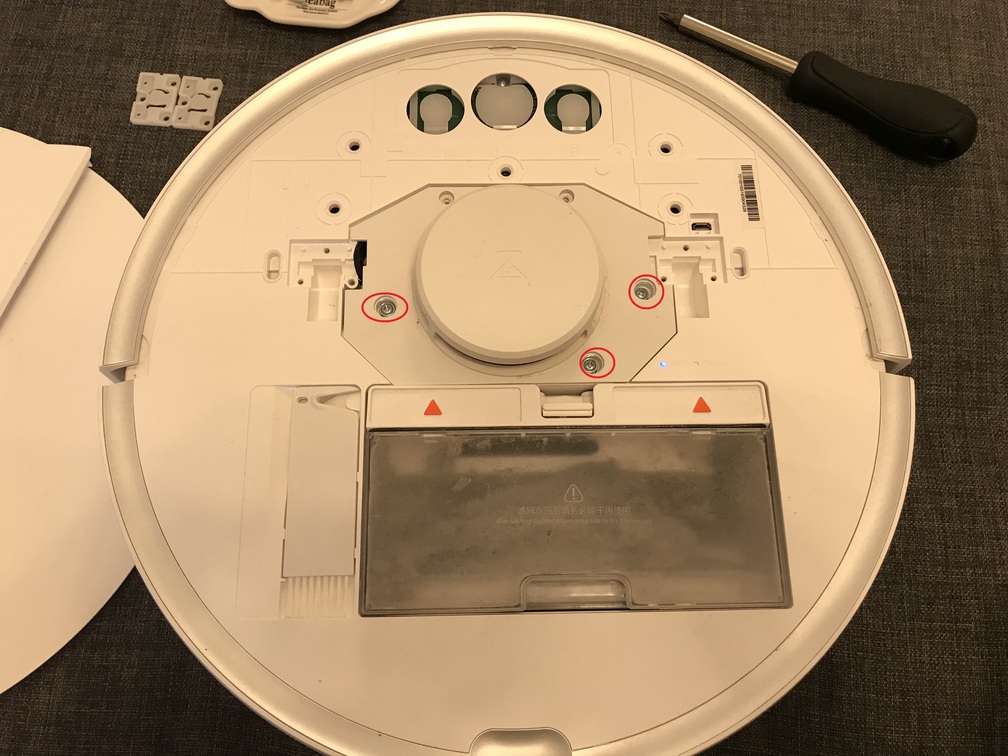
Step 5. Remove the white plastic protecting the Laser Distance Sensor
After removing the 3 screws from the previous step, the white top should come out to expose the orange LDS.
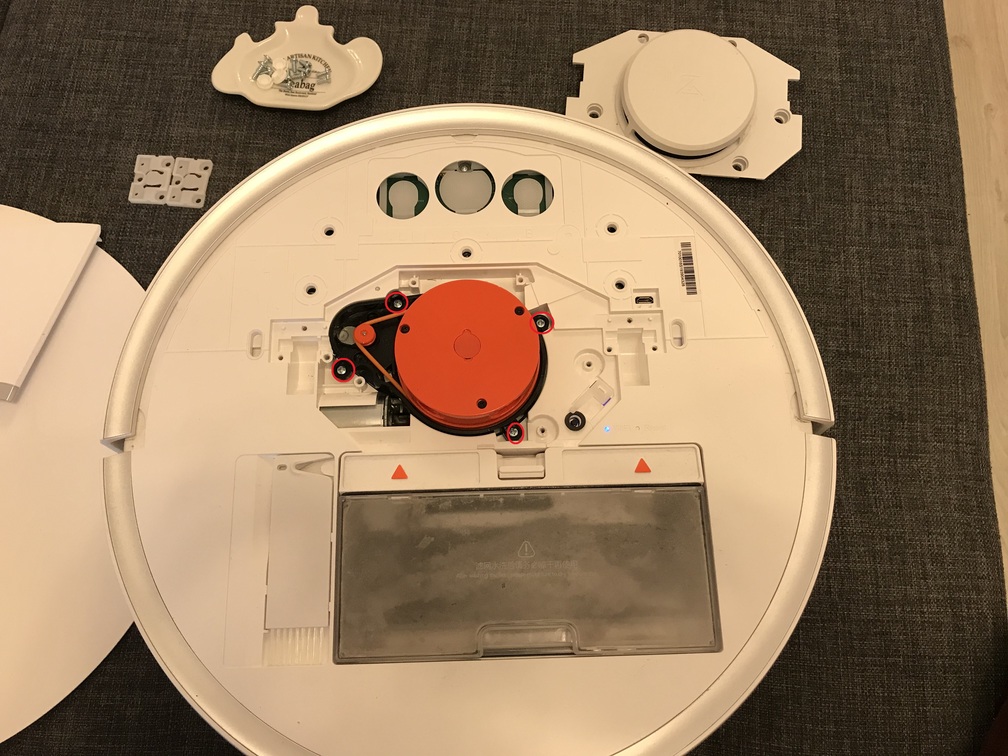
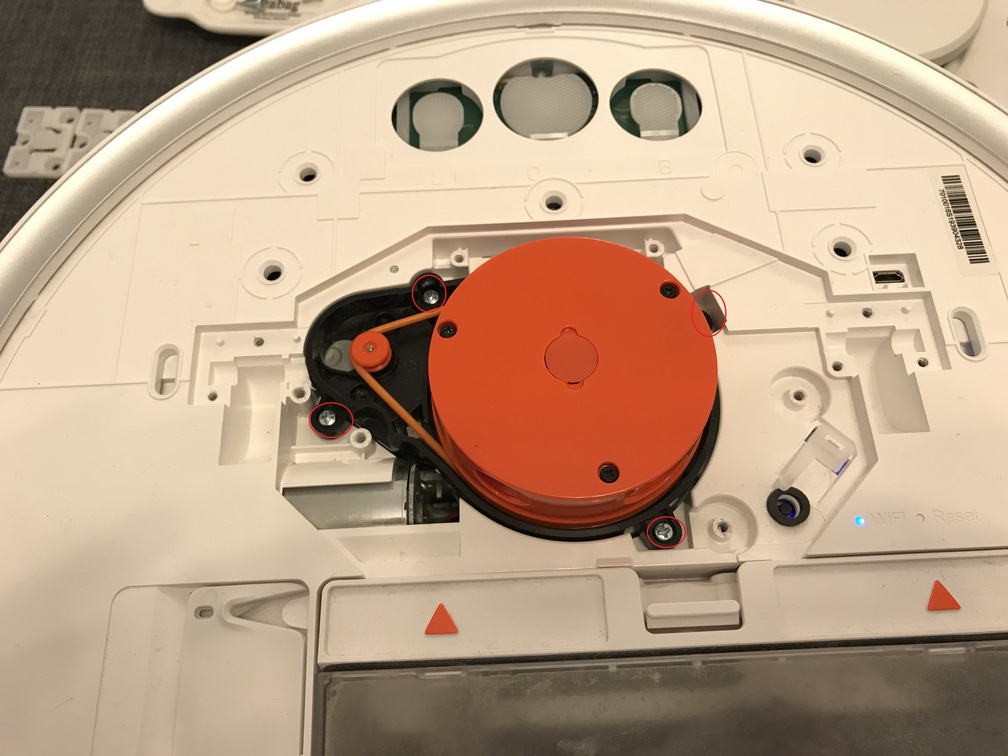
Step 6. Remove the Laser Distance Sensor
Unscrew the 4 circled screws.
Step 7. Jumpstart the little engine that couldn’t
Now that you have access to the motor, you can give it a 9V boost to attempt to get it unstuck.
You can use wires or paper clips if you have no wires around.
The Black wire is the Negative and the Red one is the Positive charge.
Connect the Negative charge of the battery to the Black, contact and the Positive part of the battery to the Red contact.
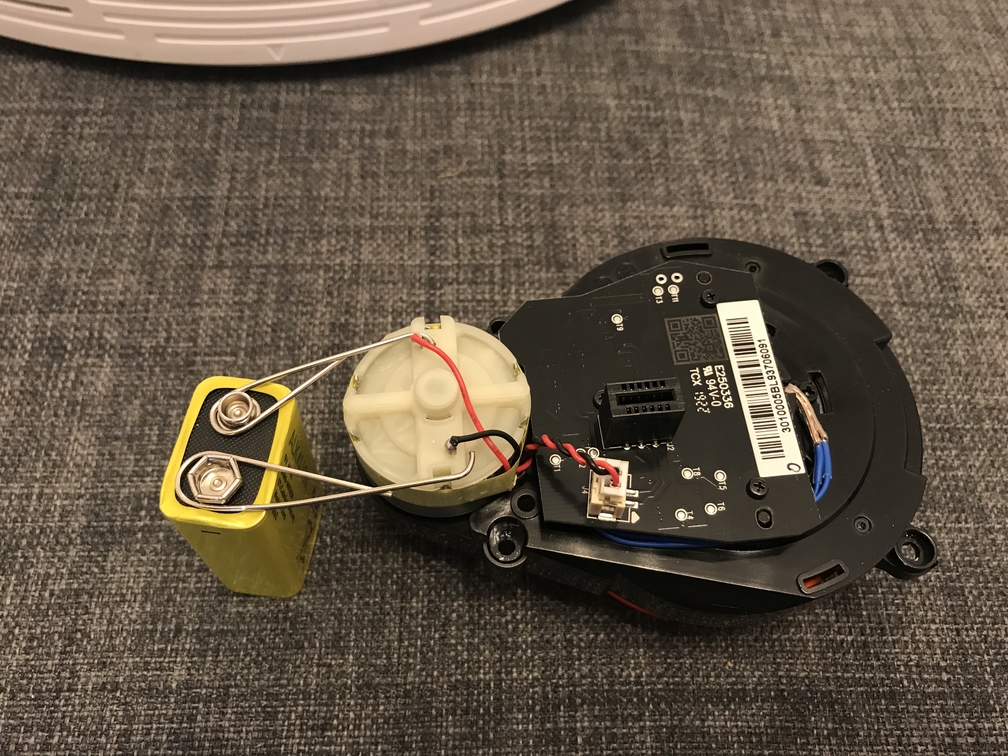
Success, the laser unit started moving! 5 Seconds should be enough, don’t overdo it!
If nothing happens when you try to jump start it, it probably means that the motor is broken. You’ll need to order a new one online and replace it. You can get one really cheap from AmazonStep 8. Put everything back together and test the Vacuum
You can follow this guide in reverse order to put things back.


Hello, thanks for the guide. Jumpstarting the motor revived my Roborock.
Glad to hear it helped!
Hi, I successfully jump started my motor! However when I put it all back together it still has the error. I would consider buying the new part however I wonder if it is something else? I cleaned every socket and connection o could find but still no good. Is there anything else I should check? The fact I could jump start the motor with the 9v battery means the motor is ok or should I try a new motor regardless?
It happened to me as well, I had to jump-start the motor 3 times in a month, but after that, it worked without issues.
You can try jump-starting it again.
Thank you for the advice! I will try again!
Hi, I ordered a new motor and replaced it. The lazer unit starts to spin, however the robot still doesnt start moving and gives again Error 1. Do you know what might be the reason and how to fix it?
Thanks so much – works like a charm!
Thank you for the simple well documented guide. Worked a treat!
You are seriously my new hero!! My husband and I just did this and our Roborock is working again. You saved us hundreds. A million thanks!!!
Díky Vašemu návodu se mi podařilo můj Roborock opět zprovoznit. Díky !
Hi
Thanks for the guide.
I had Error 1 on my S6, dissassembled – it seeems the bearings(or bushes?) feel very rough in the lidar unit, motor spins freely and so Ive ordered a complete replacement fror Aliexpress NZ$50 for the part delivered