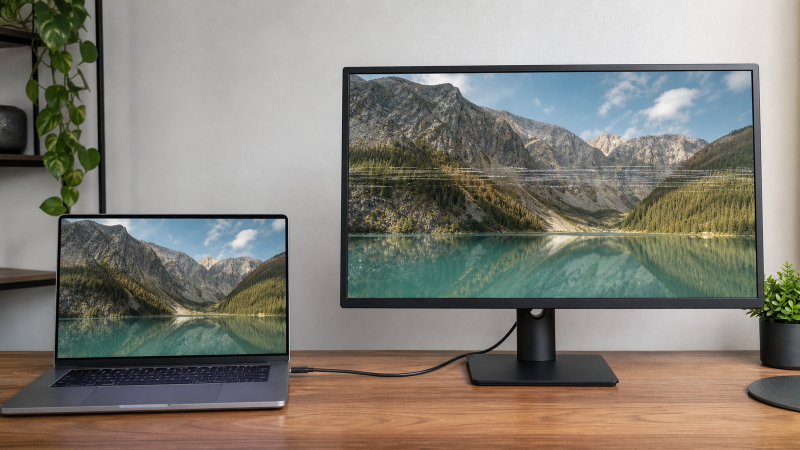
The picture is there, and then for a fraction of a second it is not. A USB-C monitor that blinks, goes black for a beat, and comes back has already carried a full image across the whole path at least once, so the screen is not dead. It is unstable, and the useful clue is not the flicker itself. It is when the blackouts happen and what the screen does around them. If the monitor never comes up at all, that is a different fault, and the USB-C monitor not-working guide is the right start.
So watch a few blackouts before you change anything. Notice what was on screen, what you were doing, and whether the monitor flashed an input name or a No signal message when the picture came back. Four patterns cover almost every case, and yours will usually match one of them at a glance:
- The flicker is there from the moment you plug in, or it never really stops. That points at the link, meaning how the cable seats, how it is strained, or the mode it negotiated.
- The picture is steady until you ask for something demanding, like a high refresh rate or HDR, and then it starts dropping. That points at what the whole route can carry, not at one broken part.
- Everything is fine on a direct cable, and the flicker only shows up once a dock or adapter is in the middle. That points at the added device, its host cable, or the mode it settled on.
- The whole desktop stutters, taskbar and clock and all, not just one monitor. That points away from the cable and toward a Windows driver or an app, which Microsoft handles on its own track.
One thing overrides all four. If a connector is hot, deformed, loose, or visibly damaged, pull it from power and let the maker handle it. Do not keep reproducing the flicker on a connector that is already failing.
Get one steady direct picture first
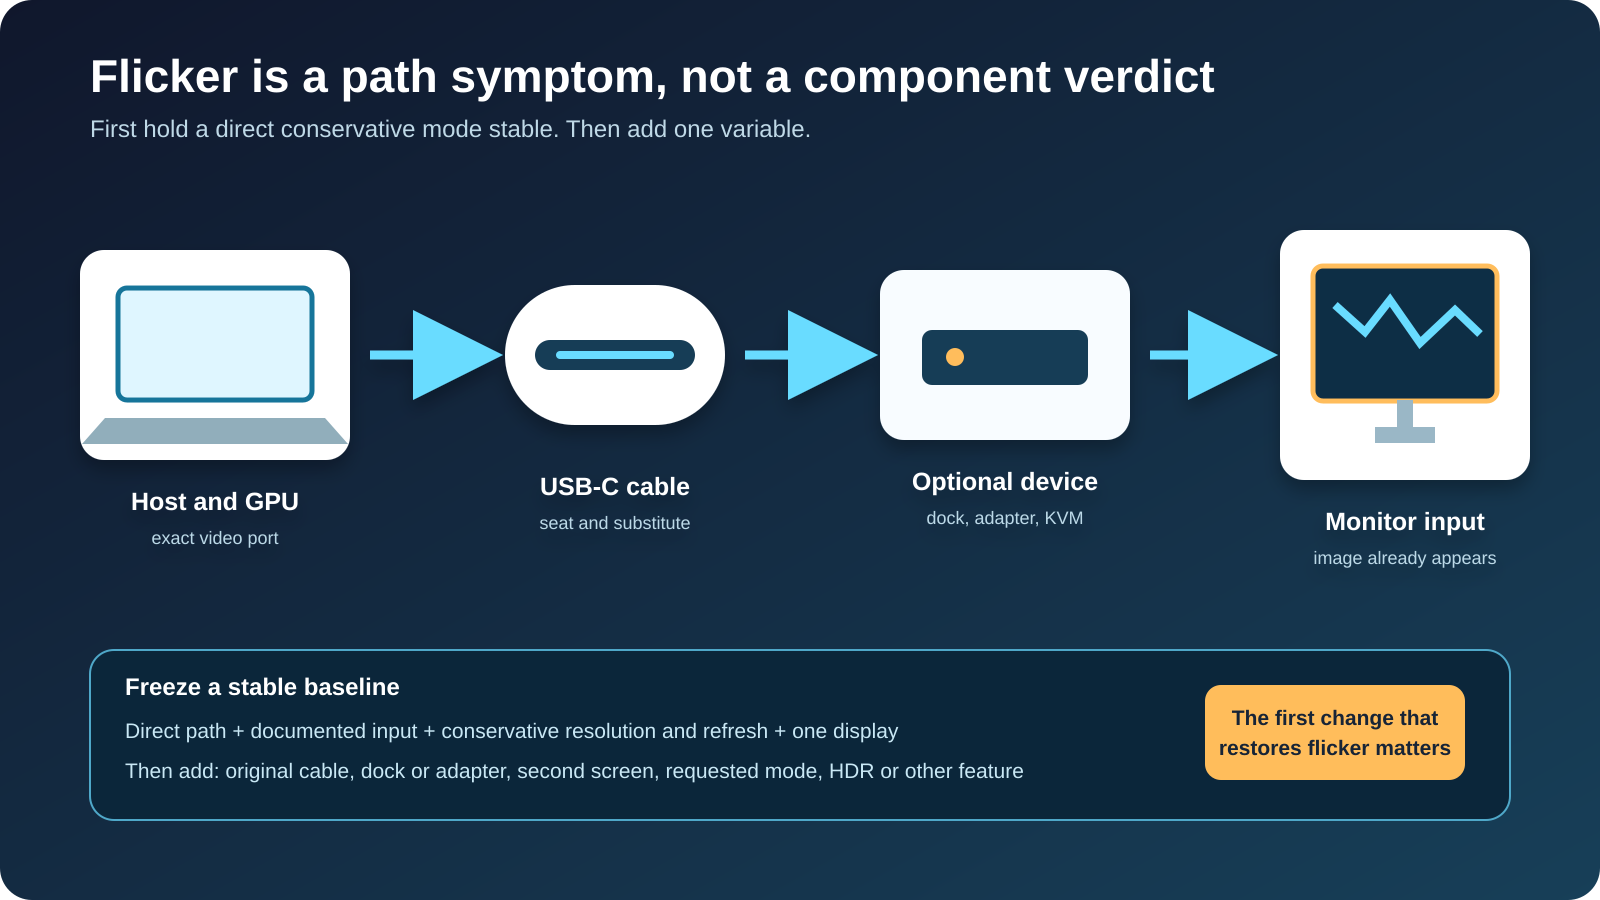
Every pattern above is easier to read against a known-good starting point, so build one. In Settings, System, Display, Advanced display, select the monitor and note the desktop and signal resolutions, the refresh rate, whether a dynamic refresh rate is listed, the display number Windows gave it, and whether a second external screen is live. Write down the physical route in the same breath: the computer and its port, each cable, any dock, adapter, KVM, switch, or extension, the monitor input, and how each piece is powered. A path with three cables and a dock is not usefully called “a USB-C cable.” Microsoft defines refresh rate as how often the image refreshes each second, and a rate you can pick from the list is not a promise that every cable and adapter in between can hold it. Your image already appeared, so the source port carries video, and the DisplayPort Alt Mode verification guide confirms you are on the port the maker meant for it.
The monitor’s own on-screen menu is a quiet tell, so bring it up during the next blackout using the manual for the buttons. If the Windows image cuts out while the menu stays visible and steady, the panel can still draw its own graphics, and the problem is in the incoming signal. If the menu itself dims, restarts, or flickers along with the picture, the trouble is not just the incoming image, so check the monitor’s power arrangement and call the maker if it keeps happening. If the monitor announces a new input name at each event, it may be switching inputs on its own, so pick the connected input by hand. Do not open the monitor or run an undocumented reset, which wipes settings and tells you nothing about the signal.
Now strip the path to a plain direct connection. Take out the dock or hub, any USB-C video adapter, a KVM or switch, an extension or coupler, a monitor passthrough, and the second screen. Run the computer’s video-capable port straight to the monitor’s video input with the monitor’s own cable, pick the connected input, and set a resolution and refresh rate the monitor lists for that input. Then use the machine normally for long enough to cover the interval where the flicker usually shows up. Ten quiet minutes against an hourly symptom proves nothing.
The direct picture sends you down one of three roads. If it stays rock steady, the fault is one of the things you unplugged, so work the link and then add the dock back. If the same flicker happens directly, leave the dock out and work the cable, the port, the monitor, and the Windows-wide pattern. If no picture appears at all, the symptom has changed under you, and this is now a no-signal problem rather than a flicker. If the only direct cable you have is a mystery, the USB-C cable testing guide shows how to see its data behavior, though a storage speed run is background here, not a measure of picture stability.
When the link itself is shaky
This is the road for a flicker that is there from the start or follows any setup with a physical cable. Shut down or disconnect as the instructions require, then look at the plugs and ports under good light, with no metal tools or liquids near a connector. You are looking for a plug that will not seat all the way, lint in the opening, a cable pulled sideways by a monitor arm, a sharp bend right at the connector, a loose port, and anything discolored or deformed.
If nothing is damaged, tidy the cable so nothing tugs it, reseat it firmly, and leave the port, input, and mode alone. A reseat only means something when it is the single thing you changed. If the flicker rides through the reseat, swap in one known-good cable meant for this route and touch nothing else. When cable B is steady and cable A brings the flicker back in the same setup, the flicker follows cable A, and a replacement is earned. Connector shape, a good charge, and a printed bandwidth number earn nothing on their own. The USB-C cable selection guide helps once the cable is the proven culprit.
When it only starts at a demanding mode
This is the road for a picture that is steady until you push it. Put the original cable back if it is usable, then change one Windows display setting. In Advanced display, drop to a lower refresh rate the monitor supports for this input and leave everything else alone. If the flicker stops, note those numbers. Then restore the rate and lower the resolution instead, again only to a listed combination, and try HDR, variable refresh rate, and color depth one pass at a time. Change one thing per pass, and each result stays separable. A steady lower mode means the setting you changed pushed the whole path past what it could hold, and the limit could be the host output, the cable, the dock, the adapter, or the monitor input.
The same monitor often offers different modes on its USB-C, DisplayPort, and HDMI inputs, so read the timing table for the input you are on. A mode listed for HDMI says nothing about USB-C on the same panel. A lower mode is a diagnosis, not a repair. Leaving a 144 Hz panel at 60 Hz is a workaround, and it stands as the fix only once you confirm the route was never built to carry more, which the high refresh rate path guide walks through end to end. When the panel cannot hold the mode you need on any steady route, the weak link is the monitor itself, and the USB-C monitor guide sorts panels by the modes they actually hold. If a second display is what triggers the flicker, hold the first monitor at its steady mode and bring the second one in low. That is a two-screen question now, and the USB-C monitor daisy-chain guide covers chained screens.
When it only starts through a dock or adapter
This is the road for a direct cable that is perfect until a box goes in the middle. With the direct path steady, add only the dock or adapter, on its own power supply, host cable, upstream port, and display output, and leave every other peripheral off. If the flicker comes straight back, the thing you added is in the loop: the dock or adapter, its host cable, its display output, any HDMI or DisplayPort cable that came with it, and maybe a different mode it negotiated. Open Advanced display before you blame the box, because a docked path can quietly land on a different resolution or refresh rate than the direct one used. If the docked path holds, add one peripheral at a time. A storage drive, an Ethernet adapter, a second screen, or a bus-powered gadget can line up with the failure by coincidence, so repeat the last addition once to be sure. A flicker that only shows up with the box in the middle belongs to the dock or adapter maker, and the direct baseline, the docked result, and both Advanced display readings are what they will ask for. The USB-C docking station guide matters only after documentation or a clean swap shows the dock cannot meet the route, and the USB-C docks with HDMI 2.1 guide comes later, once an HDMI feature is the proven boundary.
When the whole desktop stutters
This is the road for a flicker that takes everything with it, taskbar and clock and all, even on a plain direct cable. Microsoft says Windows 11 flicker like this usually comes from a display driver or an incompatible app, and its test is simple: press Ctrl + Shift + Esc and watch Task Manager during the flicker. If Task Manager flickers with the rest of the screen, follow Microsoft’s display-driver path. If Task Manager stays steady while another app flickers, follow the incompatible-app path.
Either way, this clears the cable and the dock. A shaky physical link blanks the whole image before Windows draws anything, and an app problem does not explain a monitor flashing its input name after each blackout, so the pattern really does tell you which world you are in. For driver work, start with Windows Update and the computer or GPU maker’s own site, which are the paths Microsoft points to, and skip the generic driver-download tools. A firmware or driver update only matters when it names your device and your symptom, so keep power steady, apply one update, rebuild the direct picture, and watch again. Changing the cable and the mode in the same pass throws the comparison away.
When a DisplayLink screen is the shaky one
Check the dock or adapter product page for the DisplayLink name or a named chipset before you touch this road at all. USB-A ports, an HDMI socket, or several outputs do not make a device DisplayLink. For a confirmed DisplayLink product, Synaptics publishes an article for a display that keeps disconnecting, reconnecting, or freezing, and it points at loose video cables and USB instability among the things to check. Synaptics also says its Windows software is for products with DisplayLink USB graphics chipsets, and that a device maker may ship a different release.
Keep this narrow. Confirm the product really contains DisplayLink, check the device maker’s Windows support page first, keep one DisplayLink screen connected with no unrelated USB devices, watch whether the DisplayLink USB device itself drops when the image blanks, and install only the maker package or the Synaptics package the maker sends you to. The DisplayLink docking station guide explains the category. A native DisplayPort Alt Mode monitor does not need DisplayLink software, and adding it there is one more thing to take back out later.
Bringing your real picture back
Once you know which change stops the flicker, put the setup back without giving up the stability you found. Rebuild the steady picture first, the same direct cable, port, input, and plain mode that held, and let it run clean for longer than the flicker used to take to appear. Then climb back one step at a time, adding the dock, then the higher refresh rate or HDR, then the second screen, and watch after each. A high mode that will not hold on a route the maker never rated for it is not a defect, so the step that brings the flicker back is the route’s ceiling, and a steady picture one step under it is the finished repair, even when it sits below the number printed on the box.
Frequently asked questions
Why does my USB-C monitor flicker only at a higher refresh rate?
The requested mode changes what the complete signal path has to carry. Record the resolution and refresh rate, test a conservative documented mode, and check the timing table for the input you are using.
Can a USB-C cable charge normally and still flicker with video?
Yes. Charging behavior tells you nothing about stable video transport. Isolate the cable while holding the same port, monitor input, and display mode.
Should I uninstall the display driver?
Not as a first step. Use Microsoft’s Task Manager branch for desktop-wide flicker, then Windows Update and the exact computer or GPU support page. Leave unrelated drivers alone.
Does lowering the refresh rate fix the problem?
A lower rate gives you a stable diagnostic baseline, which is not the same as a finished repair. Compare the stable and unstable states against the documentation for each part of the route before you settle for it.
Why does touching the cable make the display blink?
When movement changes the symptom, seating, strain, cable condition, connector condition, and port condition all become relevant. Stop if anything is hot or damaged. Otherwise substitute the cable in a fixed path.
Can HDR cause blackouts?
If the symptom appears only with HDR enabled and disappears when HDR is the single changed condition, HDR has changed the tested route. Verify that mode across the whole chain rather than generalizing to every HDR display.
Is DisplayLink the same as USB-C DisplayPort Alt Mode?
No. DisplayLink is USB graphics with its own hardware and software. Native DisplayPort Alt Mode carries a DisplayPort signal over the USB-C connector. Apply DisplayLink steps only to confirmed DisplayLink products.
Sources
The Task Manager test that tells a desktop-wide flicker apart from a USB-C link fault is Microsoft’s screen-flicker guidance, scoped to the Windows desktop rather than the cable. Mode recording is its refresh-rate documentation. The physical path uses the external-monitor and USB-C troubleshooting pages, and drivers stay on Microsoft’s Device Manager driver guidance. The DisplayLink branch is Synaptics’, in its repeated-disconnection article and Windows software scope, for confirmed DisplayLink hardware only.