Ah yes, daisy-chaining.
Casually defined as the act of plugging things together in a sequence or ring.
The word “daisy” here refers to the fact that the connected stuff typically resembles a flower wreath, hence the term. As to why daisy was chosen out of all flowers… maybe it’s a reference to an old hobby by coal miners?
So, it’s very straightforward and easy, right? Just plug things together, and voila, you get the connection you want with any particular set of devices/appliances.
Well, not quite.
Table of Contents
Technical Advantages Daisy-Chaining Quick Recap
Some are straightforward. Others, a bit more technical. In any case:
- Less use of cabling – instead of dealing with a tangled mess of individual wires, you can just neatly manage them through a single line.
- Connection efficiency – Allows you to use a fewer number of ports or connectors for a particular set of appliances/devices you need to connect.
- Simplifies network layout – daisy-chained peripherals are organized better, as there is less confusion in the connection between the included devices.
- Just convenient overall – daisy chaining makes setup easier to do with fewer additional steps. Same thing when disconnecting the entire line.
01. Thunderbolt Daisy-Chaining
In all technicality, daisy-chaining stuff (yes stuff) using Thunderbolt ports is very much the same as DisplayPort daisy-chaining. You’ve got the DisplayPort (1.4) protocol for audio-video data, and the connections also remain entirely the same.
There is, however, one crucial difference: almost any type of device can be daisy-chained via Thunderbolt so long as each device supports the same connection type.
In general (for most types of devices and displays), daisy-chaining devices using Thunderbolt requires the following instructions:
- Check if your GPU supports MST (same as when checking actual DisplayPort connections)
- Check all power sources of each device or monitor
- Connect the first device to the first Thunderbolt port of the next device, then the second Thunderbolt port to the first port of the next device, and so on.
- Alternatively, you can use a Thunderbolt docking station to achieve the same thing. Just plug all monitors in the available slots, then connect the main one into your PC (which should recognize all monitors separately)
Additionally, you may also take note of these other Thunderbolt daisy-chaining tips:
- When another display at the end of the device chain is connected via DisplayPort, it does NOT count towards the total maximum of six.
- It is preferred that devices using older Thunderbolt connections should be placed lower down the chain.
- If the host machine is running with a lower Thunderbolt version, its daisy-chained devices will only run at the speed of its version.
- (External) GPUs are super high-bandwidth devices. It is not recommended to include them in any Thunderbolt daisy chain.
- Be wary of integrated devices that may have Thunderbolt connections inside of them. The connection inside will also count towards the maximum of six within the daisy chain.
- PCs with multiple Thunderbolt ports may allow more than six (twelve total across two ports, for example), but do remember that the bandwidth is still the same. You may have data transfer issues if too many devices are connected to all ports.
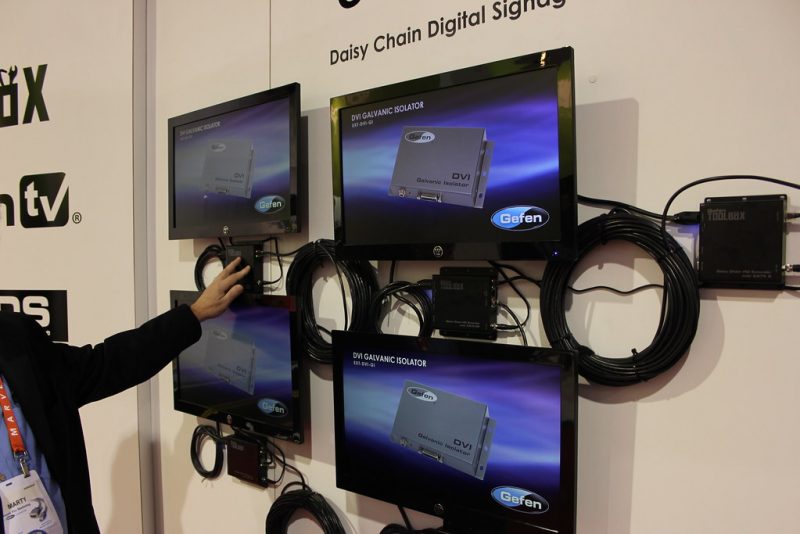
02. Monitor Daisy-Chaining
Video Description: A very short and useful video demonstrating how to daisy-chain monitors using DisplayPort. By Jarrod’sTech.
Beyond pure productivity reasons, multi-monitor setups are a great way to make your PC setup more “technologically aesthetic” for both form and function. On the one hand, you have the efficiency of lesser routing, easy management, and connection ports saved. At the other, you maintain complete functionality of a multi-monitor setup if it was just directly connected one by one on your computer.
In general, there are two different ways to implement daisy-chaining on monitors, depending on the type of port that you will use (namely DisplayPort and USB Type-C). Needless to say, all monitors would have to be connected with the same type of connector for the setup to work.
Oh yeah, and HDMI doesn’t support daisy-chaining.
DisplayPort Daisy-Chaining
- First, make sure that your GPU supports MST (multi-stream transport) in the first place – this is the fancier, more official term for daisy-chaining for DisplayPort. Do not forget this crucial step. There is a chance that you won’t be able to manually change the monitor back and be left with a blank screen to fix later if you don’t confirm this first.
- Then, make sure that all monitors support at least DisplayPort 1.2 – this is the minimum version of DisplayPort that supports the feature.
- Plug the next monitors in succession to the output DP of the previous monitor – assuming that the first monitor is already connected to the GPU (or other video processing device) by default. The end of the connection is always the main DP port of the last monitor. So yeah, it’d probably be more convenient (ironically) if the next monitor had some alternative type of DP port to ensure daisy-chaining compatibility.
- Enable DisplayPort 1.2 mode (or higher) on the first main monitor via OSP/monitor button menu – is usually the most forgotten step of the process due to the default DP 1.1 setting. A prompt will usually appear asking if you are sure before doing this. Well, if you aren’t, go back to step one. Also, If you don’t enable DP 1.2 and just plug the other monitor immediately, the monitors will only function in mirror mode.
And that’s it. Don’t worry about succeeding versions, as they are all backward compatible with each other. If you’re using a higher-end or more advanced/recent graphics card, you can even check out its DisplayPort MST specs if it supports more monitors than two, so that you can increase the number (of connected monitors) as you need them.
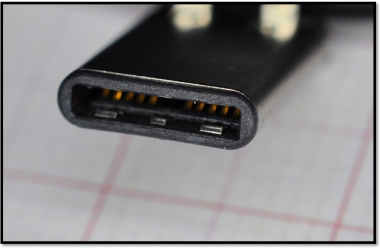
USB Type-C Daisy-Chaining
Setting up a monitor daisy-chain using USB Type-C is pretty much the same. The only major difference is that you can plug other devices in between these connections, and so long as the bandwidth is not maxed out, all devices within the chain will work just fine.
Technically, you should be able to daisy chain an alternate USB Type-C and DisplayPort system, since USB Type-C also uses the similar DisplayPort 1.4 protocol. However, due to DisplayPort’s data transfer type limitations, this isn’t really possible. So, it’s either all USB Type-C, or all DisplayPort.
03. Audio Daisy-Chaining
Video Description: Short practical video on daisy chaining speakers. By Seismic Audio.
Daisy-chaining speakers can be just as simple as outlet daisy-chaining, but there’s a bit of a twist. Instead of just one line across all audio output devices, you have two lines, one connecting all left, and the other connecting all right output speakers.
The step-by-step specifics of this method are as follows:
- Connect the first left and right speakers with their respective connections at the main output hardware (mixer, radio, playback device, etc.)
- Then connect the remaining speakers using the unused connection on both sides.
- So for right-side speakers, connect the unused left port to the right port of the next speaker.
- Then for left-side speakers, connect the unused right port to the left port of the next speaker.
- Repeat until all speakers are connected equally on both sides.
- Oh, and probably keep it on the relatively uncomplicated side. Only connect, like, three speakers at most for each side for the safest results.
Needless to say, if separate power sources are required for the speakers, you’d have to fix the outlet system to accommodate for that as well. You may refer to the aforementioned outlet daisy-chaining guide for some safety info on that matter.
04. Outlet Daisy-Chaining
Video Description: A very informative, useful and fun video on extension cords in the US. By Technology Connections.
This one doesn’t really require a dedicated tutorial per se, and is probably not even of the same category as the other consumer tech daisy-chaining tutorials here. But we ought to include it because it still officially falls under the same more general category of electronics.
If you have ever experienced connecting an extension power strip to another, then congratulations; you have just deftly executed a daisy-chaining maneuver. Although extension power strips are, well… meant to extend an outlet’s reach, the usually multiple numbers of additional sockets mean that users are generally tempted to “optimize” it by plugging many devices and appliances on them. Unfortunately, wire gauges used on typical power strips are not really rated for this sort of octopus plugging system.
Even with a relatively robust 12-gauge-wire power strip, you only got a total of 20 amps on the first power strip connected directly to a wall outlet before things go haywire. Put in a different perspective, appliances like hairdryers and microwave ovens use 10 amps during use. Ten whole amps… for just one single appliance. Connect a standard vacuum cleaner on the power strip daisy-chain, and you’re already over by two (12 amps). Sure, other things plugged into the outlets don’t consume as much, but you can imagine a good number of these connected together when one or two more extra power strips start daisy-chaining along the line.
And so, we only have two instructions when daisy-chaining power strips:
- Use it simply as an extension, and nothing else (no other stuff connected).
- Keep the number of amps of all devices connected in the entire daisy chain lower than the total current capacity of the very first power strip connected to the wall outlet.
Fail to take note of that (or if the power strip doesn’t have failsafe features), and you can potentially cause severe fires with the daisy-chained monstrosity you made.
05. (Internal) PC Cable Daisy-Chaining
Video Description: A hands on video by JayzTwoCents, where they test how power cables could affect GPU performance.
Finally, we come to the wonderful world of daisy-chaining internal cable components. Any DIY PC enthusiast should know the extreme criticism significant importance of computer cable management, not just for aesthetic purposes, but also to make stuff easier to recognize and work on in the future.
By default, PSU cable connectors are already daisy-chained for each type of connector. More critical connectors like the 8-pin (4+4) CPU and 24-pin (20+4) motherboard cables are, of course, on their own. But other cables are often mixed with other connector types or have two or more of the same in a single daisy chain.
Here are a few pointers about PSU daisy-chaining:
- Data storage devices generally consume very little power (SSD = 1~3 watts and HDD = 6~9 watts, on average). Even if you fill all your SATA PSU cables with storage devices, your mega-data daisy chain still won’t draw enough current to overload the wires.
- Molex peripheral connectors can draw a bit more than SSDs. But again, very little power is consumed. Perfectly safe to use all for, let’s say, static case fans. In fact, even if you directly connected them to each other, it still wouldn’t cause any issues, and might actually be a nice cable management technique(?) if your PSU is not modular.
- 8-pin (6+2) PCIe connectors can be efficiently daisy-chained using two connectors in a single line (since they are manufactured that way, after all). However, if your PSU supports two separate PCIe connections, then it may not be such a bad idea to use the two separate lines, for open configuration’s sake.
Lastly, daisy-chaining different types of devices on a single line is perfectly fine for the purposes of better internal component organization. The specifics of this tip are already within the realm of PC cable management, however, so it’s beyond the scope of this article.