In this tutorial we’ll install xRDP on a server running Ubuntu 20.04 and install multiple desktop environments on it (Openbox, GNOME, XFCE, LXQt, LXDE, MATE, KDE Plasma). We’ll see how to connect via RDP from Windows, Linux, macOS, Android and iOS, how to optimize the connection speed in some cases, and how to fix a few common issues when using xRDP.
xRDP is a free and open-source implementation of Microsoft RDP (Remote Desktop Protocol) that enables other operating systems, other than Windows, to provide a fully functional remote desktop experience.
xRDP is fully compatible with Microsoft RDP, rdesktop, FreeRDP and NeutrinoRDP.
With xRDP you can have your own RDP Server on your Linux box, and connect to it via Microsoft’s Remote Desktop Client (if you use Windows), but also, you can use Linux, macOS, Android and iOS using their respective clients.
Table of Contents
Prerequisites
- A Linux box running Ubuntu 20.04.
- A Desktop Environment.
- A user with
sudoprivileges. We recommend a non-rootsudouser, because acting as root can damage your system if you’re not careful. When you’re logged in asroot, applications are running with root privileges and because of some bug or vulnerability they can damage your system. You can do anything and the system won’t ask, and you can easily change the system in a way that could be harmful, if you’re not careful. If you act as anon-rootsudouser, then the system will ask for the password, which could make you pause and prevent you from making a potentially harmful change.
Step 1 – Install xRDP on Ubuntu 20.04
To begin,we’ll update the package index:
sudo apt update
To install xRDP, run the command:
sudo apt -y install xrdp
The output will look something like this:
Reading package lists... Done
Building dependency tree
Reading state information... Done
The following packages were automatically installed and are no longer required:
  libunity-gtk2-parser0 libunity-gtk3-parser0 unity-gtk-module-common
Use 'apt autoremove' to remove them.
The following additional packages will be installed:
  xorgxrdp
Suggested packages:
  guacamole xrdp-pulseaudio-installer
The following NEW packages will be installed:
  xorgxrdp xrdp
0 upgraded, 2 newly installed, 0 to remove and 147 not upgraded.
Need to get 488 kB of archives.
After this operation, 3212 kB of additional disk space will be used.
Once installed, it should run as a service automatically. You can check it by typing:
sudo systemctl status xrdp
You should see something like:
● xrdp.service - xrdp daemon
     Loaded: loaded (/lib/systemd/system/xrdp.service; enabled; vendor preset: enabled)
     Active: active (running) since Wed 2020-12-23 15:10:48 CET; 3min 24s ago
       Docs: man:xrdp(8)
             man:xrdp.ini(5)
   Main PID: 1937 (xrdp)
      Tasks: 1 (limit: 1068)
     Memory: 1.4M
     CGroup: /system.slice/xrdp.service
             └─1937 /usr/sbin/xrdp
xRDP makes use of the file /etc/ssl/private/ssl-cert-snakeoil.key which belongs to the ssl-cert group. Therefore, we need to add the xRDP user to that group:
sudo adduser xrdp ssl-cert
We need to restart xRDP to changes to take effect:
sudo systemctl restart xrdp
At this point, you have xRDP installed and running on your Ubuntu.
Opening Ports
Assuming you have Uncomplicated Firewall (ufw) installed and active, to be able to connect to our server, we need to open the 3389 (default) port on our Firewall.
To accomplish this, we need to run:
sudo ufw allow 3389
You can secure it even more, by allowing only a specific IP address or IP range:
For a specific IP address:
sudo ufw allow from 1.1.1.1 to any port 3389
For a specific IP range:
sudo ufw allow from 192.168.0.0/24 to any port 3389
xRDP Configuration
By default, you don’t need to make any changes. But you can change the default port, add compression, and other settings by typing:
sudo nano /etc/xrdp/xrdp.ini
Remember to restart the service, after any change.
Step 2 – Install Your Preferred Desktop Environment
To be able to connect to your box with xRDP, you’ll need at least one desktop environment installed on it.
Install GNOME Desktop Environment
GNOME is the default desktop environment for many Linux distros. At the time of writing, the latest version is GNOME 3.
To install it, run the following command:
sudo apt -y install ubuntu-desktop
This is how GNOME Desktop looks like when you log in:

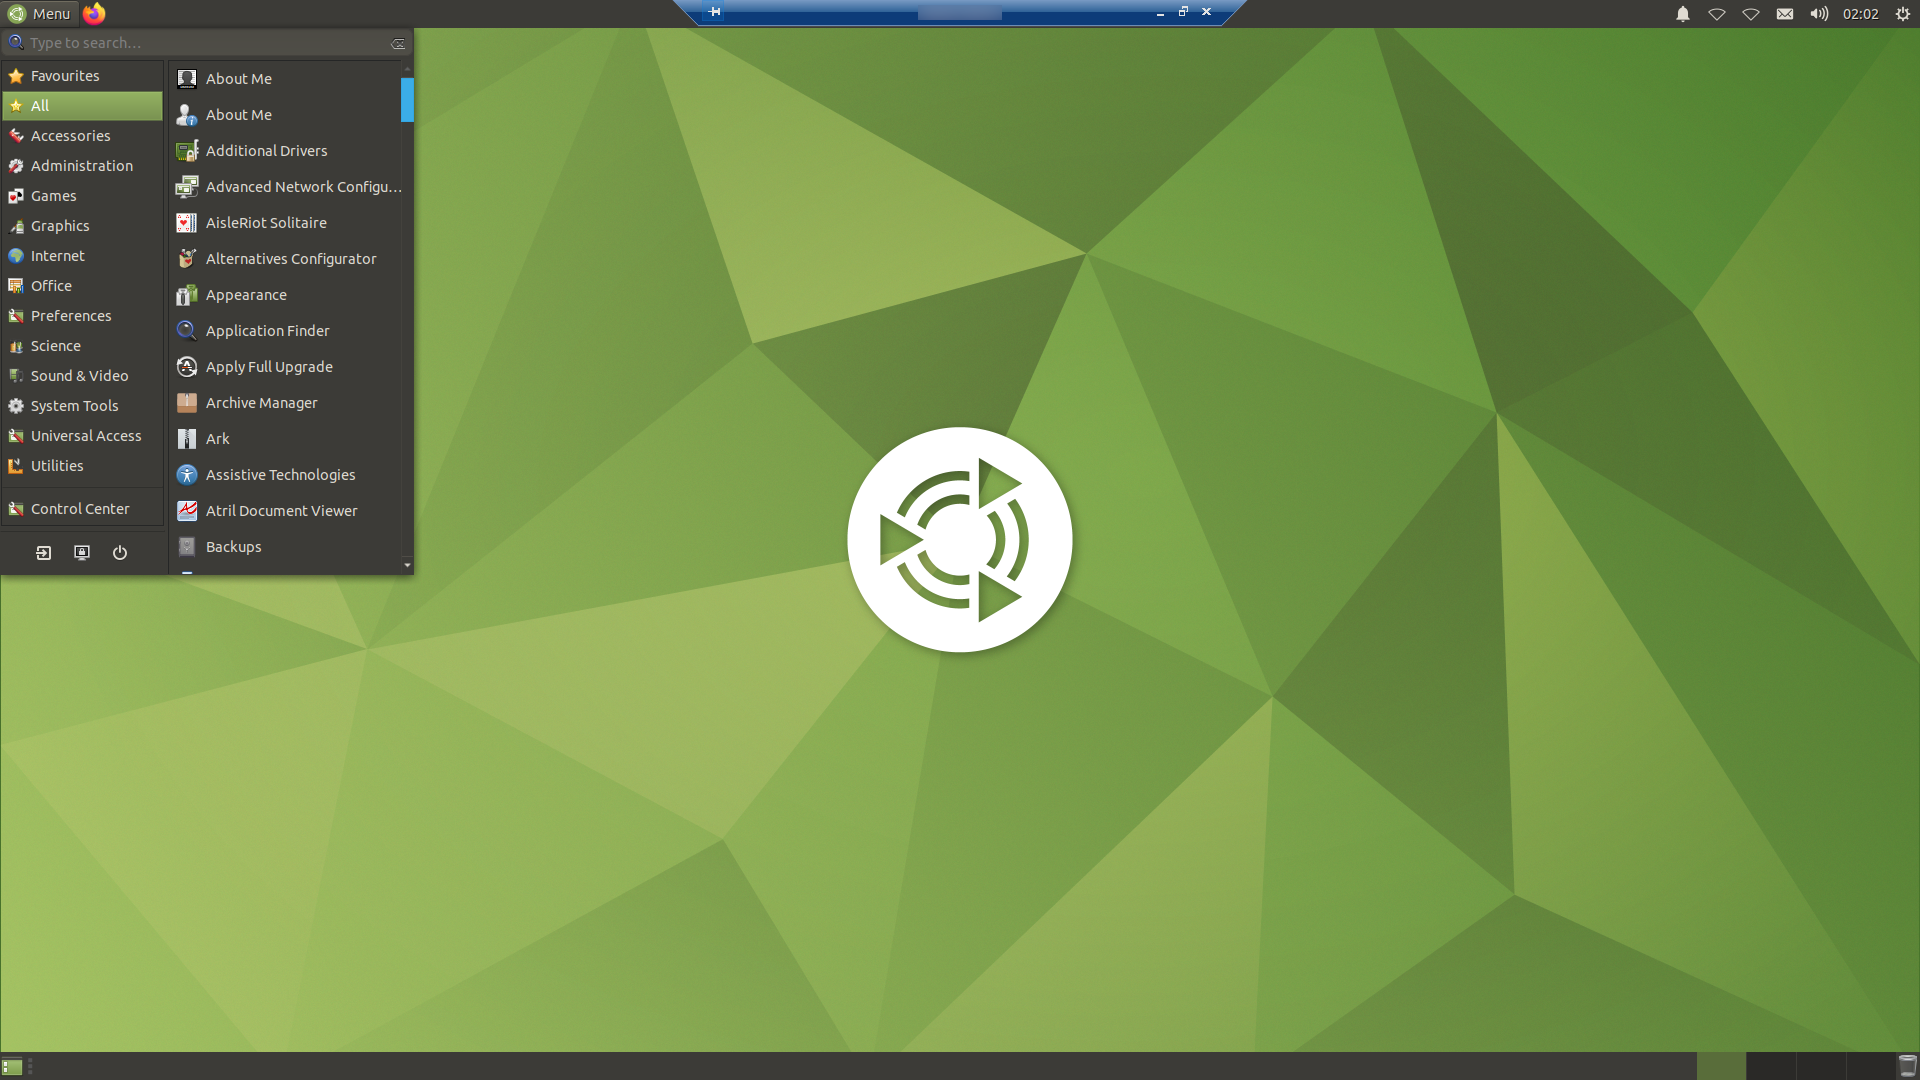
Install XFCE Desktop Environment
XFCE is another Desktop Environment but low on system resources and fast. In other words: a lightweight desktop. You can install it by typing:
sudo apt -y install xfce4
This is how XFCE looks like:
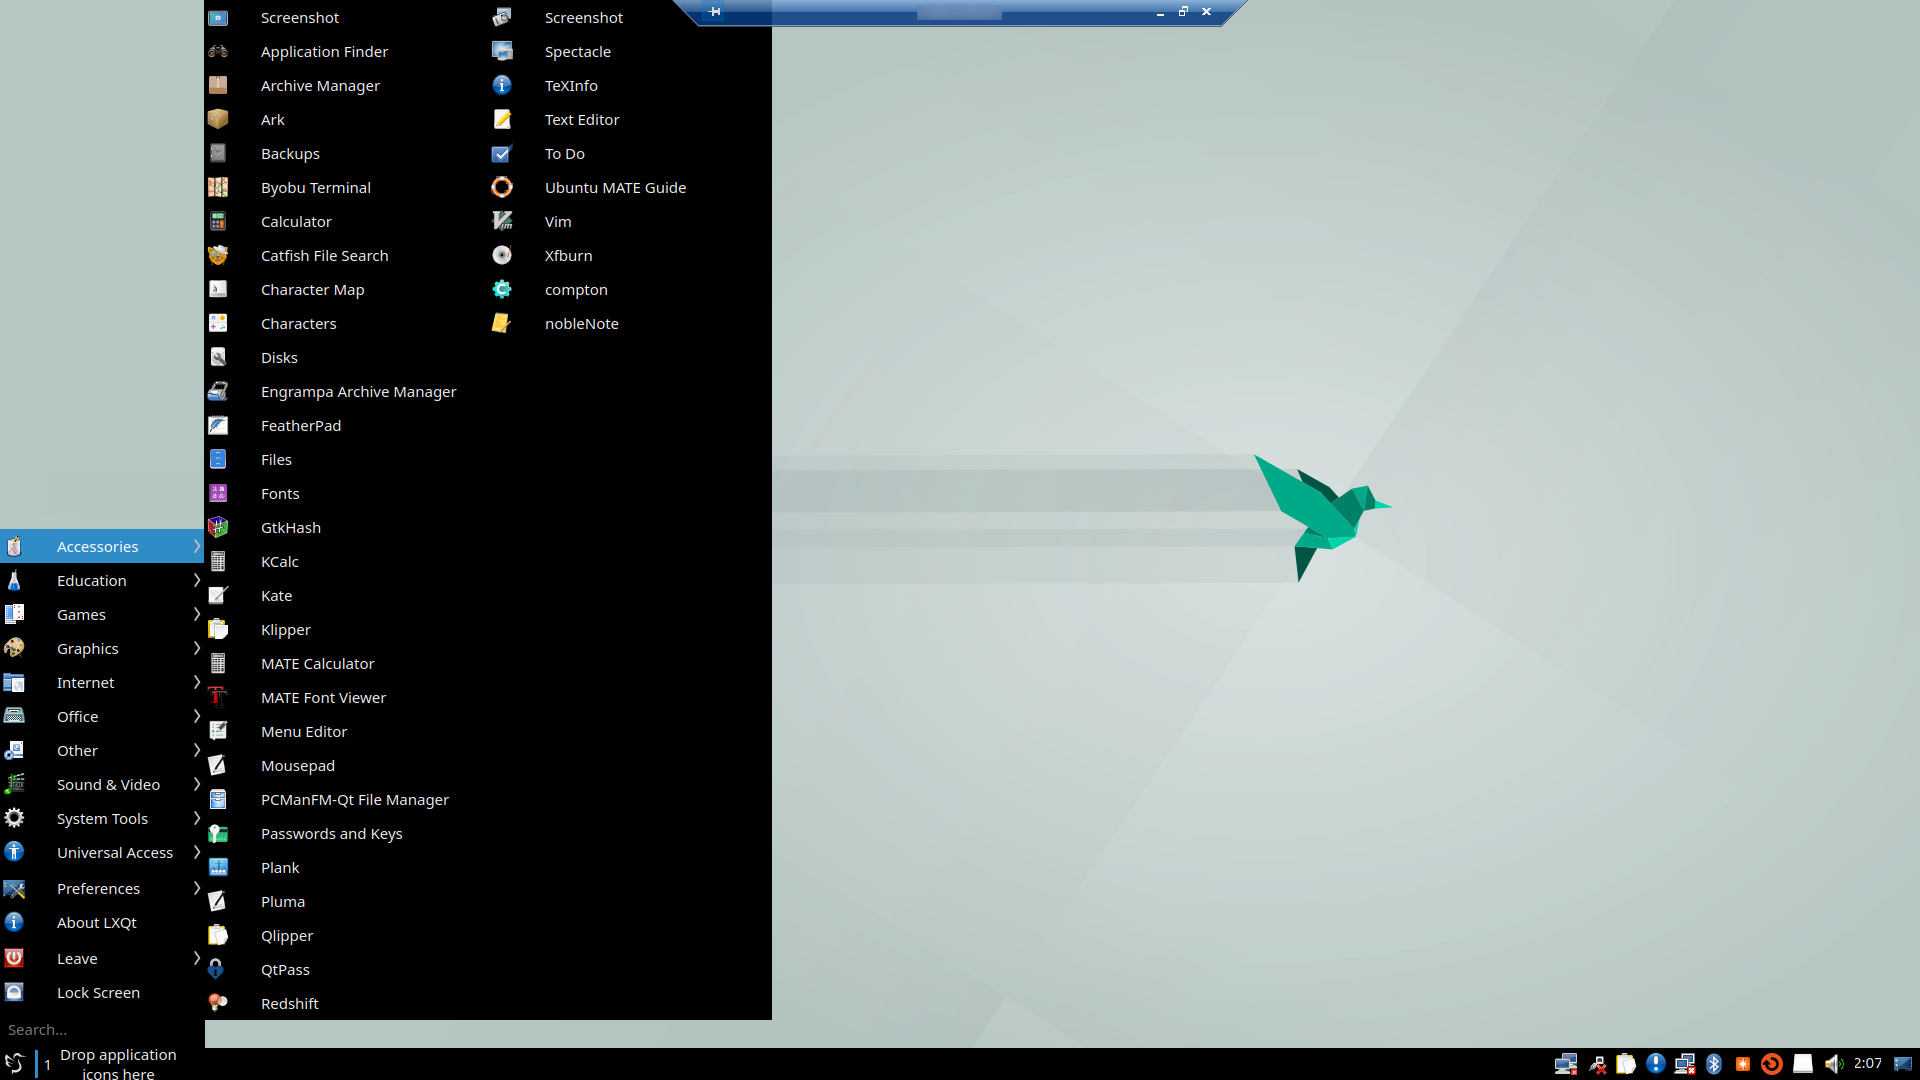
Install LXQt Desktop Environment
LXQt is a port of LXDE. As LXDE, it has low resource requirements, in comparison to most popular desktop environments. It’s one of the better choices to use with xRDP, in my opinion.
To install it run:
sudo apt -y install lxqt
This is how LXQt looks like:
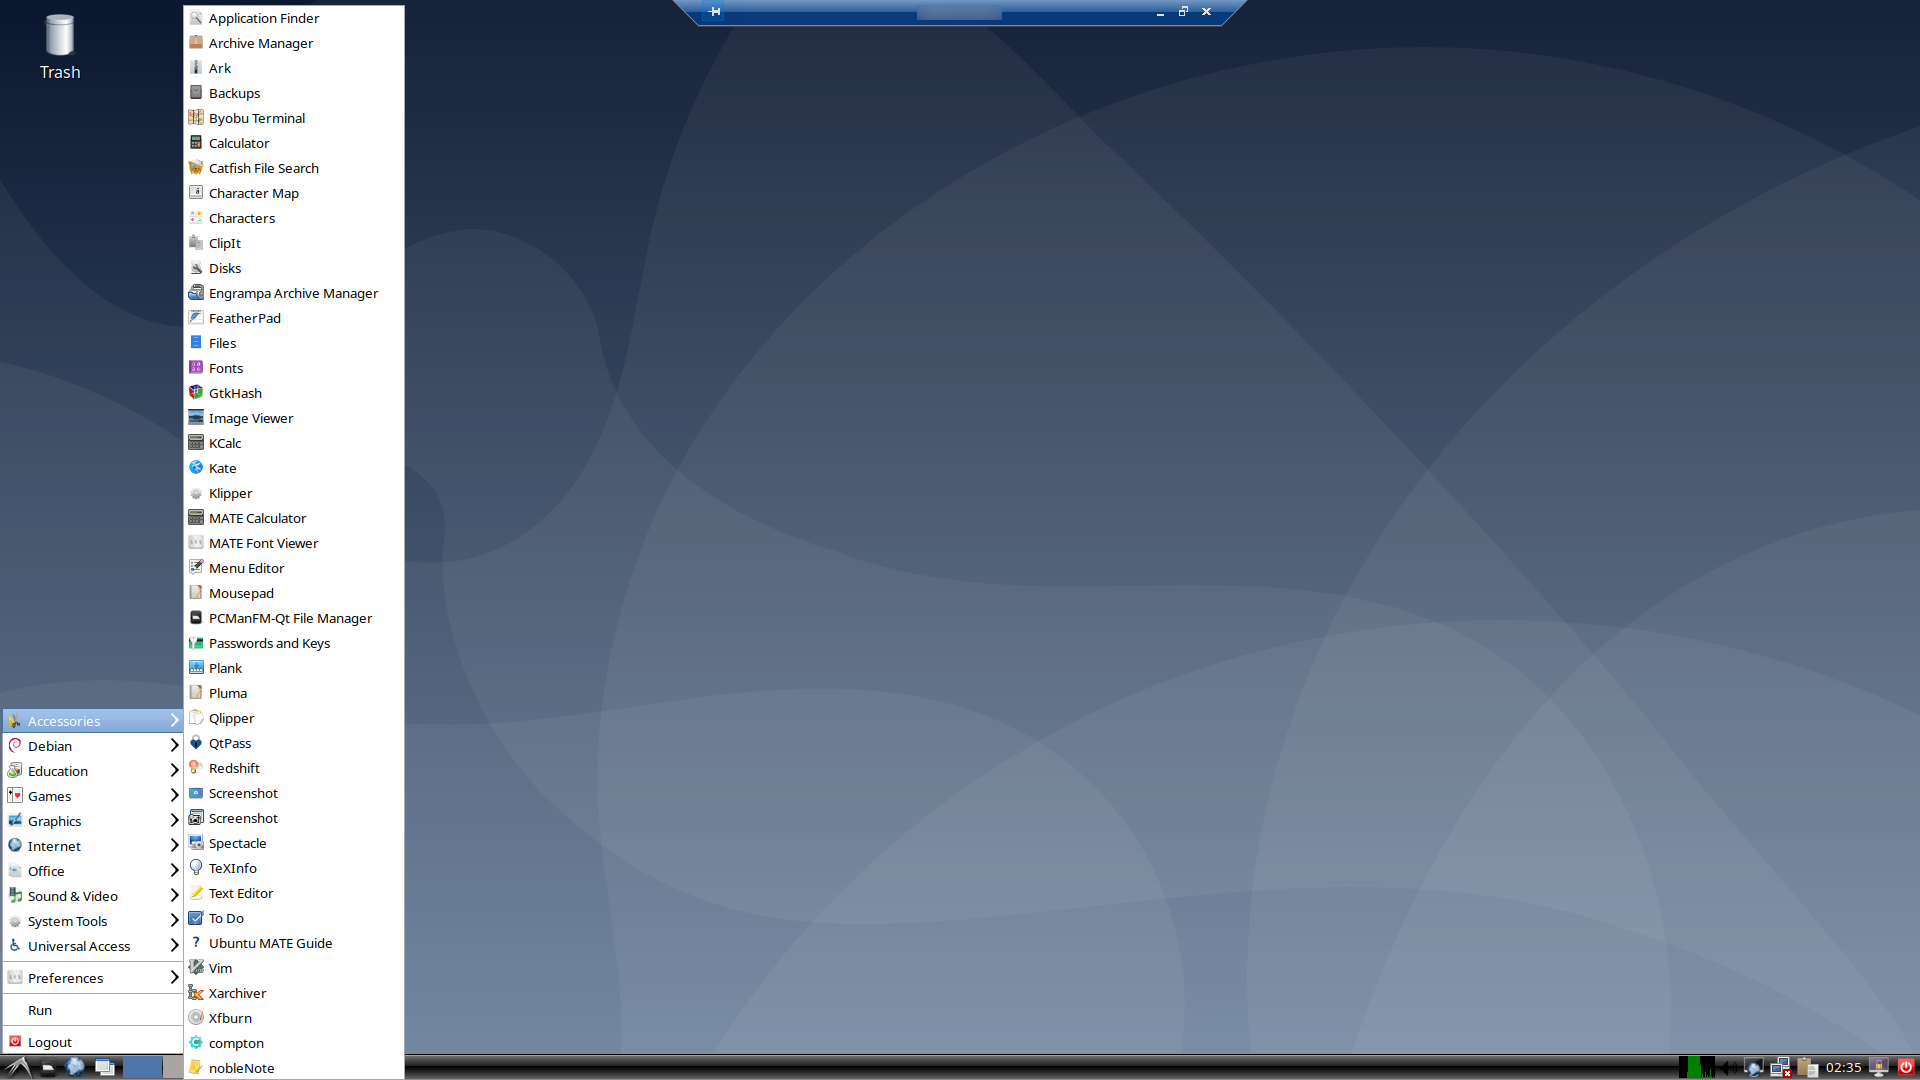
Install LXDE Desktop Environment
LXDE (Lightweight X11 Desktop Environment) is a popular lightweight desktop environment. It’s built to have low resource requirements, and is another great choice for xRDP.
There are multiple ways you can install it. For the purposes of this tutorial I’m using a simple command. If you’d like different methods, based on certain preferences you may have, you can check the Intallation section on LXDE.org
To quickly install LXDE run:
sudo apt -y install lxde
This is how LXDE looks like:
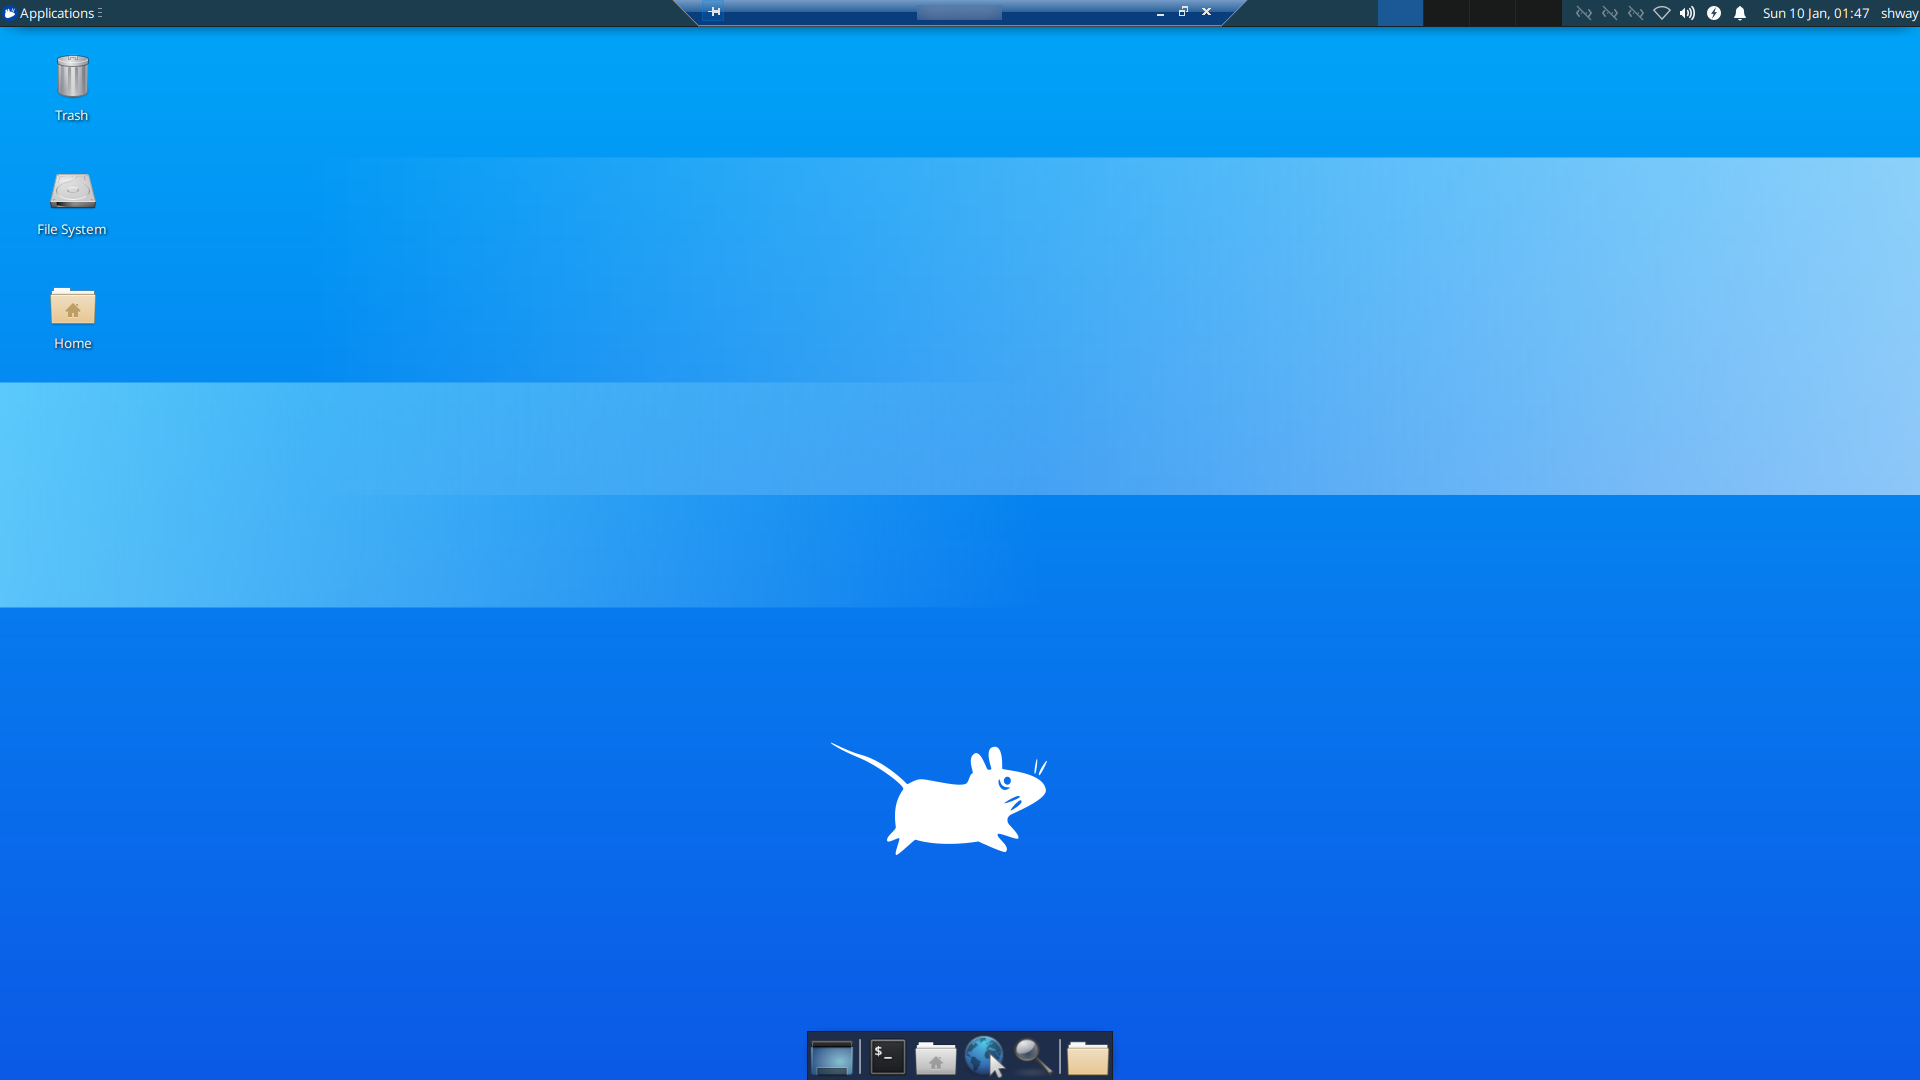
Install MATE Desktop Environment
MATE is an attractive and intuitive Desktop Environment. A fork from the GNOME 2 Desktop, in response to the negative reception of GNOME 3, when the traditional taskbar (GNOME Panel) with the GNOME Shell.
To install it run:
sudo apt -y install ubuntu-mate-desktop ubuntu-mate-core
This is how MATE Desktop looks like:
Install KDE Plasma Desktop Environment
KDE Plasma is one of the most recognized Desktop Environments. It’s one of the most beautiful desktop environments, in my opinion, and it’s got some great features, and it’s very customizable.
You can install it by running:
sudo apt -y install kubuntu-desktop
This is how KDE Plasma looks like:

Install Openbox Window Manager
Openbox is a window manager and not a desktop environment. It won’t offer you a wallpaper, taskbar or system panel. But it’s very lightweight and you can open the menu by right clicking anywhere on the screen and selecting what you want to run.
It’s probably the best choice if you find that your connection is laggy with xRDP, but you absolutely need to connect to a Linux machine using xRDP.
Here’s how Openbox looks like:
Switching Between Desktop Environments for xRDP
If you have multiple desktop environments installed and want to switch between them you can run the following command:
sudo update-alternatives --config x-session-manager
You’ll be presented with the options representing your installed desktop environments. Just enter the number corresponding with your desktop environment from the list and press Enter.
There are 9 choices for the alternative x-session-manager (providing /usr/bin/x-session-manager).

  Selection    Path                      Priority   Status
------------------------------------------------------------
  0            /usr/bin/startlxde         50        auto mode
  1            /usr/bin/gnome-session     50        manual mode
  2            /usr/bin/lxsession         49        manual mode
  3            /usr/bin/mate-session      50        manual mode
  4            /usr/bin/openbox-session   40        manual mode
* 5            /usr/bin/startlxde         50        manual mode
  6            /usr/bin/startlxqt         50        manual mode
  7            /usr/bin/startplasma-x11   40        manual mode
  8            /usr/bin/startxfce4        50        manual mode
  9            /usr/bin/xfce4-session     40        manual mode

Press <enter> to keep the current choice[*], or type selection number: 2
update-alternatives: using /usr/bin/lxsession to provide /usr/bin/x-session-manager (x-session-manager) in manual mode
In my example I have 9 choices:
0 - /usr/bin/startlxde – the current desktop environment
1 - /usr/bin/gnome-session – GNOME 3
2 - /usr/bin/lxsession – LXDE
3 - /usr/bin/mate-session – MATE Desktop
4 - /usr/bin/openbox-session – Openbox
5 - /usr/bin/startlxde – LXDE (same as lxsession)
6 - /usr/bin/startlxqt – LXQt
7 - /usr/bin/startplasma-x11 – KDE Plasma
8 - /usr/bin/startxfce4 – XFCE
9 - /usr/bin/xfce4-session – XFCE (same as startxfce4)
startlxde, and to start XFCE select startxfce4. I am not yet sure why lxsession and startlxde both appear, as selecting either switches to LXDE. The same for startxfce4 and xfce4-session – selecting either will switch to XFCE. As far as I know, startlxde and startxfce4 are scripts that call the executables lxsession and startlxde, respectively. If you know the explanation for this, then please feel free to let us know and we’ll update the guide.Next time you log into your server via xRDP, your desktop environment should be changed. There’s no need to restart xRDP for the changes to be applied.
Interacting with the xRDP service
Like any other service, you can interact with xRDP via systemctl:
Stop xRDP Service:
sudo systemctl stop xrdp
Start xRDP Service:
sudo systemctl start xrdp
Enable xRDP on boot:
sudo systemctl enable xrdp
Disable xRDP on boot:
sudo systemctl disable xrdp
Step 3 – Connecting to Your Remote Desktop
To connect to our new RDP service, we need to use a RDP Client.
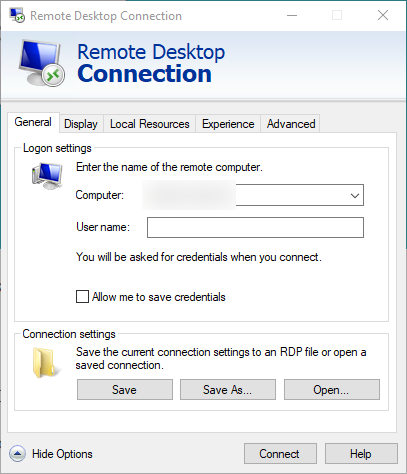
Connect from Windows
Microsoft’s default RDP client it’s called “Remote Desktop Connection”, and it’s installed by default.
To quickly connect, enter the Ubuntu machine’s IP address or hostname, and click on Connect.
If you click Show Options you’ll see more options, such as inputting the User name, saving credentials for future use, so you don’t have to add them every time, adjusting the connection quality preferences, and more.
Connect from Linux
There are a lot of options in Linux to use a RDP client, but Remmina is a great option with lots of features. I also use it in my day to day.
If you don’t already have it installed, you can install it by running the following command.
sudo apt -y install remmina*
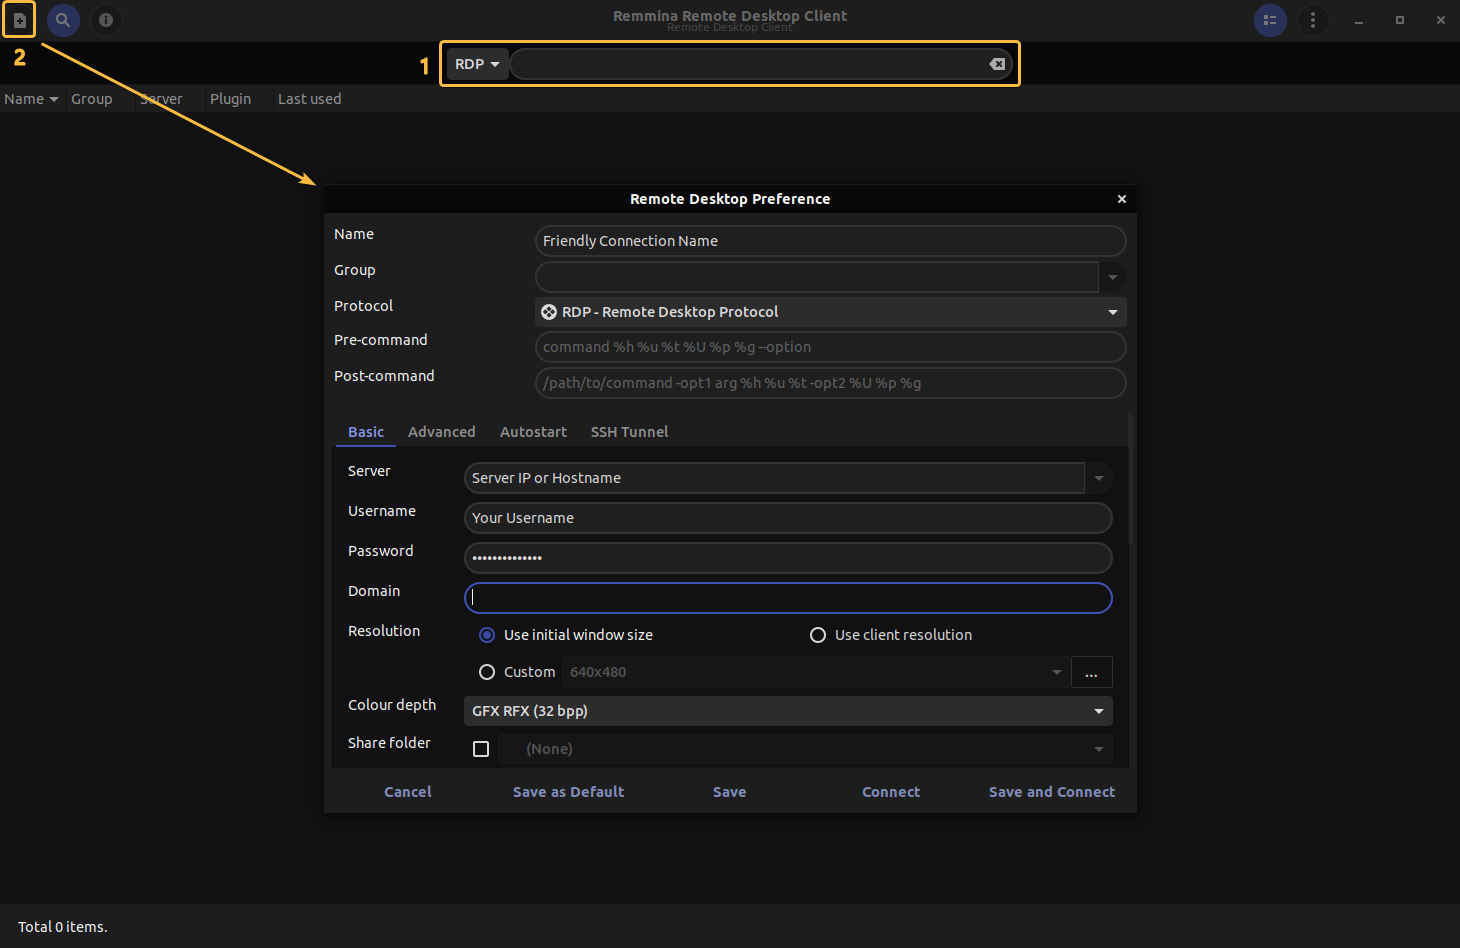
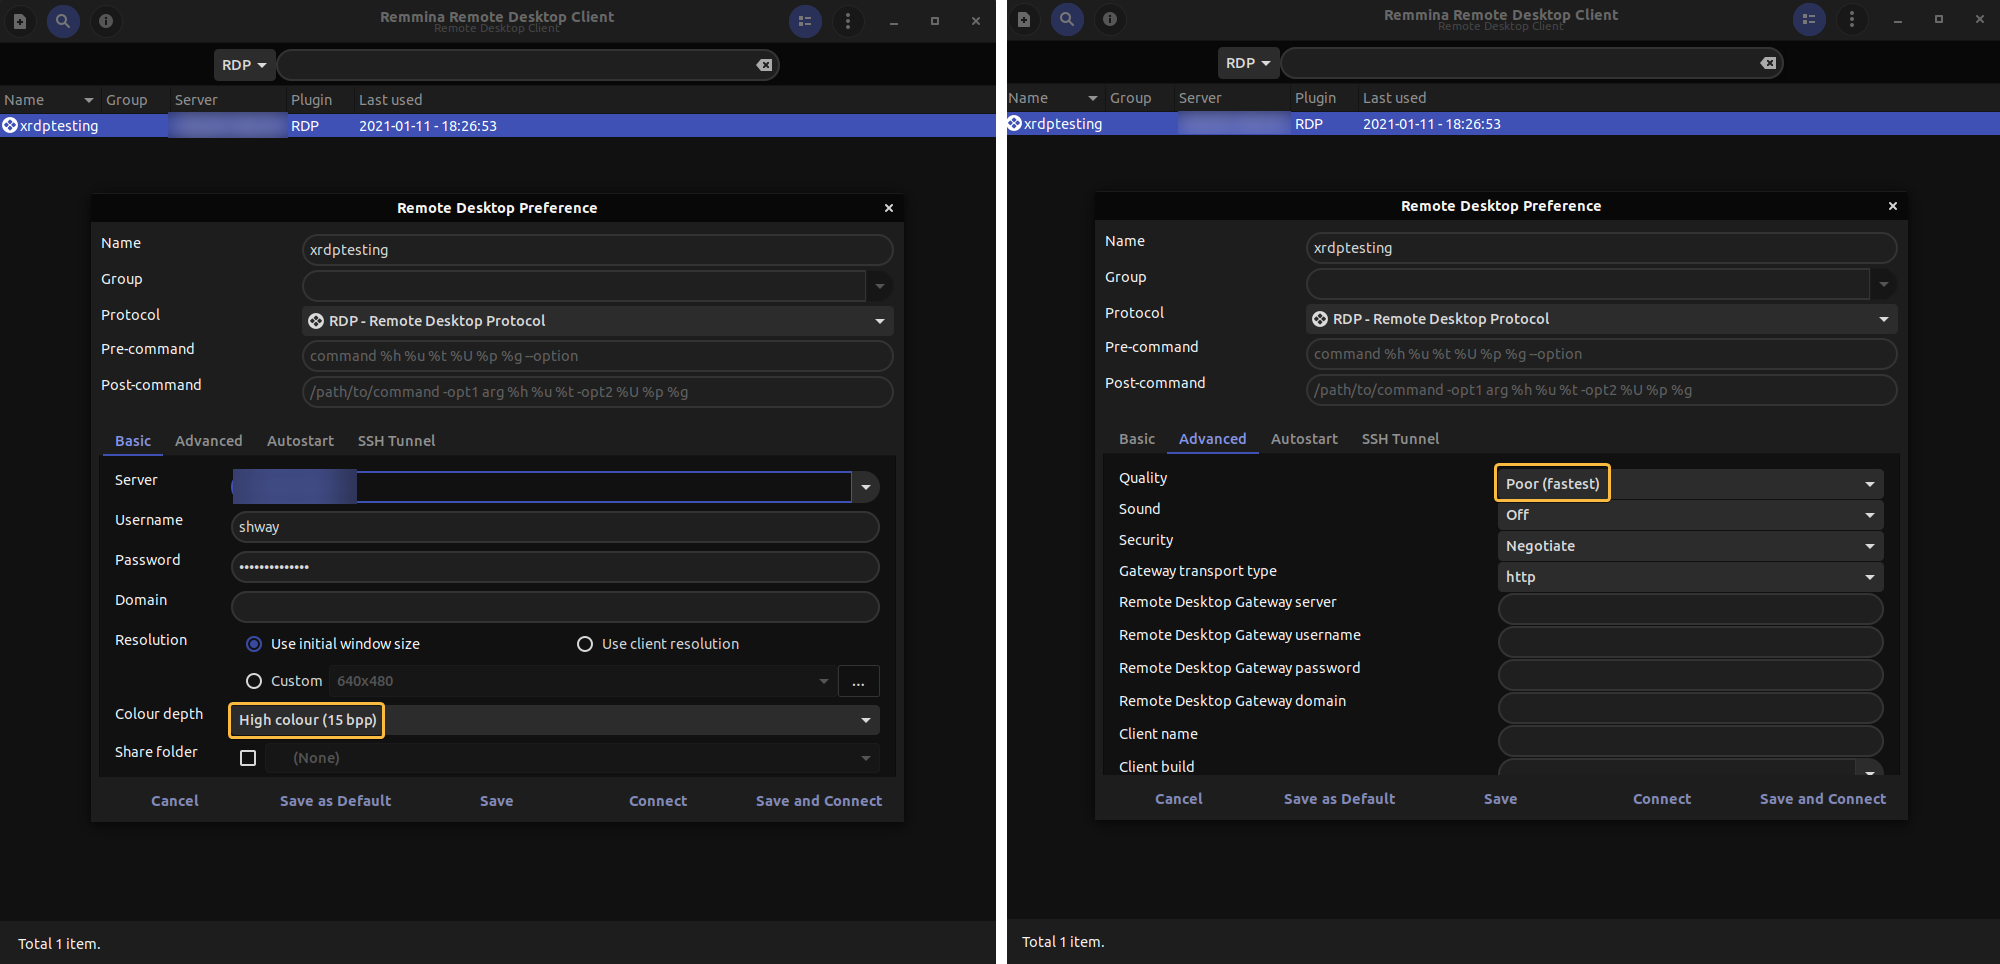
When you open Remmina you can either Quick Connect (1) or create connection and save it (2).
Quick Connect
To Quick Connect, as shown in the image above, select RDP from the drop down, and in the field to its’ right just enter the server IP or hostname and press Enter. You should then be prompted to enter your credentials.
Saved Connection
To create a save connection click the + Icon in the upper left corner and the Remote Desktop Preferences window will pop up. There are multiple options you can configure. For the purpose of this tutorial we’ll just name a few:
Name – a friendly connection name. It doesn’t influence the connection and it is only for your convenience
Server – the server IP or hostname
Username – your username
Password – your password
Colour depth – adjusting this can help with slow connections. If the connection is laggy, try setting it to High colour (15 bpp). The lowest is 256 colours (8 bpp), but it’s painful.
Advanced -> Quality settings – adjust the quality of the connection. This is important if you find you have a slow/laggy connection. If the connecion is laggy, then set it to Poor (fastest) if it’s not already.
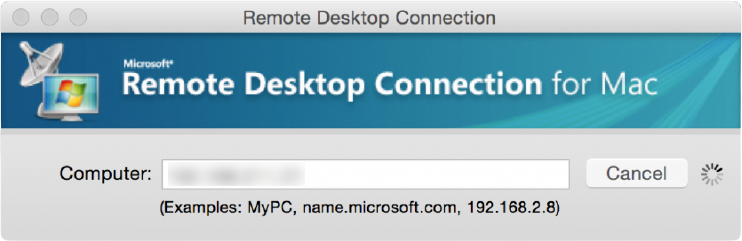
Connect from macOS
To connect to a RDP Session on macOS, first we need to install the Microsoft Remote Desktop App from the App Store.
Once installed, just enter your Server IP or hostname, then click on Connect.
Android/iOS
On Android, we must download and install Microsoft Remote Desktop App from the PlayStore.
On iOS, is the same procedure, but we need to download it from the AppStore.
Once downloaded and installed, run it and you should be presented with the dashboard. Yours is most likely empty, mine has a connection that I have already saved.
Tap the + Icon and you should be presented with a form to fill in the server’s details.
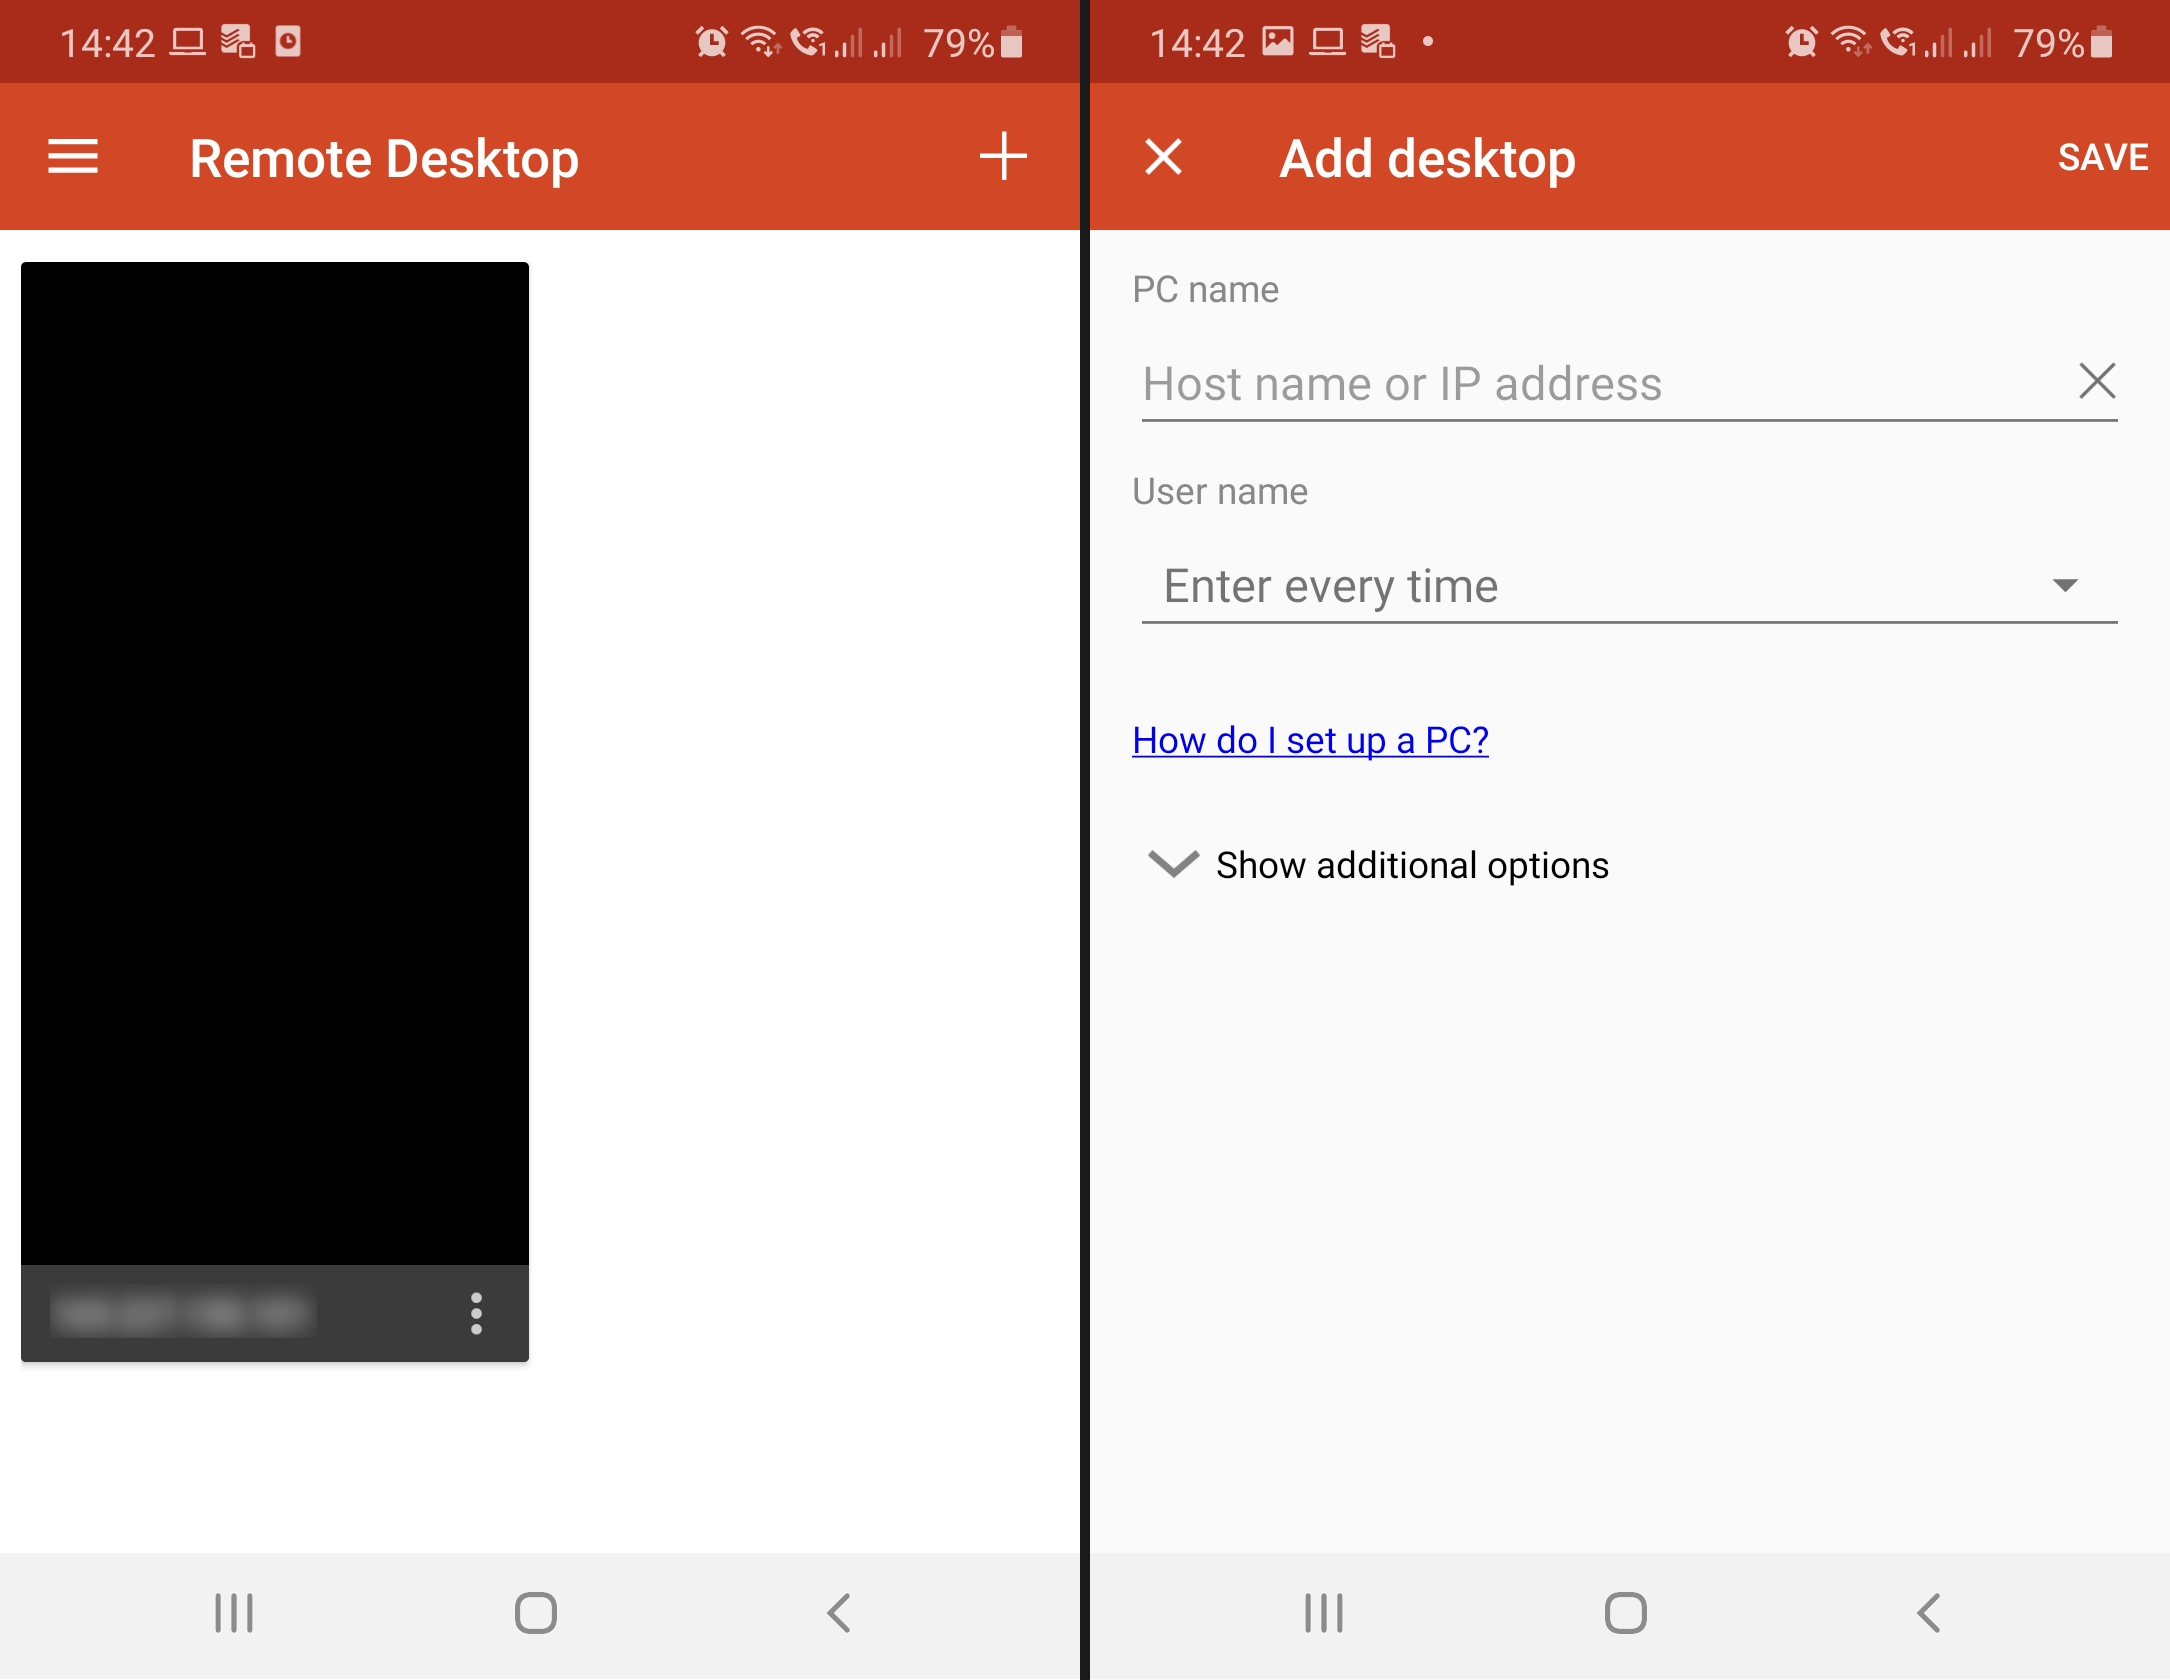
The minimum you need to enter is the hostname or IP address, and tap save. Then you’ll see the saved session, such as in the first screenshot, which you can tap to connect. Next you’ll be presented with the Login screen on your server, where you can enter your credentials and start working.
Frequent Issues
Blank Screen Problem
Sometimes when you connect, you will face a Blank Screen.
There is a known bug in the xRDP program, but it’s easy to workaround.
First of all, if you finish with your RDP session, don’t close the window! Instead, logout the user.
If you logout the user, instead of closing the window, you will not face the Blank Screen problem.
But if for some reason you forgot to logout, you must kill all the users process:
sudo pkill -u UserName
Then, you will be able to login again, without a blank screen.
xRDP Laggy/Slow
Apart from the fixes listed below, a universal method of speeding up the xRDP connection can be to use a lower resolution.
Remote Desktop Laggy/Slow when Connecting from Windows
- Remote Desktop Connection Display & Experience
If your connection is slow when connecting from Windows, then you can reduce the Display -> Color settings and adjust the Experience -> Performance settings, which will reduce the visual quality of the experience, but will hopefully increase speed.

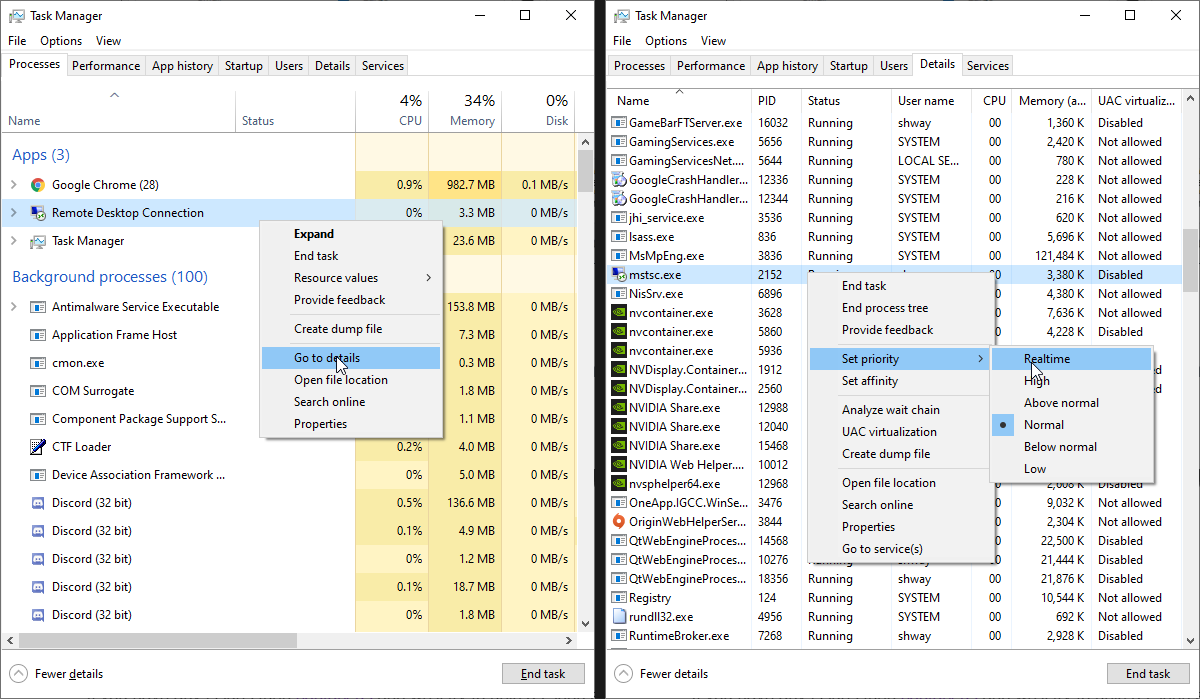
- Set Priority to Realtime in Task Manager
You can also set the highest priority, which is Realtime, in Task Manager. Just open Task Manager, and in the Processes view, right click Remote Desktop Connection and click on Go to details. You’ll be taken in the Details tab with mstsc.exe highlighted. Right click it, and in the context menu Set priority -> Realtime.
Remote Desktop Laggy/Slow when Connecting from Linux (using Remmina)
- With Remmina you can adjust the Color depth and Connection quality. When creating the connection, in the Basic tab you can change the Color depth. I recommend High colour (15 bpp) as I find it also provides decent visuals. In the Advanced tab you can also change the Quality to Poor (Fastest) – it’s most likely set like that by default, however.
- I’m not certain about this, but I suspect it might help if you also set the Remmina process priority to Highest, in System Monitor. Again, I am not sure of how much this can improve performance.
Authentication Required to Create Managed Color Device
It’s likely that you’ll receive a few popups with the title Authentication Required that read Authentication is required to create a color managed device. Depending on the desktop environment you may see these popups 2-4 times.
You can easily dismiss them and carry on with your work. They most likely won’t bother you in your current session.
A comprehensive explanation on why this is happening and how to fix it can be found in this article xRDP – The Infamous “Authentication Required to Create Managed Color Device” Explained on c-nergy.be.
We’ll summarize their explanation and solution to prevent this from happening in the future.
Explanation: Ubuntu is using a software component called PolKit, which is a framework for application authorization. It captures actions performed by the user and checks if the user is authorized to perform these actions on the system. PolKit reads some policy files that specify if the user is authorized, not authorized or needs authentication to perform an action.
Solution: A quick solution for this is the following.
We will create the file 02-allow-colord.conf in /etc/polkit-1/localauthority.conf.d. To do this run the following command:
sudo nano /etc/polkit-1/localauthority.conf.d/02-allow-colord.conf
Now paste the following content in it, replacing users with a group in which your user belongs to:
polkit.addRule(function(action, subject) {
 if ((action.id == "org.freedesktop.color-manager.create-device" ||
 action.id == "org.freedesktop.color-manager.create-profile" ||
 action.id == "org.freedesktop.color-manager.delete-device" ||
 action.id == "org.freedesktop.color-manager.delete-profile" ||
 action.id == "org.freedesktop.color-manager.modify-device" ||
 action.id == "org.freedesktop.color-manager.modify-profile") &&
 subject.isInGroup("{users}")) {
 return polkit.Result.YES;
 }
 });
Now the file is basically telling PolKit that if the user belongs to the group users (or the group that you used instead of users) they can create, modify profile and color device, without the authentication prompt.
Conclusions
Well done! Hopefully you’ve managed to set up and configured xRDP on your Ubuntu 20.04 machine and installed the desktop environment(s) of your choice.
If you have any issues then feel free contact us and we’ll try to help as soon as we can.
Resources & Acknowledgements
Authentication Required to Create Managed Color Device adapted from:
Remote Desktop Laggy/Slow when Connecting from Windows adapted from:
Reasons on why it’s bad to always be logged in as root adapted from:
Custom script to install an optimized xRDP, along with some great fixes and in-depth tutorials: